> ## Documentation Index
> Fetch the complete documentation index at: https://docs.sequence.xyz/llms.txt
> Use this file to discover all available pages before exploring further.
# Apple Auth Configuration for Embedded Wallet
> Learn how to configure Apple auth for your Embedded Wallet by creating an Apple client in the Apple Developer Console. Follow step-by-step instructions to create App Identifier and App ID for iOS or web applications.
In order to have Apple auth integrated into your Embedded Wallet instance, you should configure an Apple client in the Apple Developer Console. Depending on whether you are integrating Embedded Wallet into an iOS or web application, you should pick the correct configuration accordingly.
## Create App Identifier
To start with, access the [Apple Developer Console](https://developer.apple.com/account/) and navigate to Certificates > Identifiers. Once there, click on the `+` button to create a new identifier.
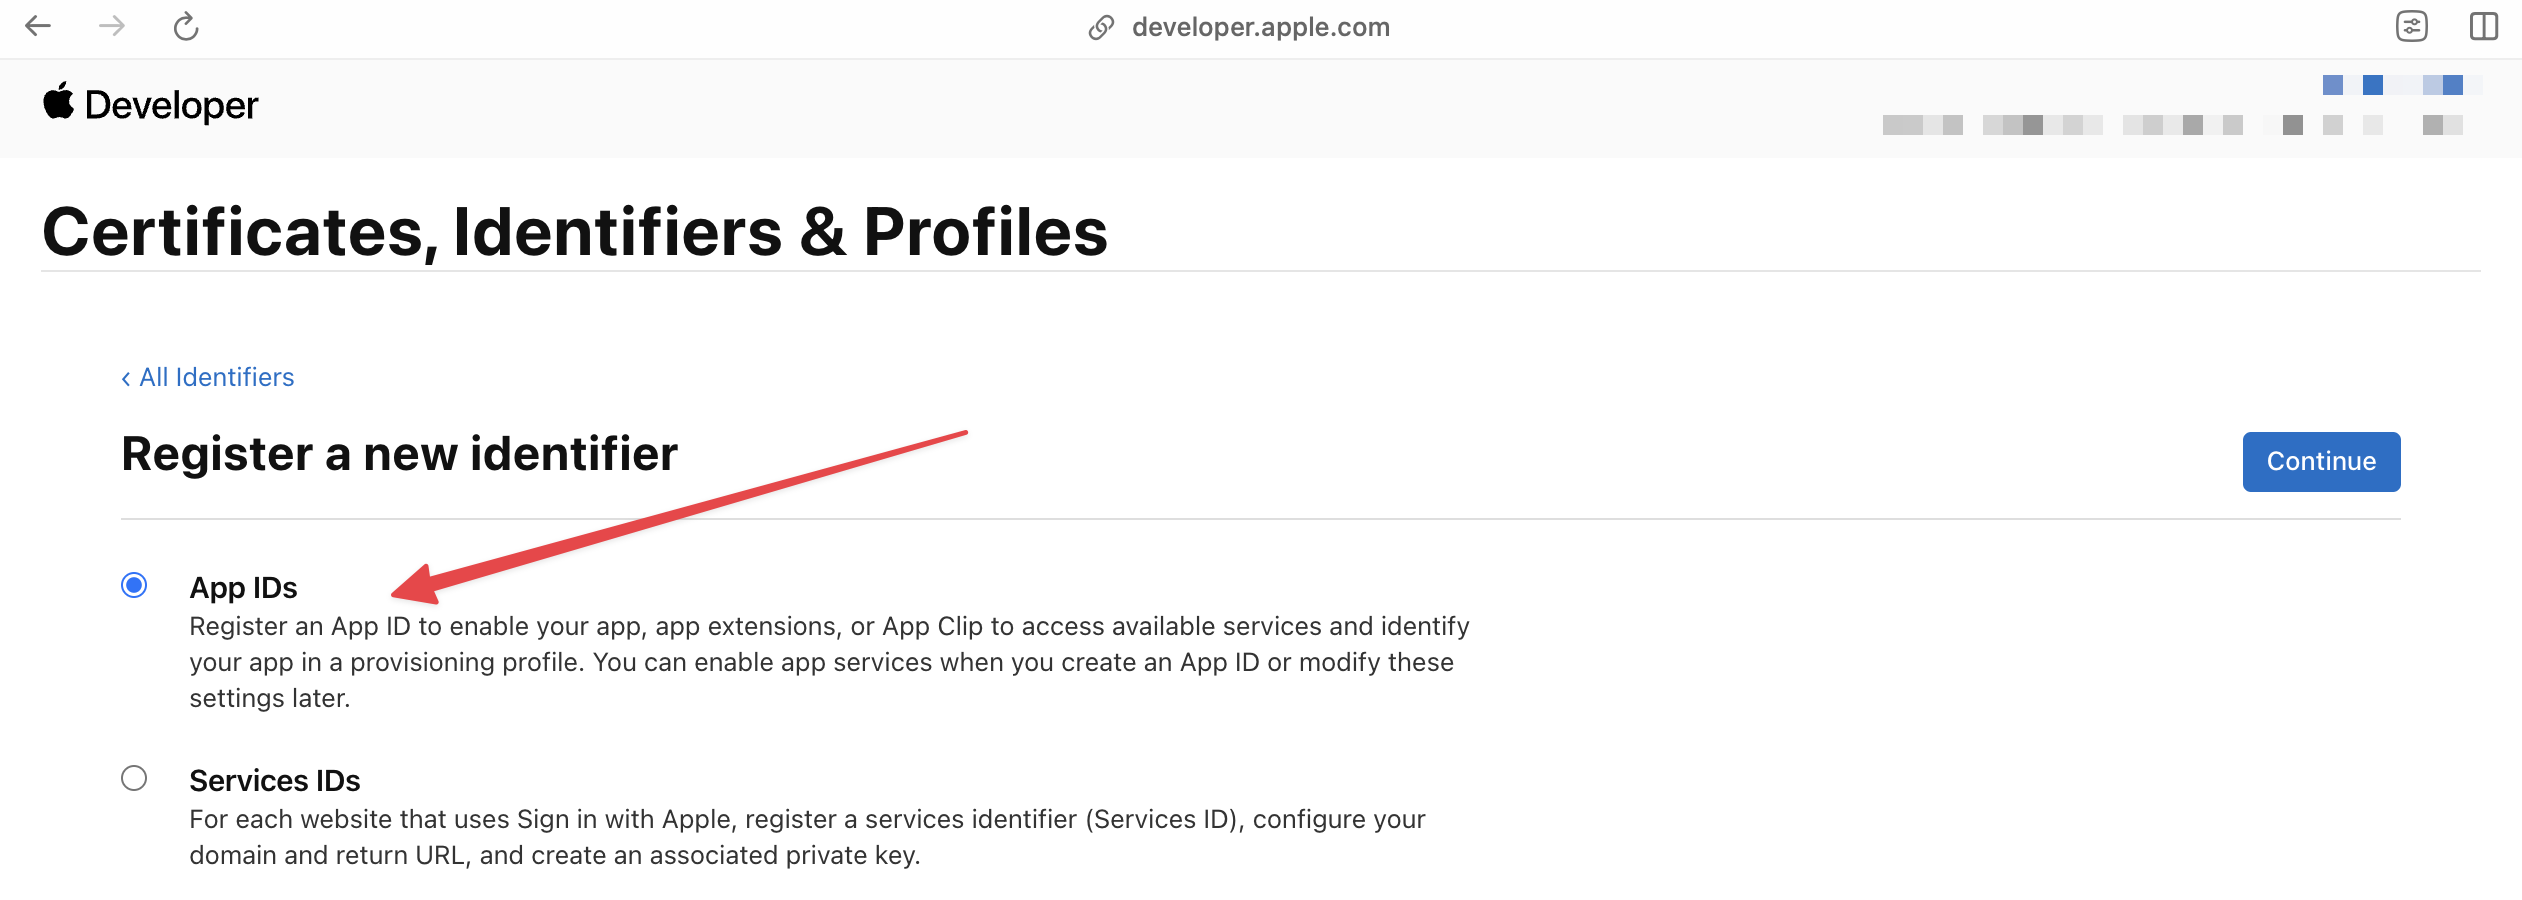
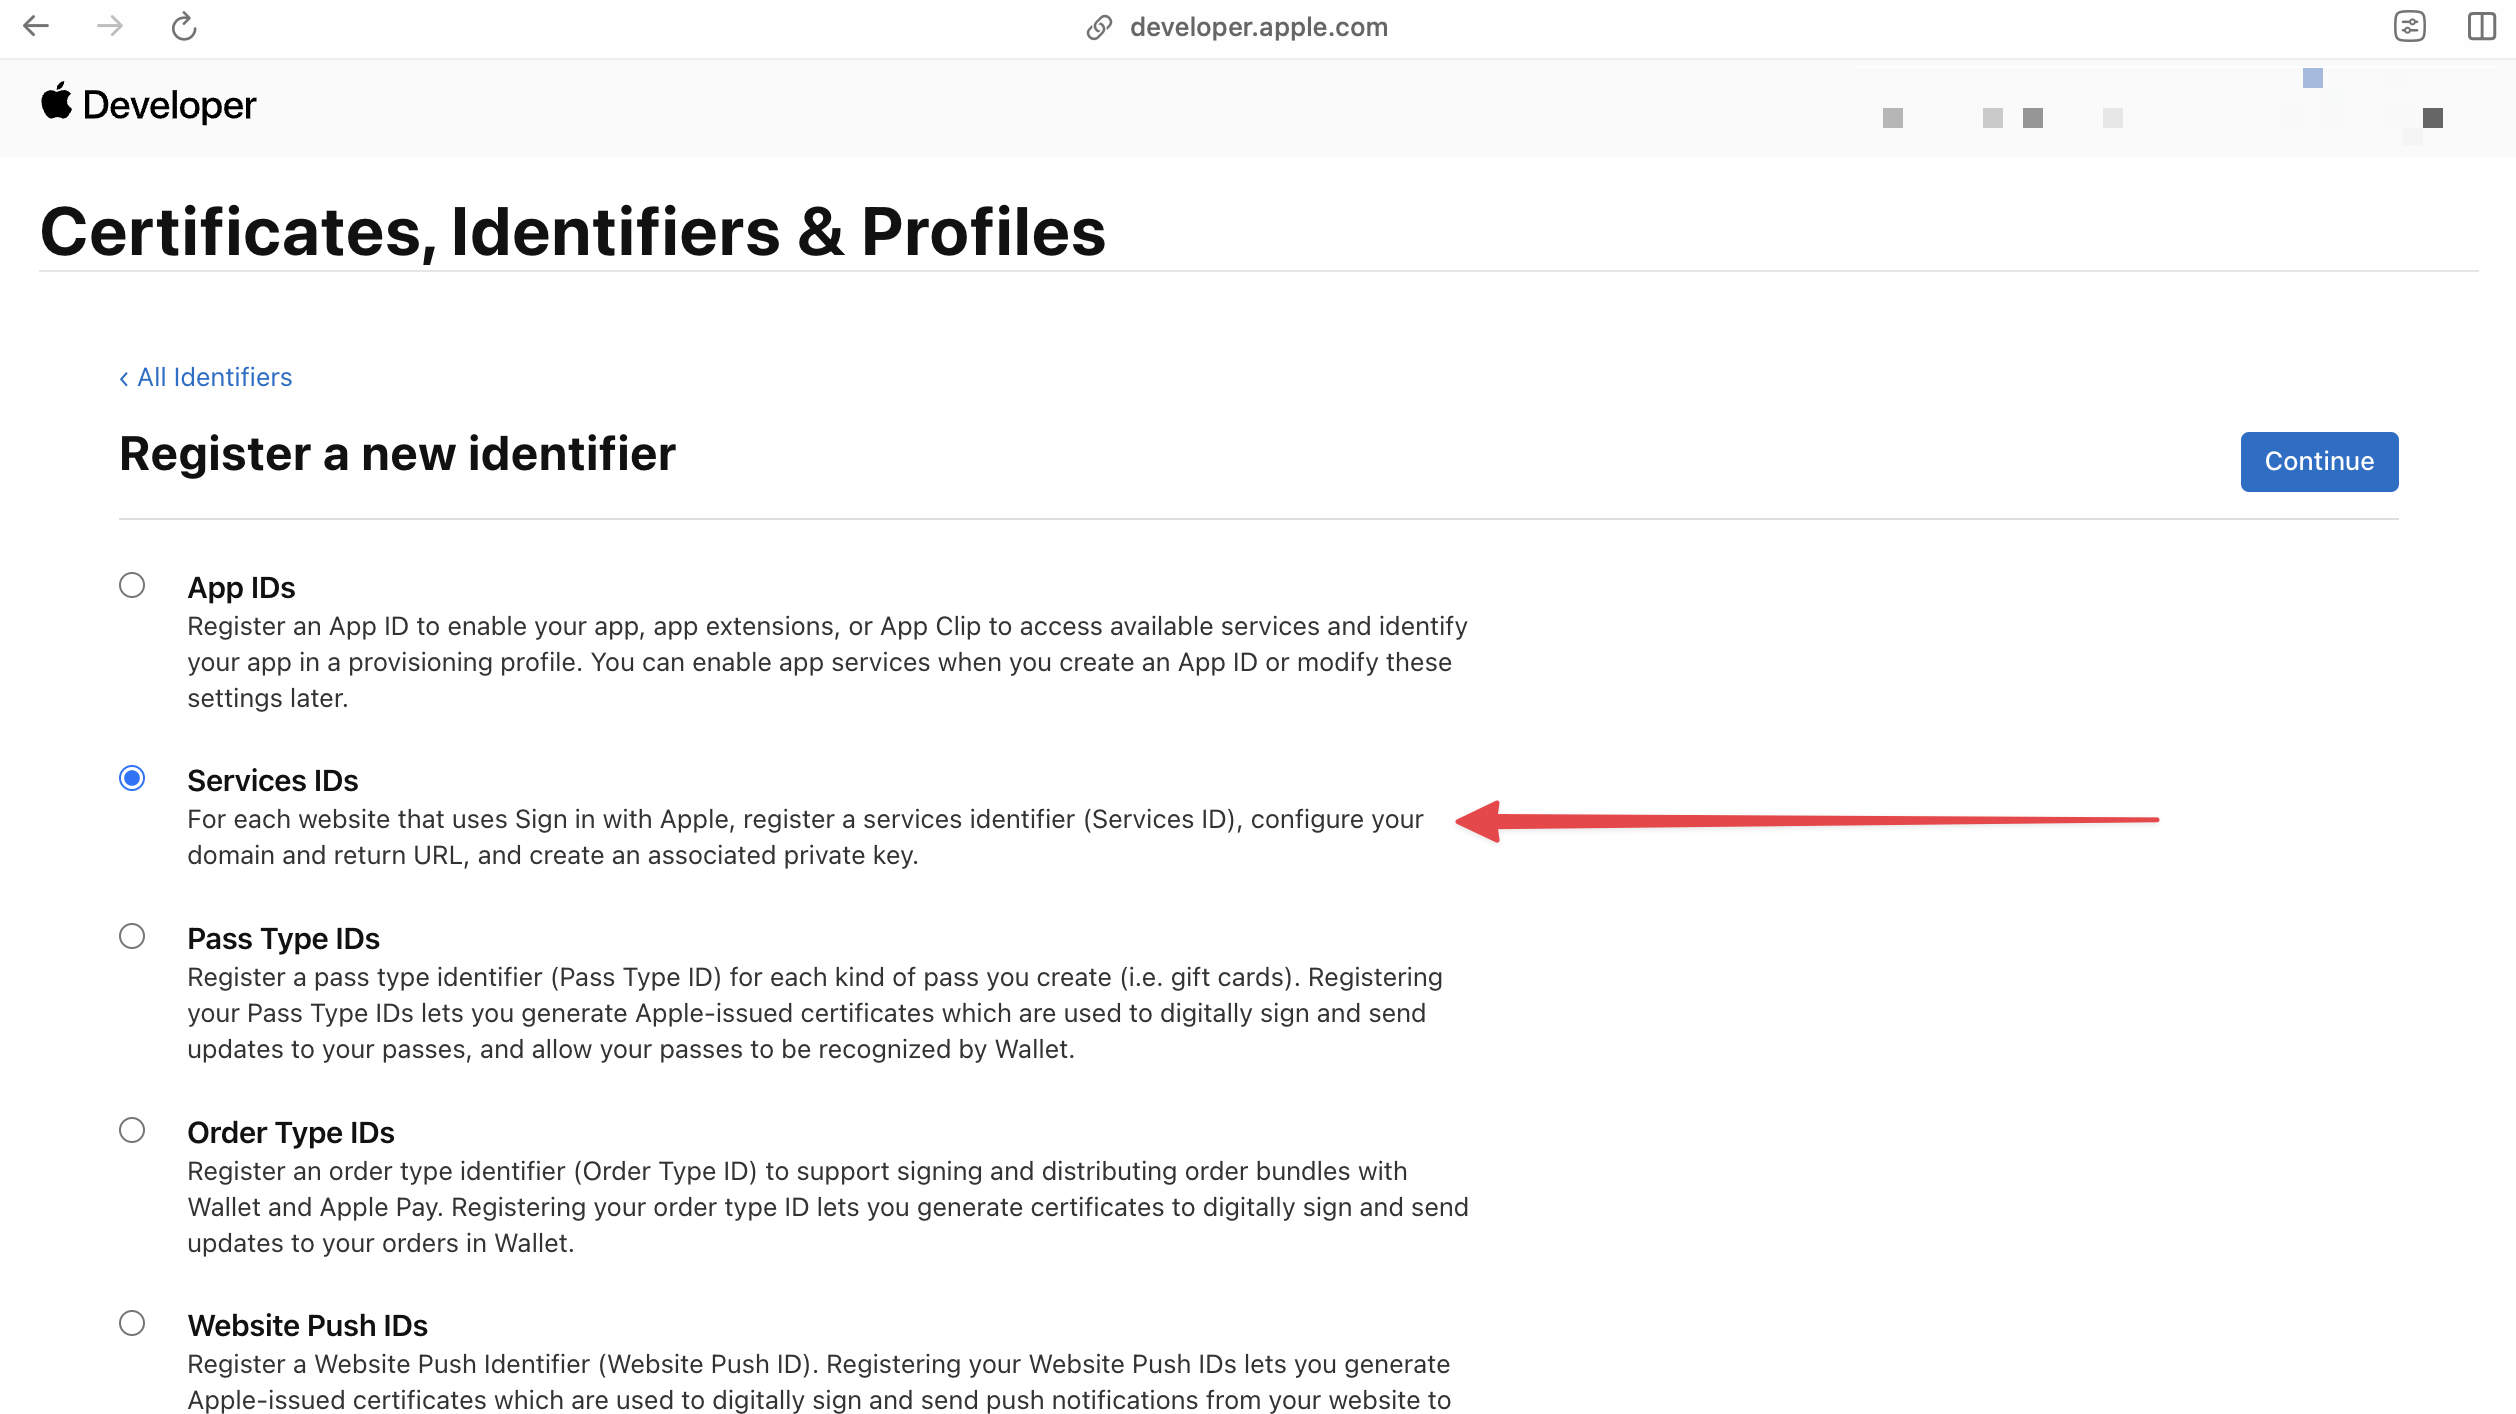
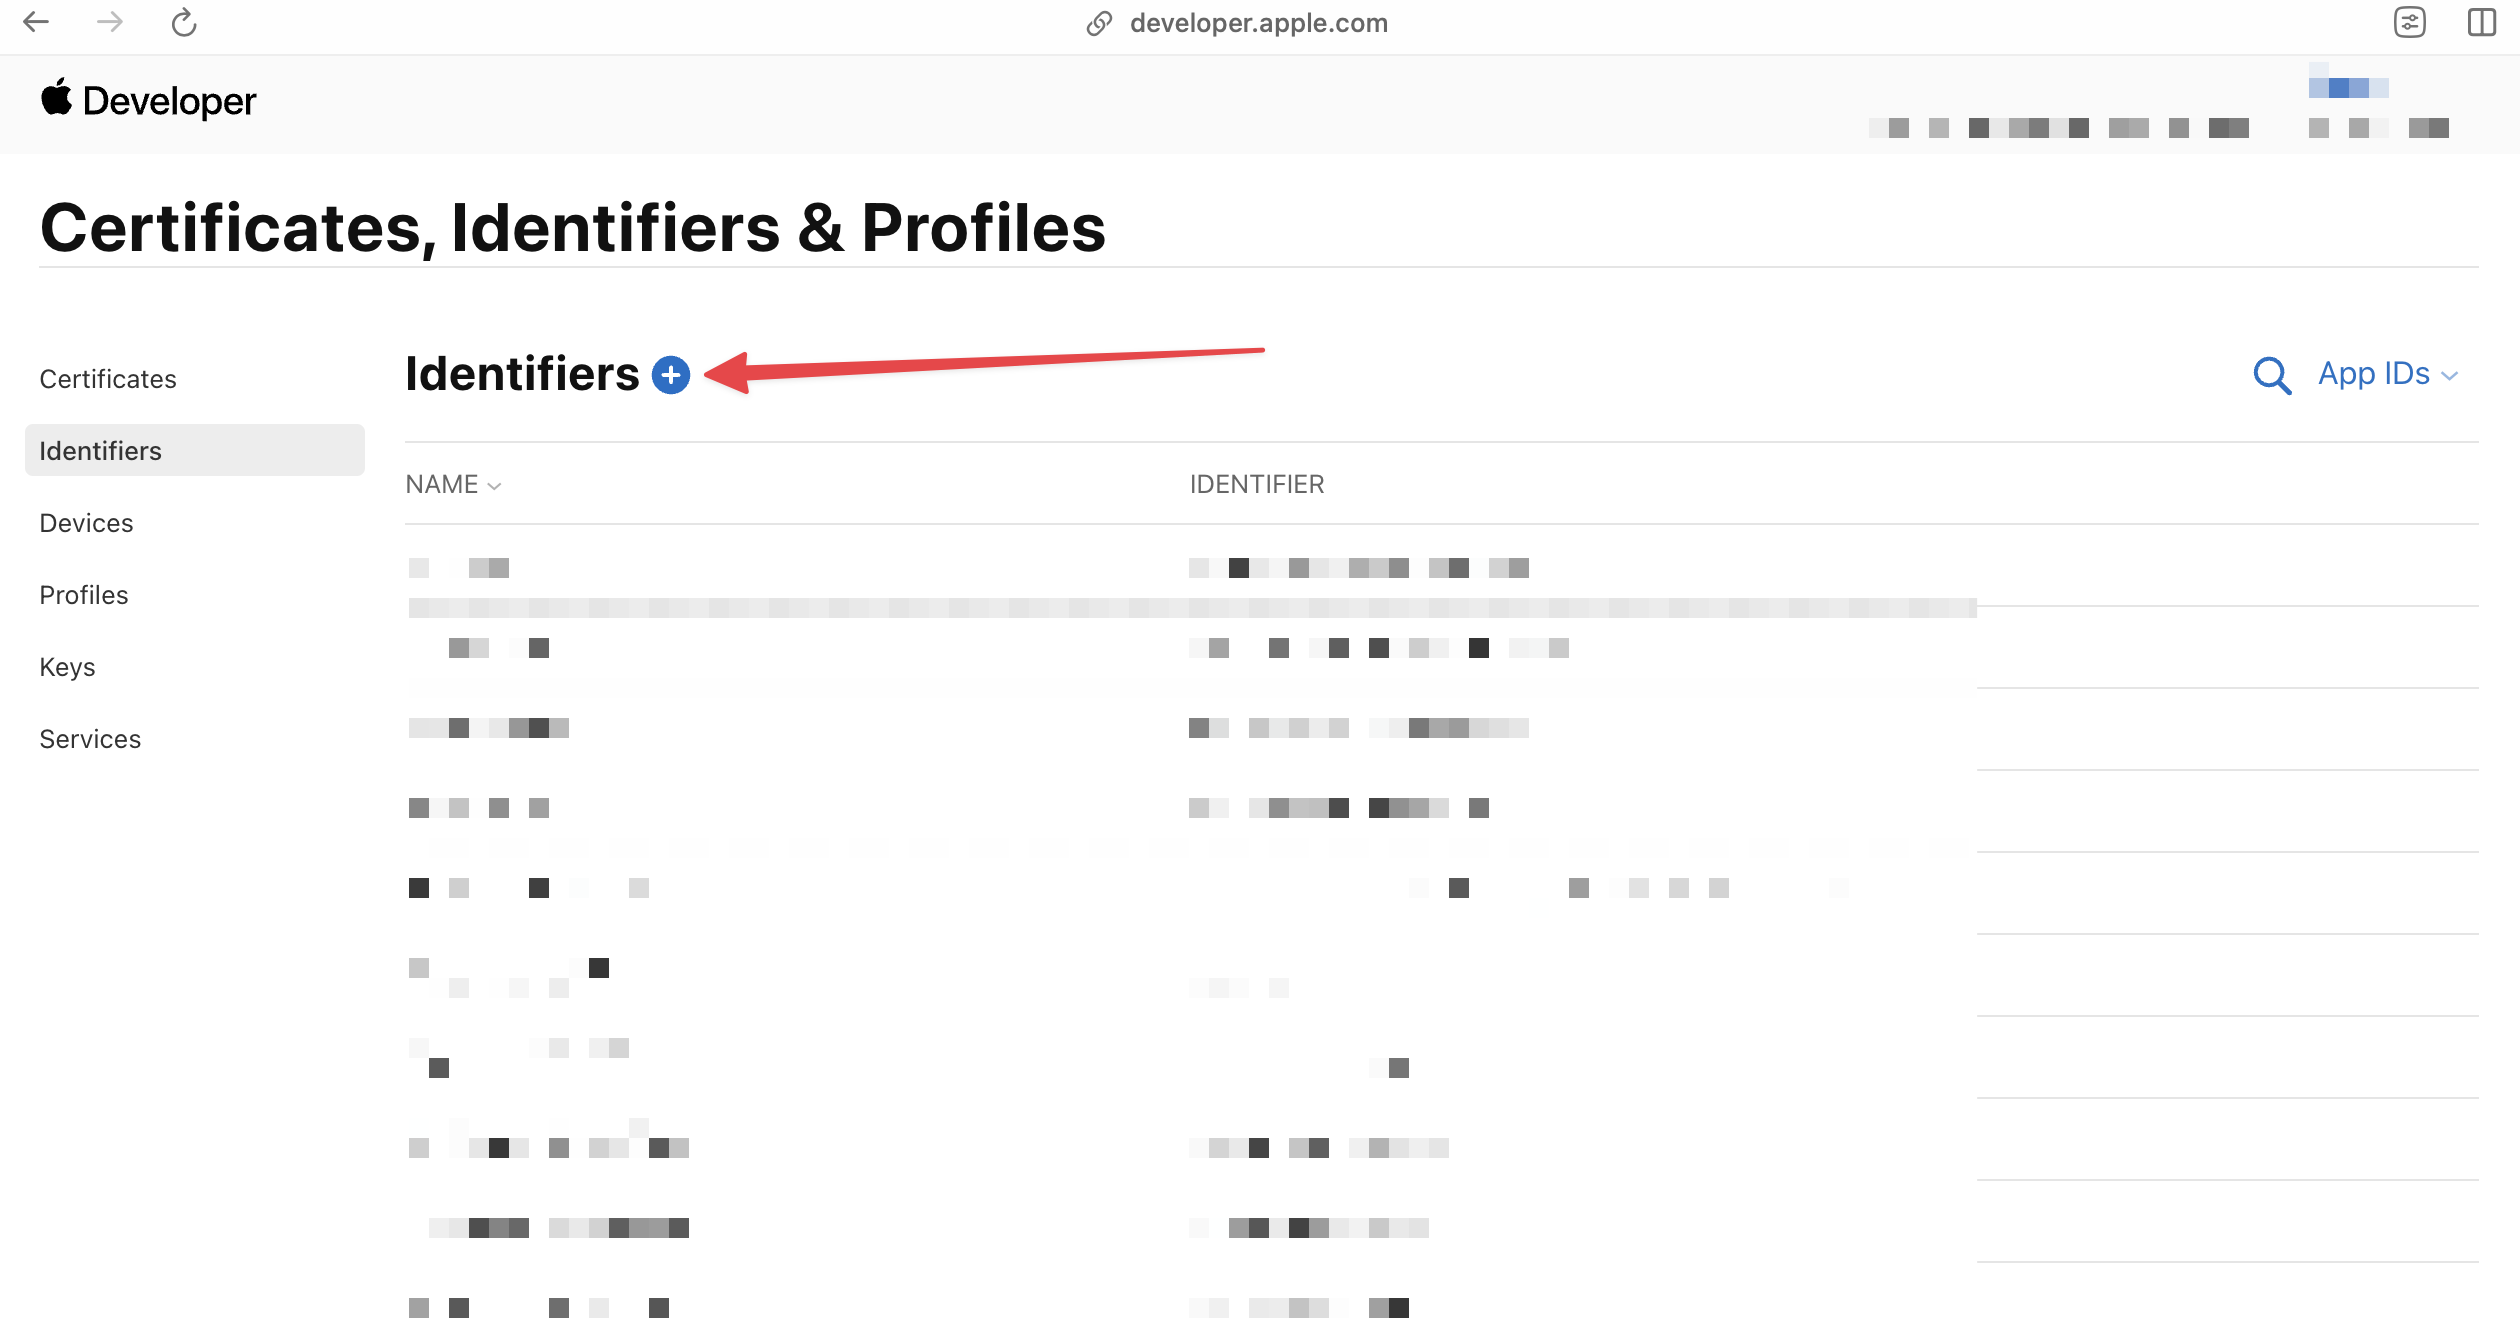 Whether you are configuring for an iOS application or not, you need an App ID. Select App IDs and click Continue.
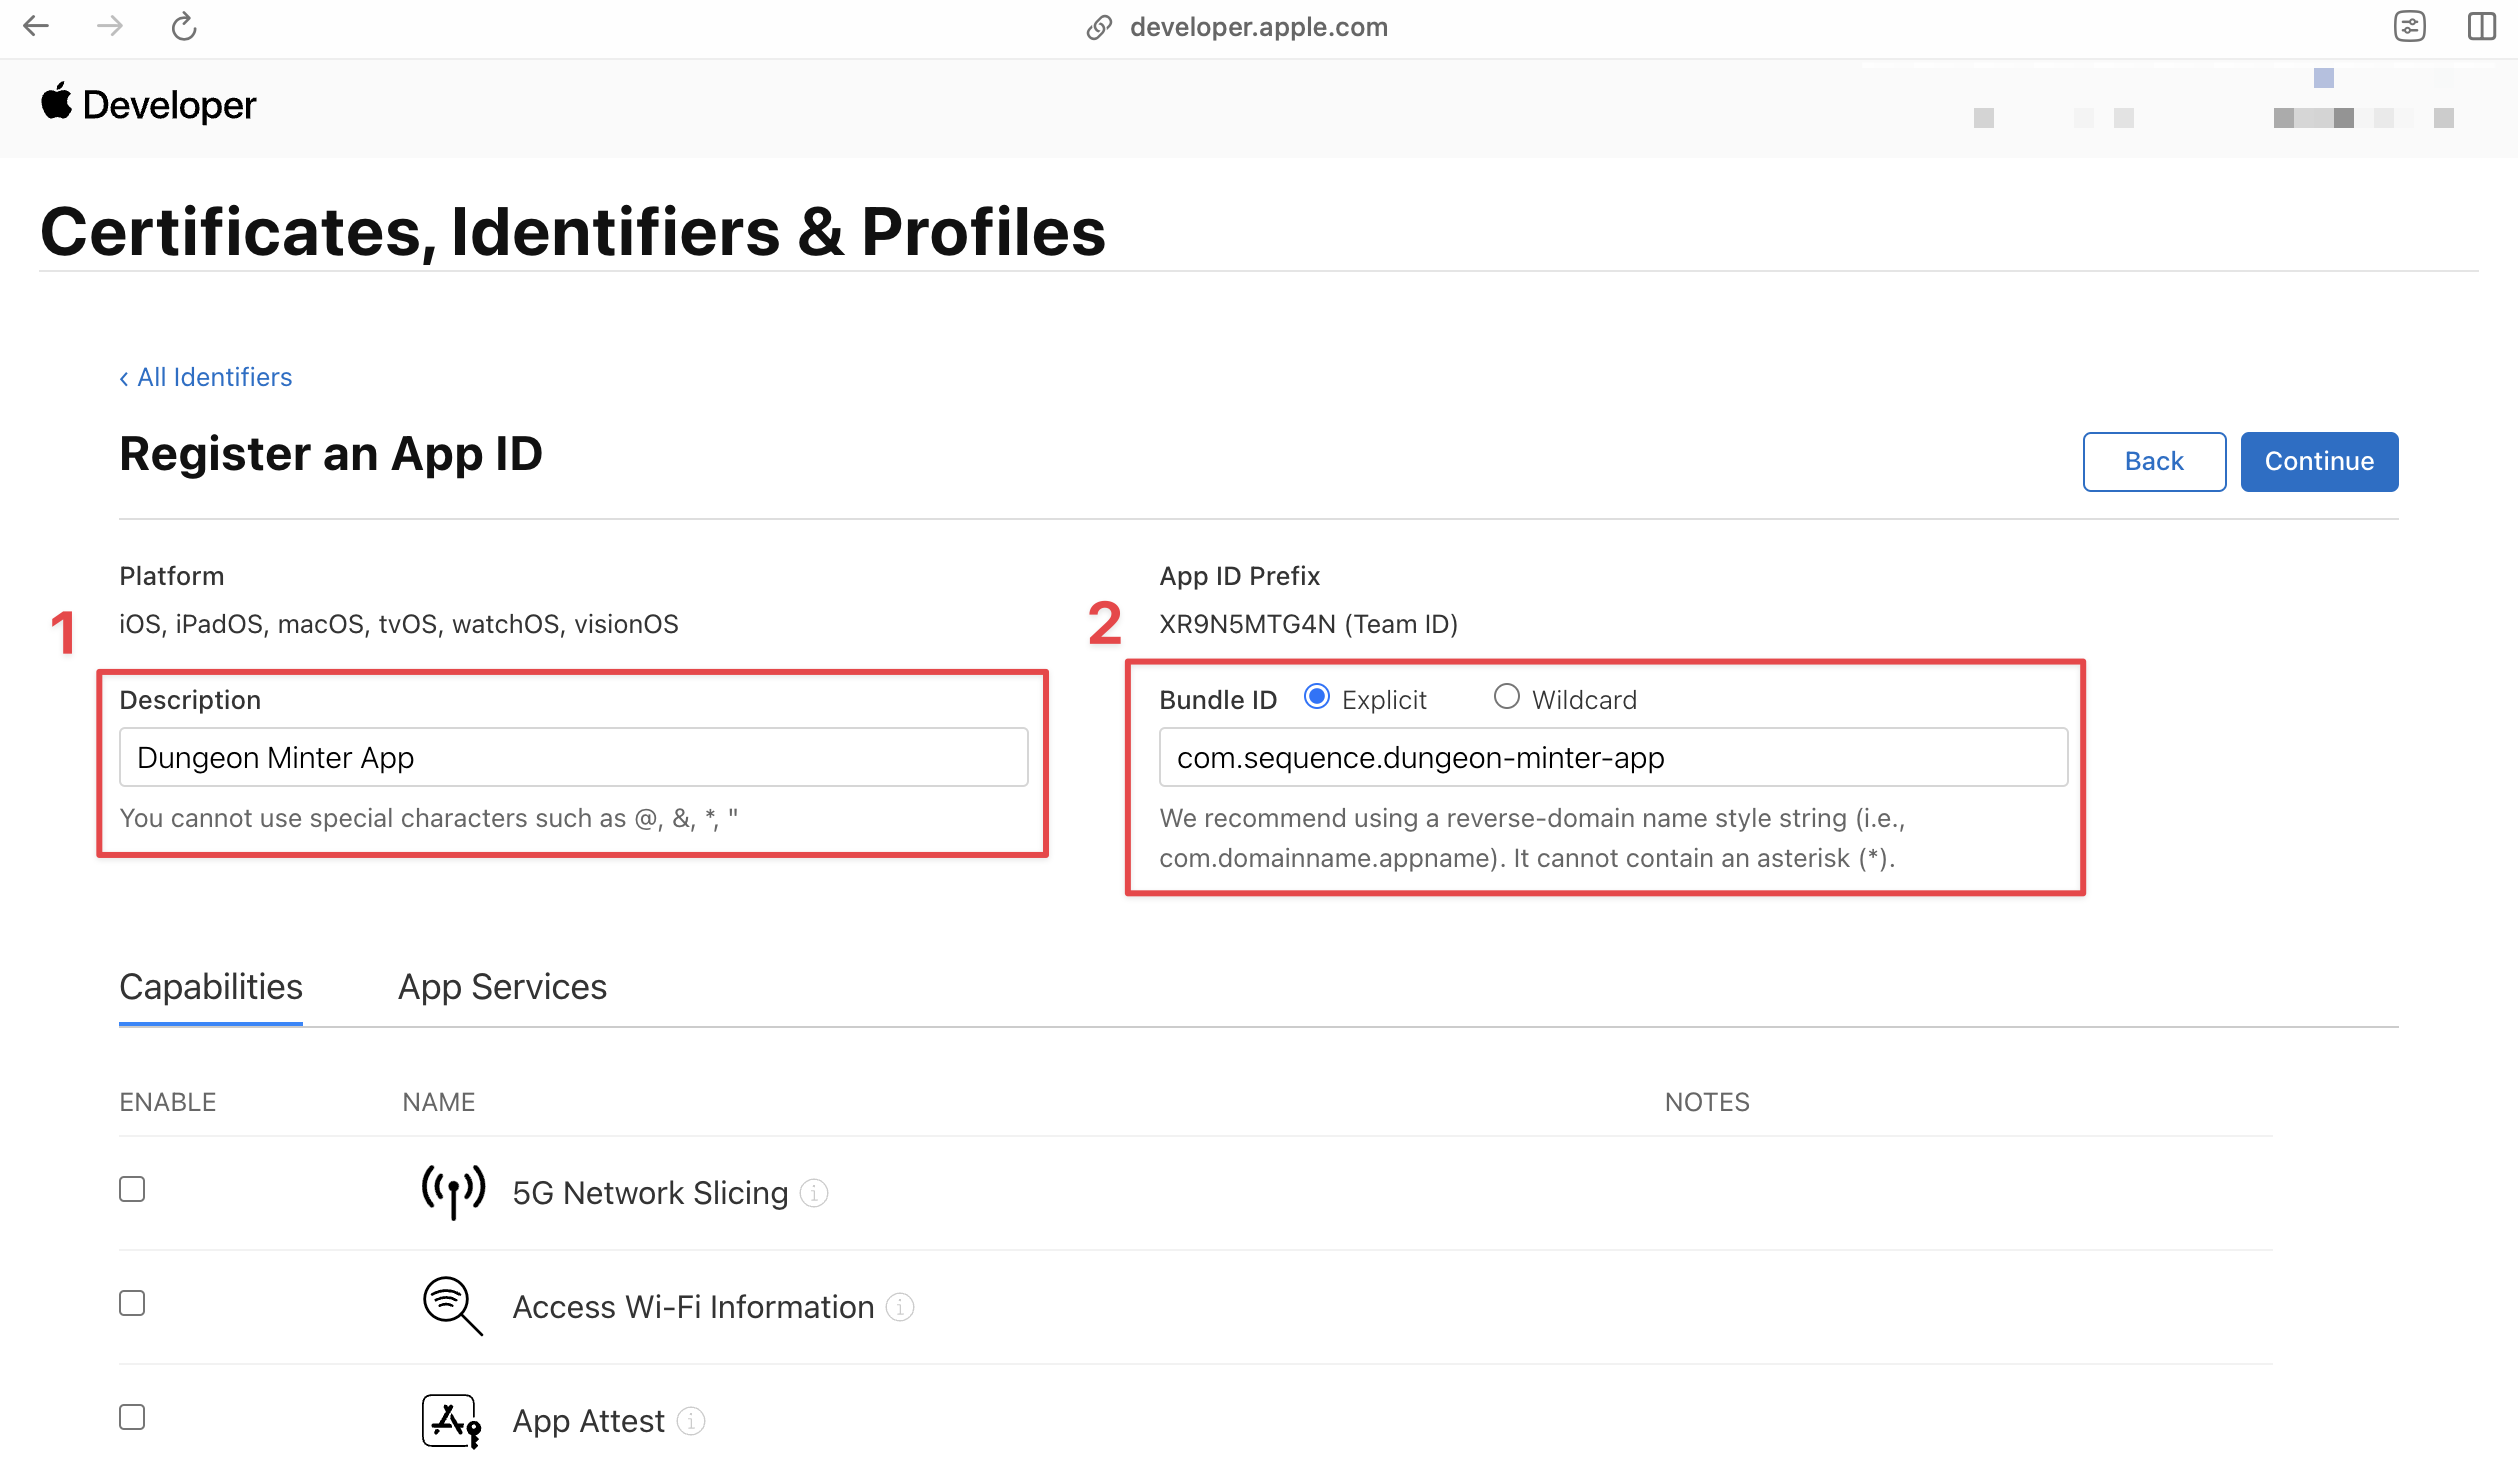
 ## Create App ID
Provide the following in the form:
1. Description
2. Bundle ID: This is the unique bundle identifier for your iOS project. If you are configuring for a web application, you can provide a placeholder value.
## Create App ID
Provide the following in the form:
1. Description
2. Bundle ID: This is the unique bundle identifier for your iOS project. If you are configuring for a web application, you can provide a placeholder value.
 Before you continue, you will need to enable the Sign In with Apple capability for the App ID. Scroll down to the Capabilities section and enable the Sign In with Apple capability.
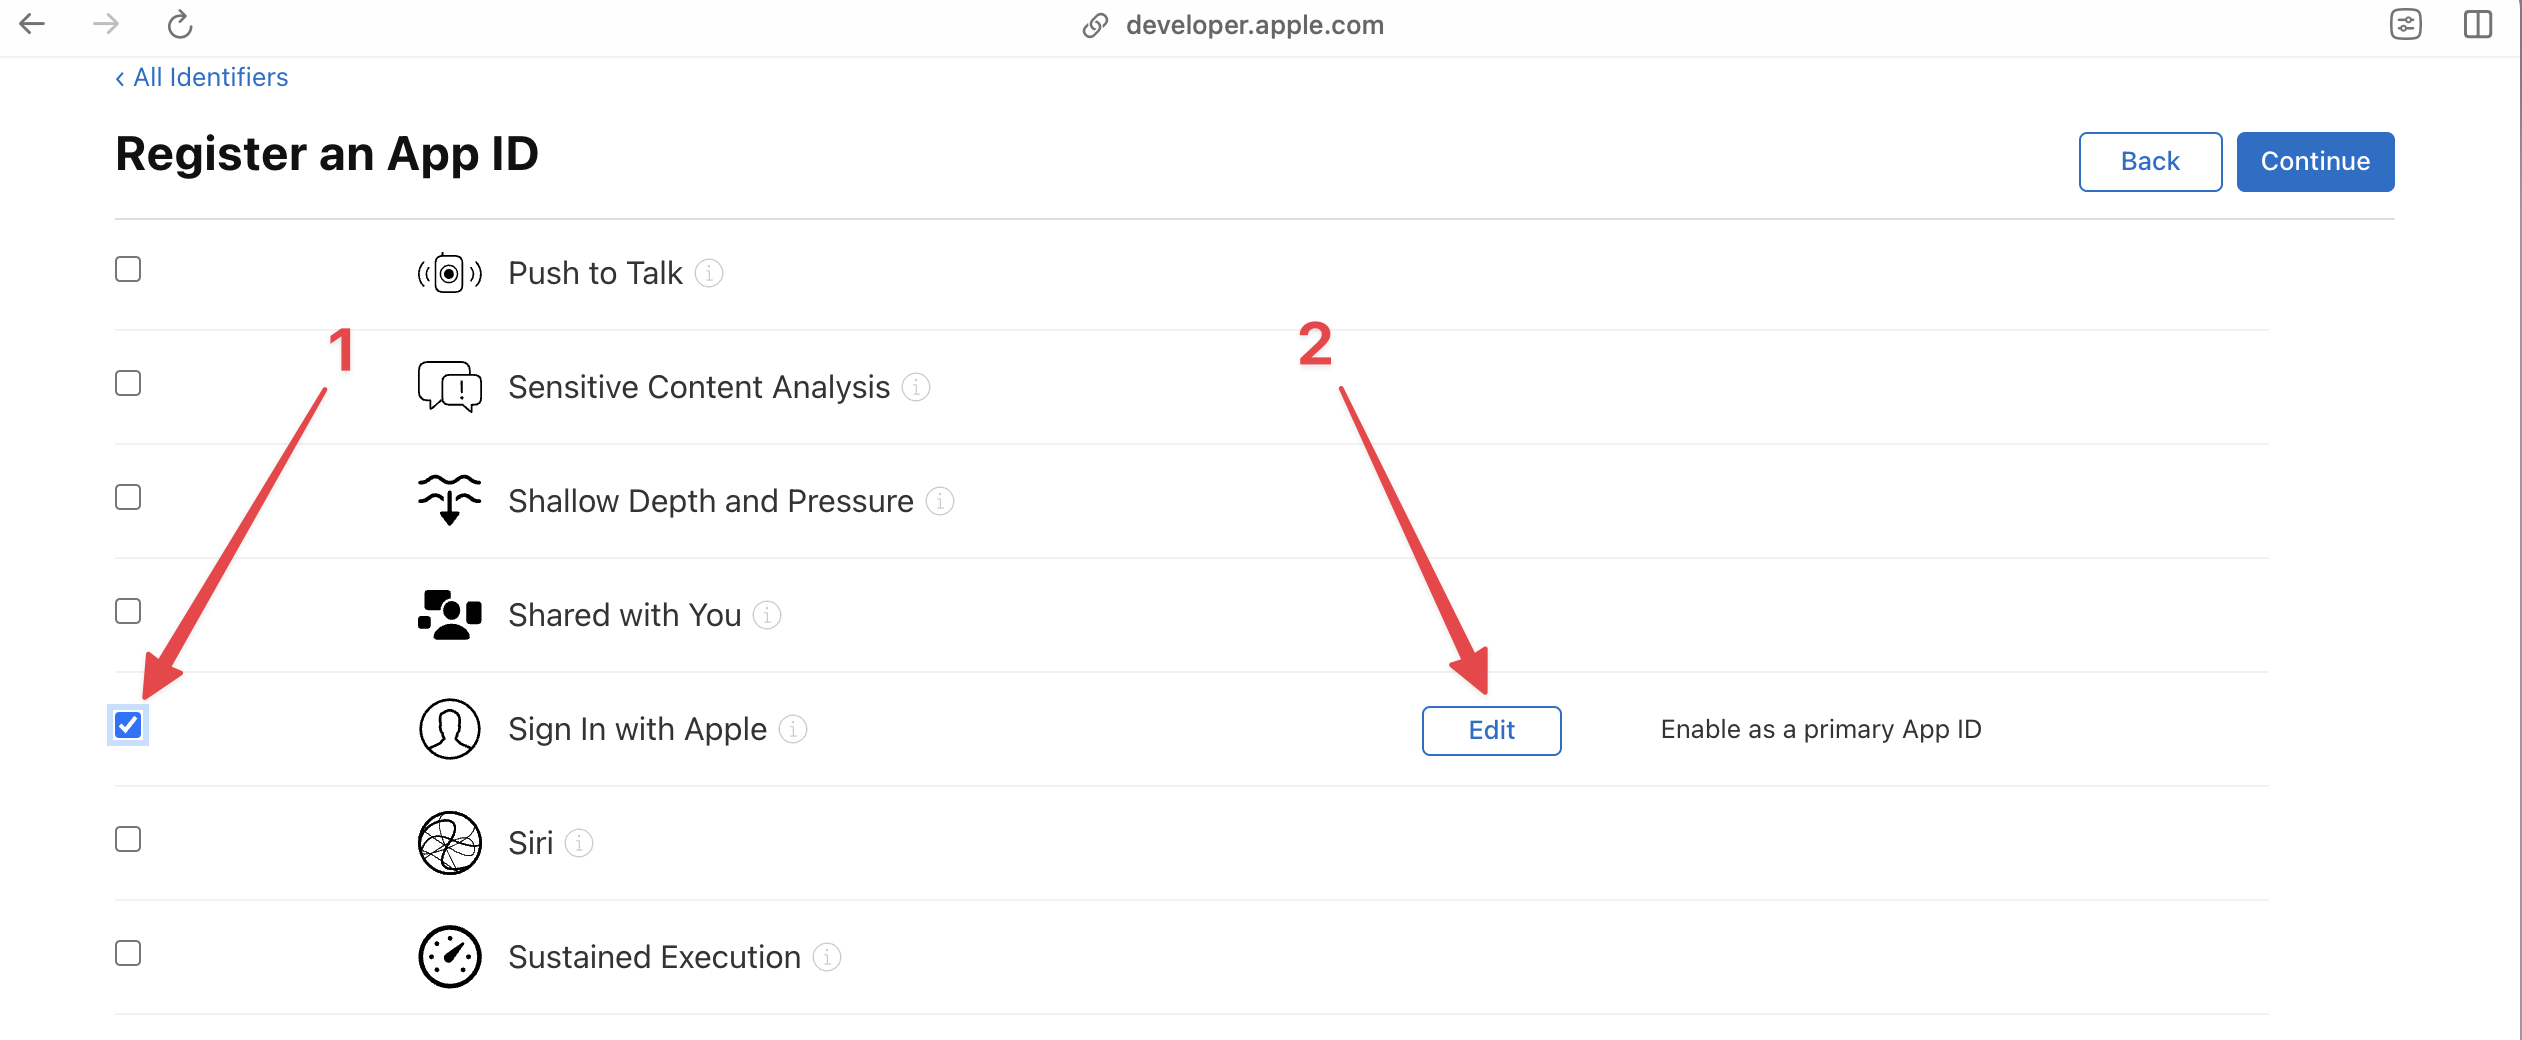 Click Continue, and then Register to create the App ID.
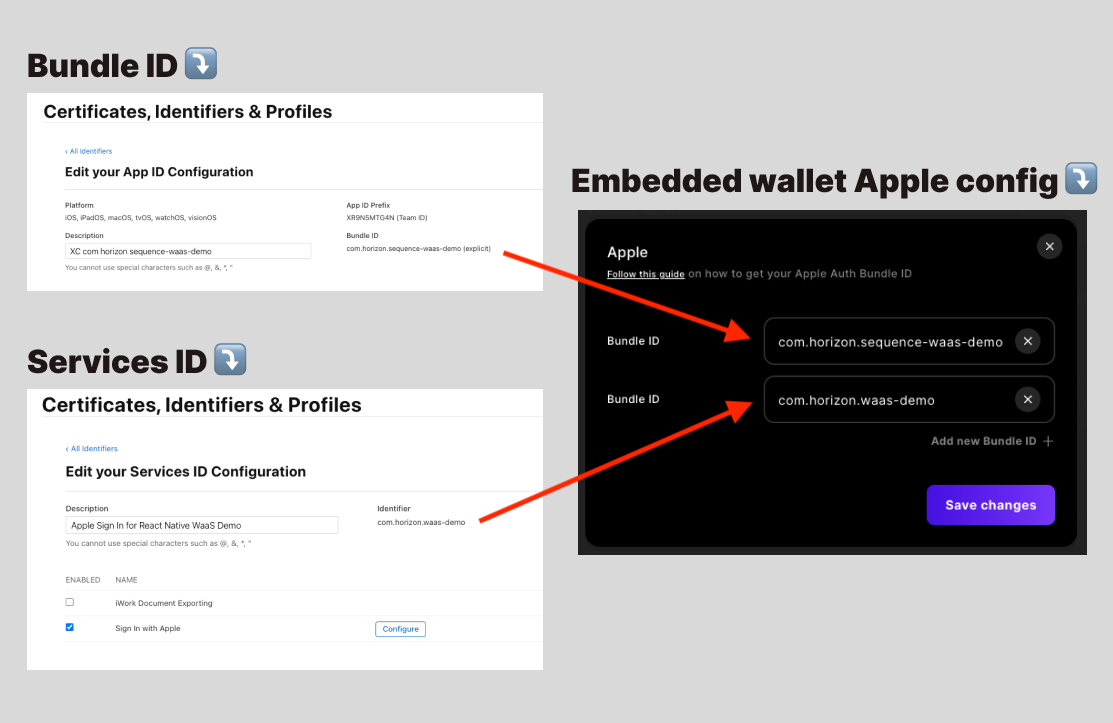
At this stage if you are configuring only for an iOS application, you can skip the next section and proceed to using your Bundle ID as your Client ID in Sequence Builder.
## Configure Web Services ID
If you are configuring your Client ID for a web application, click on the `+` sign on the Identifiers section and select the Services IDs option. Click Continue.
Click Continue, and then Register to create the App ID.
At this stage if you are configuring only for an iOS application, you can skip the next section and proceed to using your Bundle ID as your Client ID in Sequence Builder.
## Configure Web Services ID
If you are configuring your Client ID for a web application, click on the `+` sign on the Identifiers section and select the Services IDs option. Click Continue.
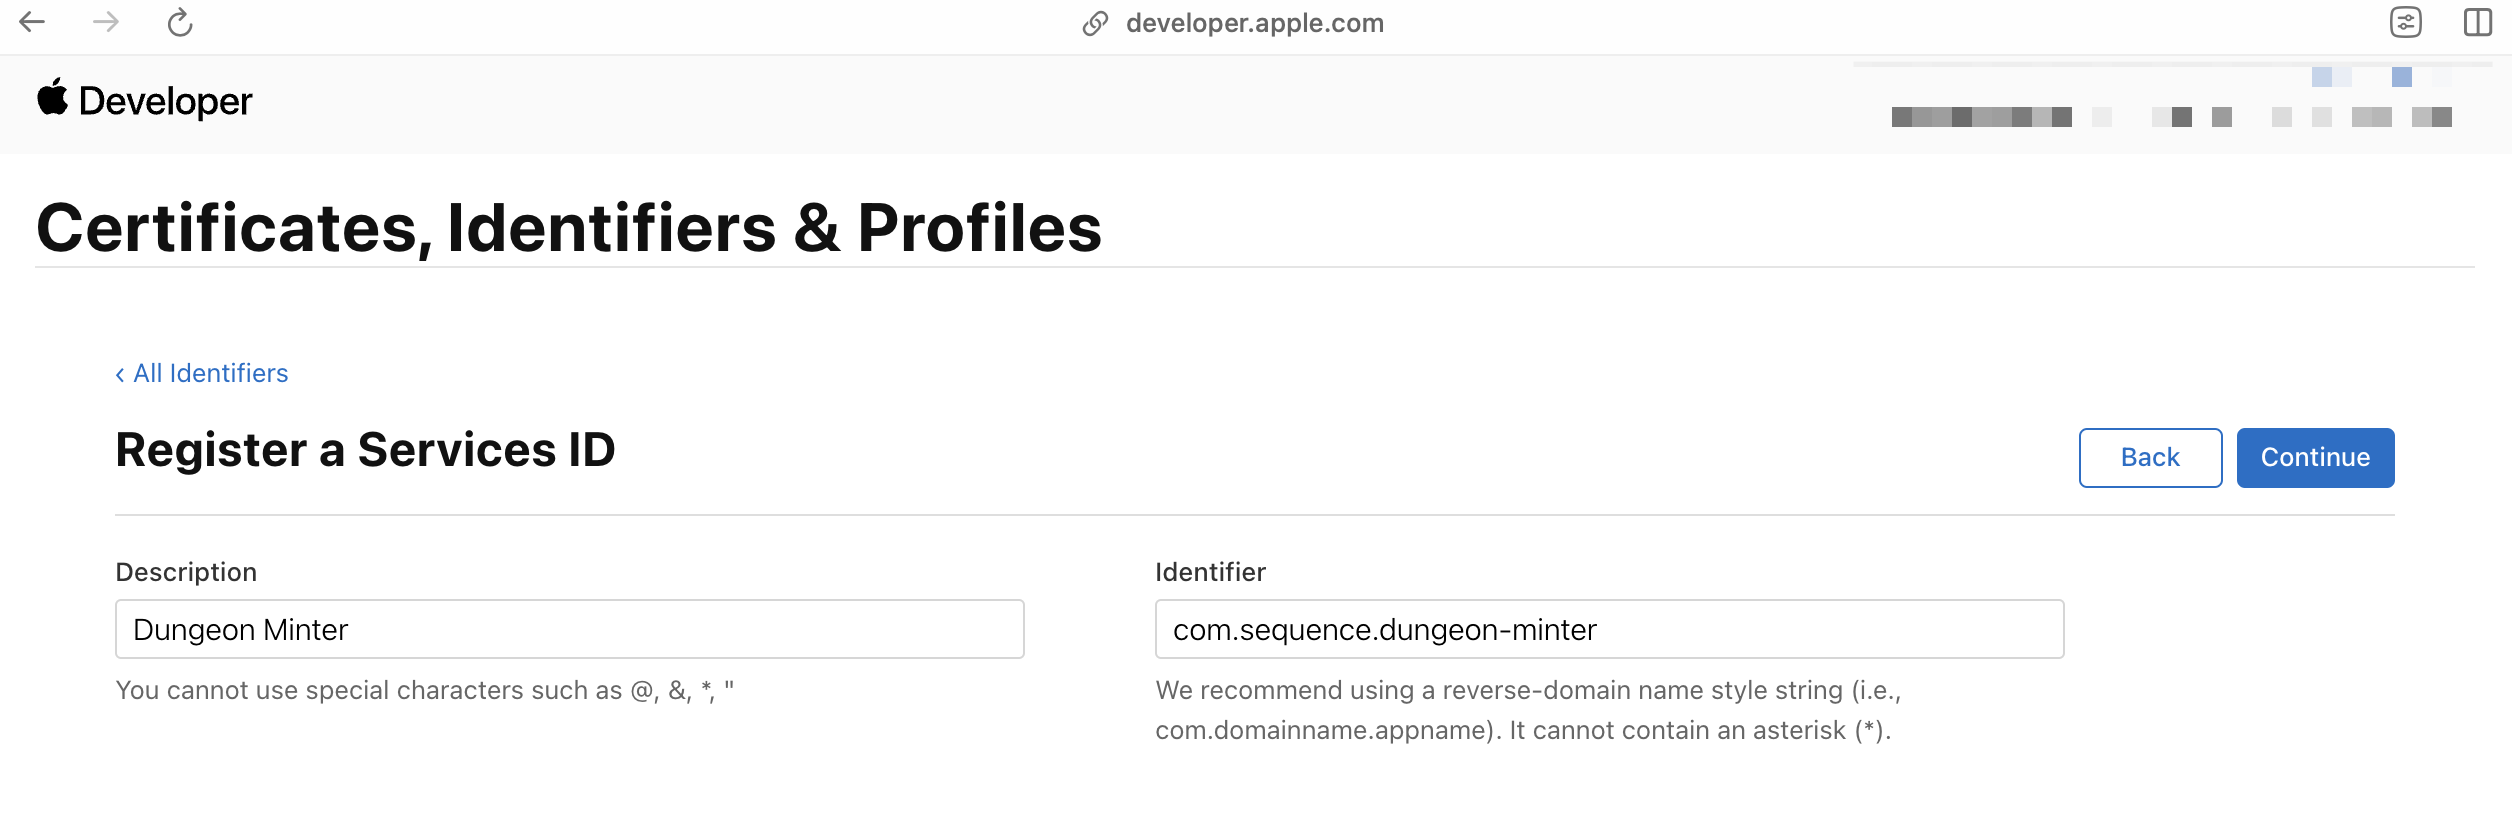
 Then provide the following in the form:
1. Description
2. Identifier: This will be the client ID for your web application that you use to identify in the SDK and Sequence Builder.
Click Continue, and then Register to create the identifier.
Then provide the following in the form:
1. Description
2. Identifier: This will be the client ID for your web application that you use to identify in the SDK and Sequence Builder.
Click Continue, and then Register to create the identifier.
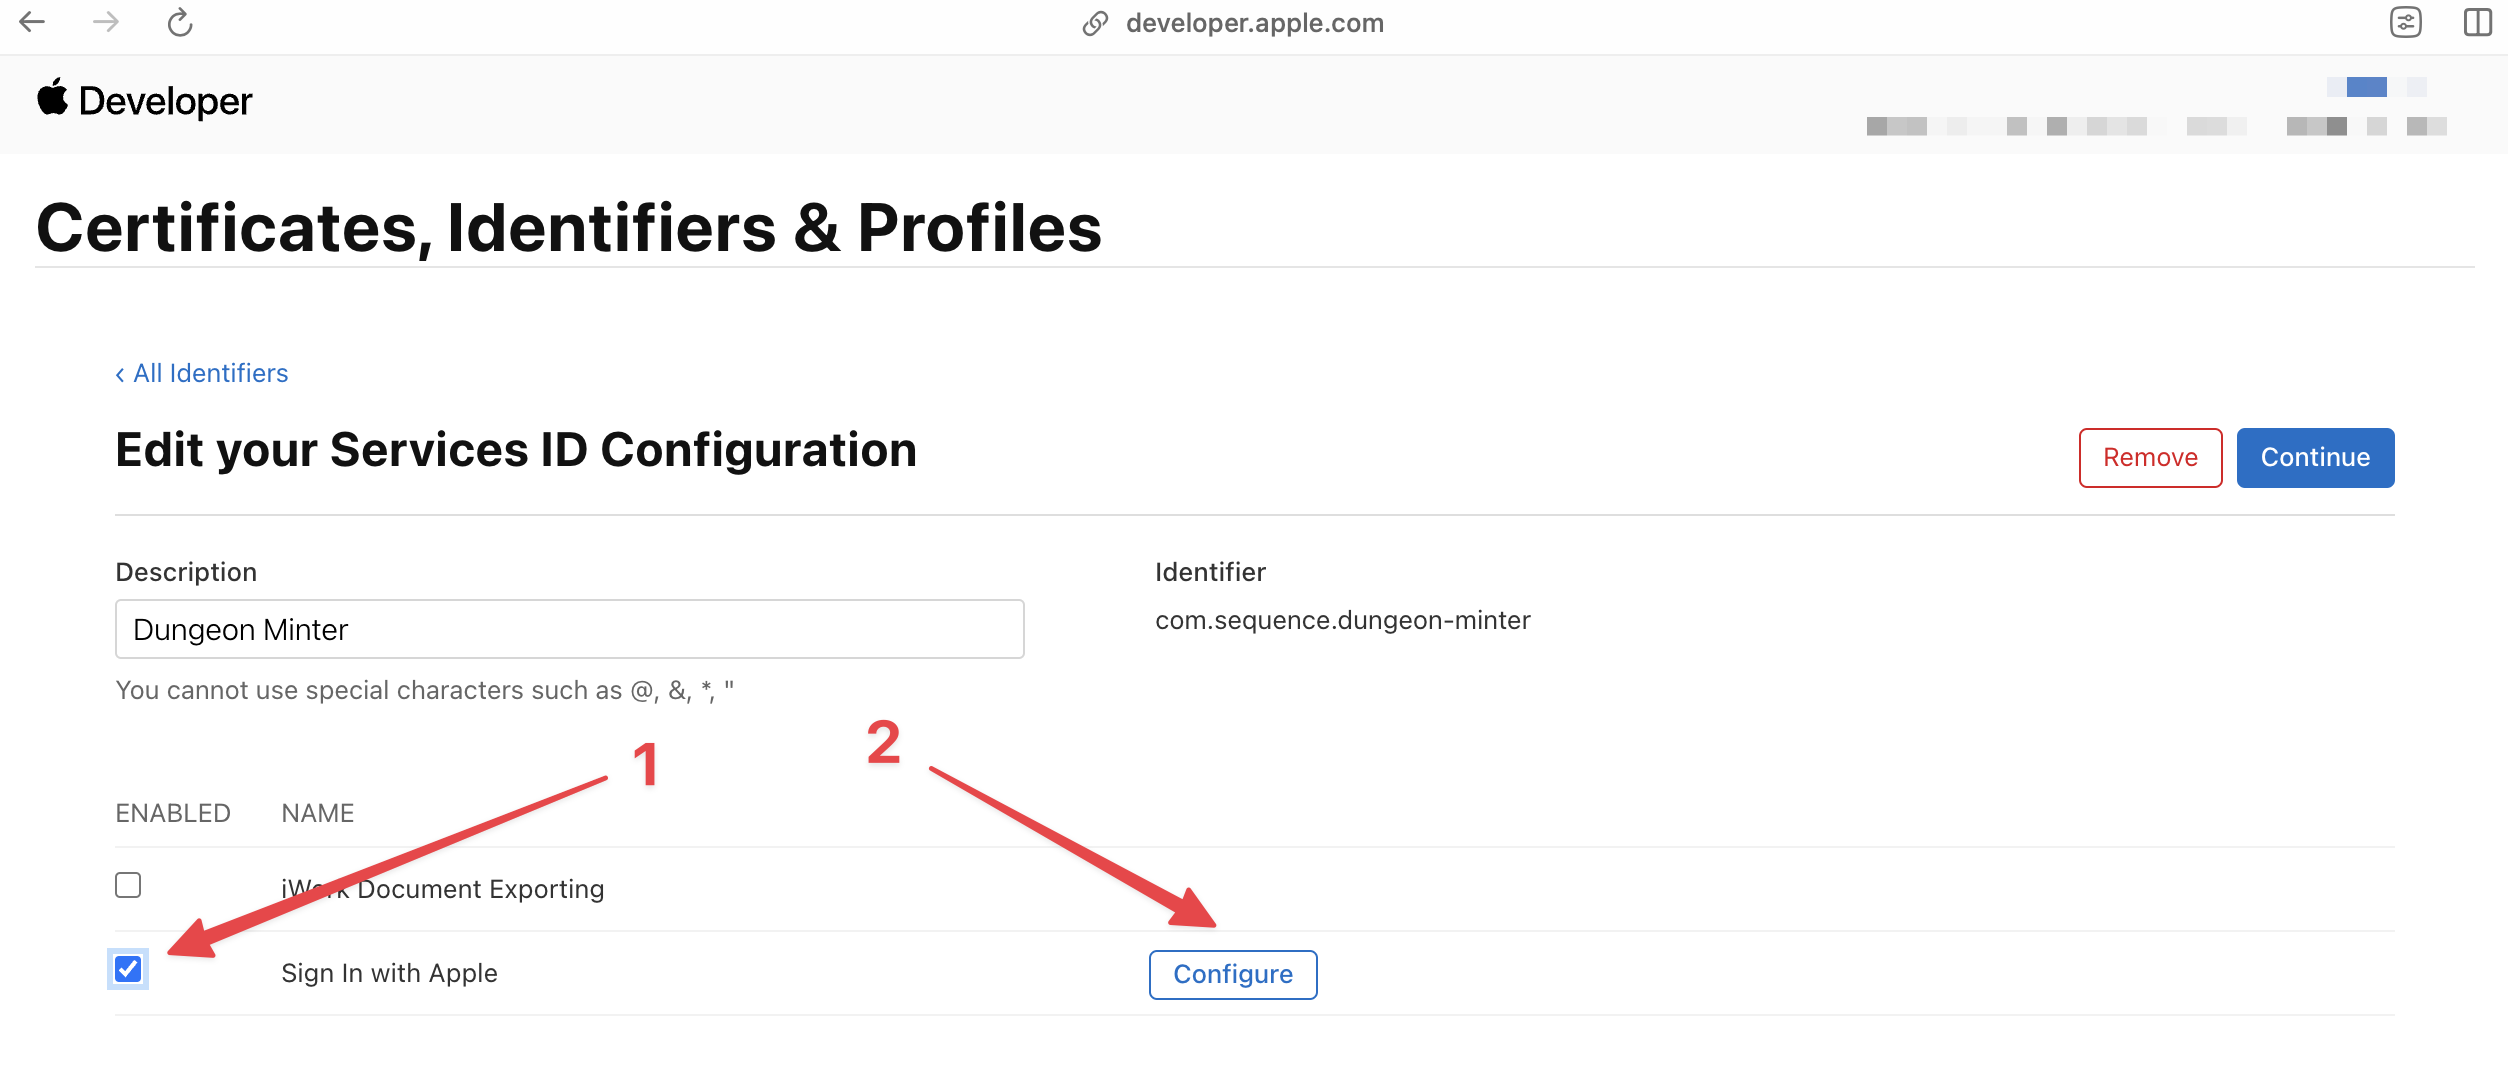
 Once created, click on the identifier that's now listed in the Identifiers section. You will now need to configure the domains and redirect URLs for the Services ID. To do so, click on the checkbox next to "Sign In with Apple" and then click on the Configure button.
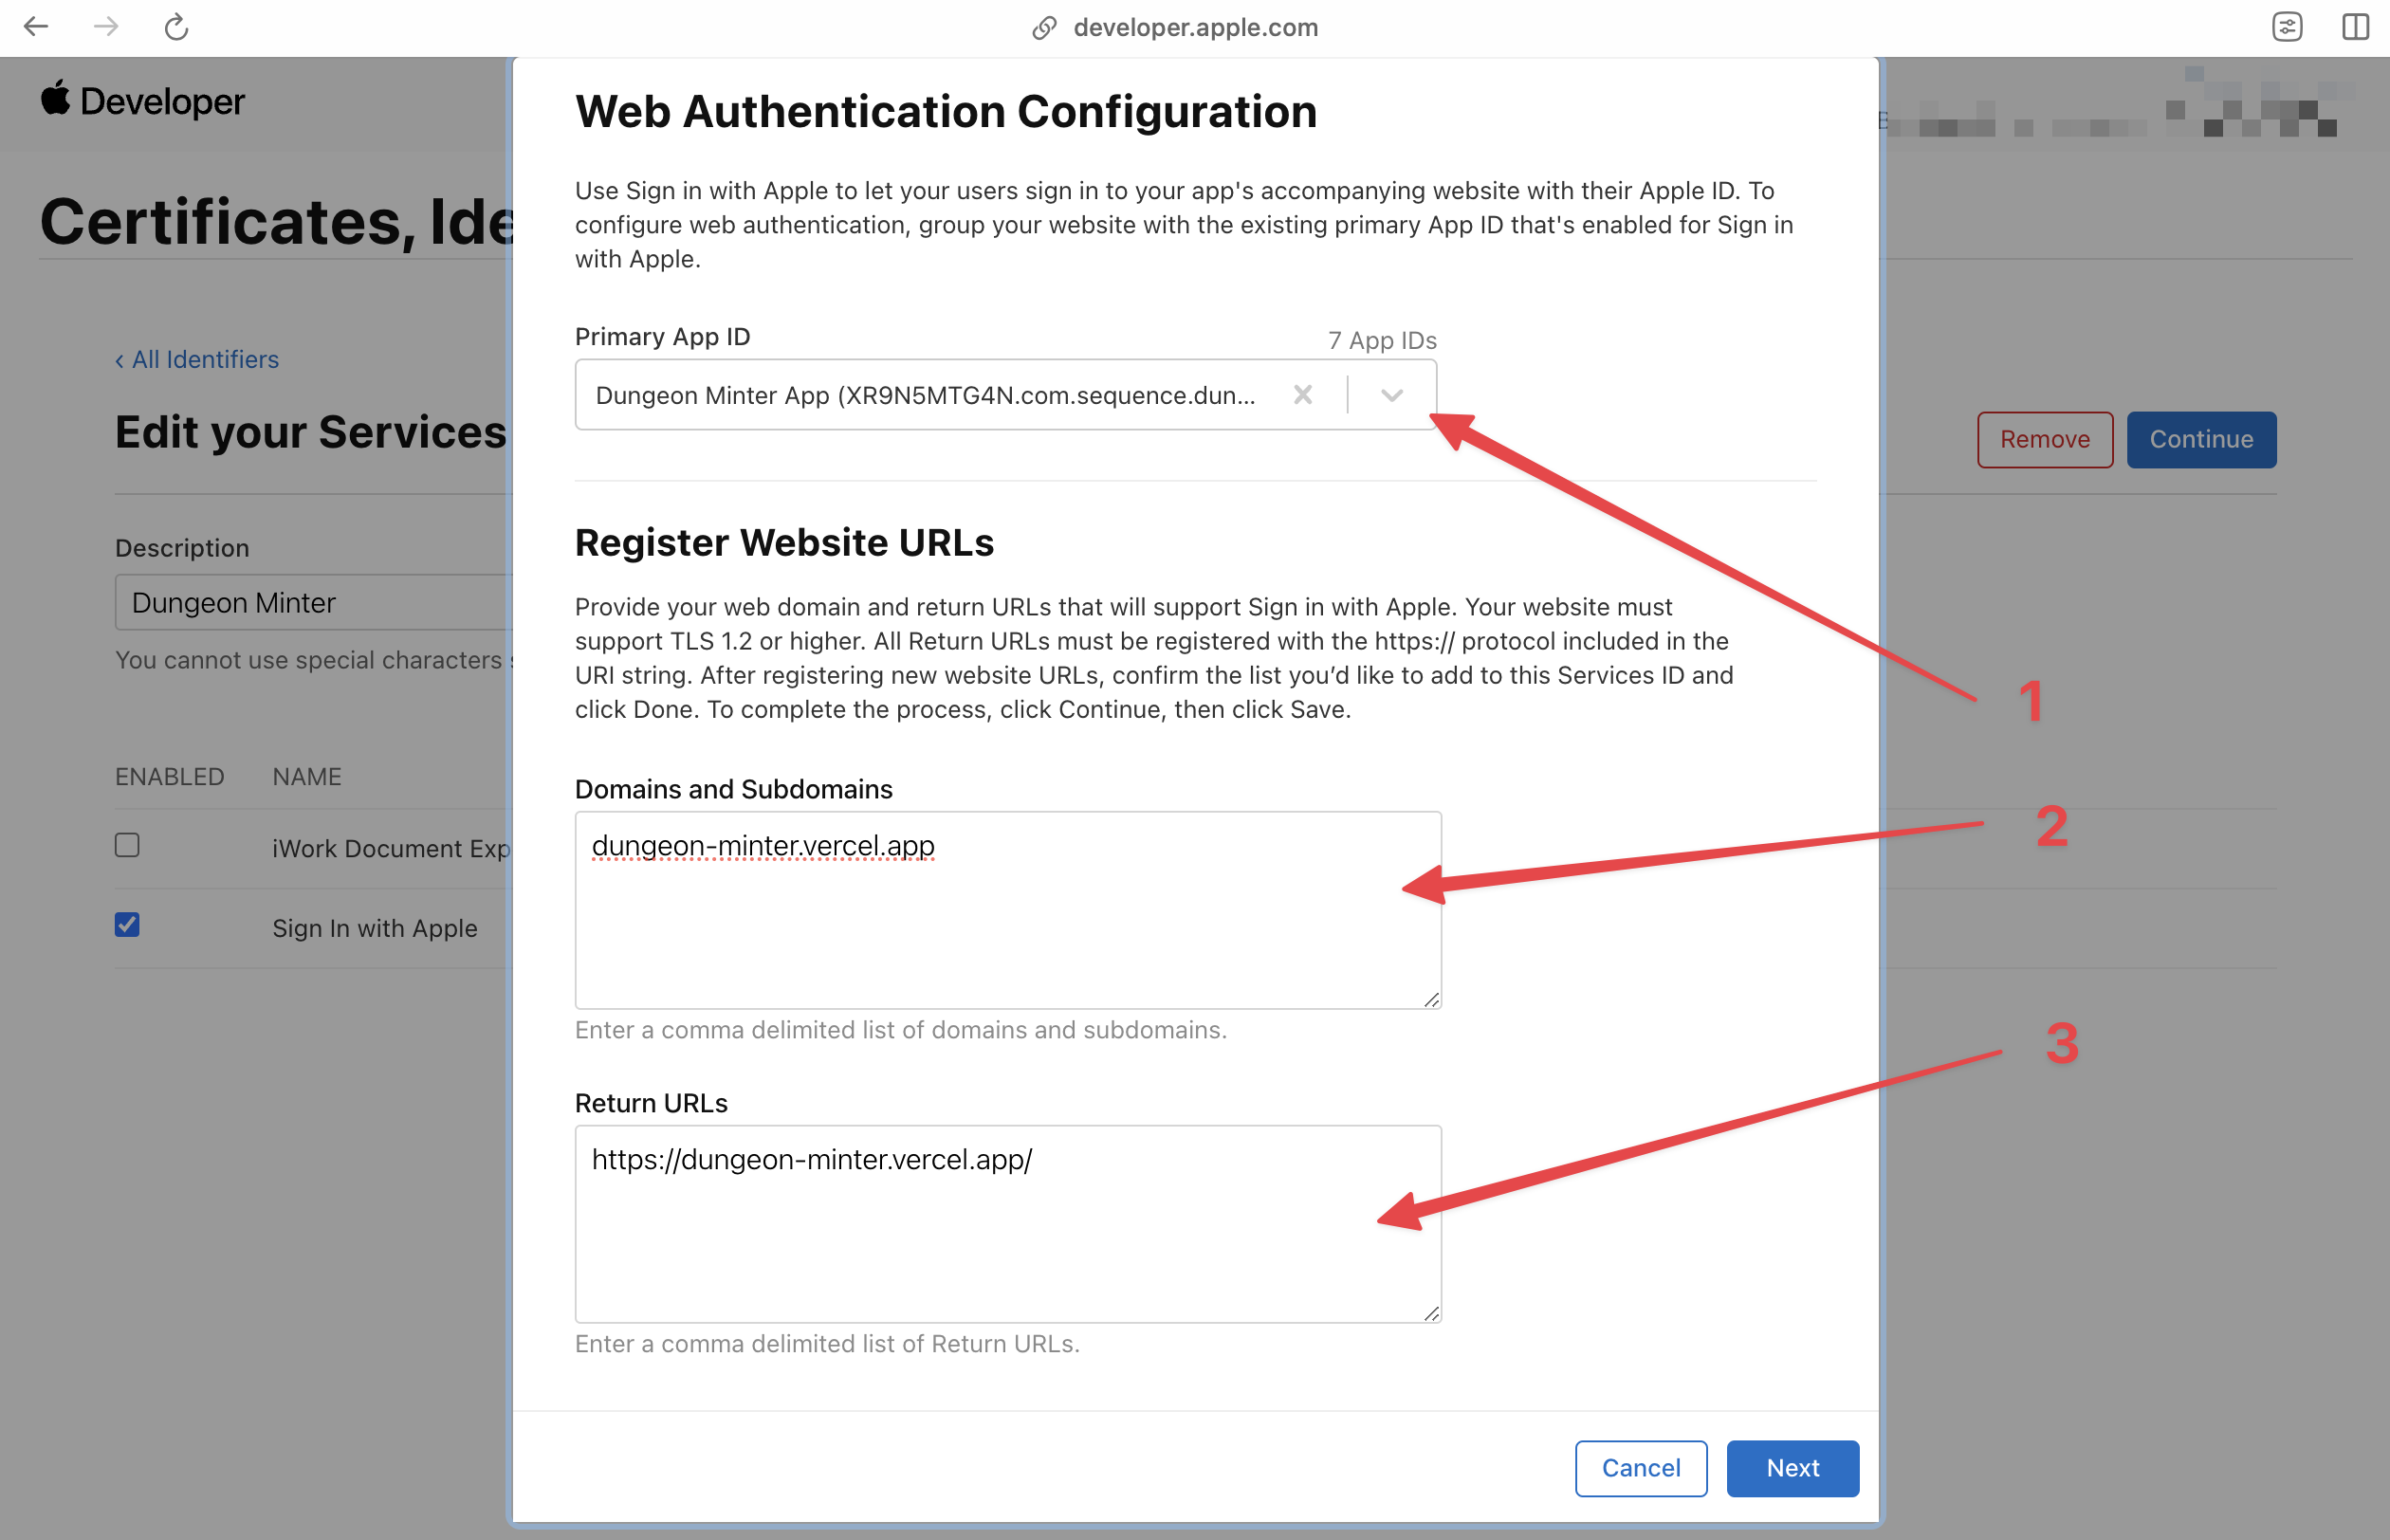
 On the Web Authentication Configuration modal, provide the following:
1. Primary App ID: Select the App ID you created earlier.
2. Domains and Subdomains: A list of domains that will be whitelisted for interacting with this Services ID.
3. Return URLs: A list of redirect URIs that the user will be redirected to on successful authentication, Sequence SDKs will by default redirect to the same page that loads the SDK.
Apple Auth won't work without `https` when testing locally. If you are registering a localhost address, we recommend that you use a tool such as [ngrok](https://ngrok.com/) to create a secure tunnel to your local server and use the `https` URL provided by ngrok.
On the Web Authentication Configuration modal, provide the following:
1. Primary App ID: Select the App ID you created earlier.
2. Domains and Subdomains: A list of domains that will be whitelisted for interacting with this Services ID.
3. Return URLs: A list of redirect URIs that the user will be redirected to on successful authentication, Sequence SDKs will by default redirect to the same page that loads the SDK.
Apple Auth won't work without `https` when testing locally. If you are registering a localhost address, we recommend that you use a tool such as [ngrok](https://ngrok.com/) to create a secure tunnel to your local server and use the `https` URL provided by ngrok.
 Click Next, and then Done to complete the configuration, don't forget to click Continue to save the changes.
Finally, add this new Service ID to your Apple configuration in Sequence Builder, which will now have two entries: one for the Bundle ID and one for the Service ID.
Click Next, and then Done to complete the configuration, don't forget to click Continue to save the changes.
Finally, add this new Service ID to your Apple configuration in Sequence Builder, which will now have two entries: one for the Bundle ID and one for the Service ID.
 If you ever need to update the domains or redirect URLs for the Services ID, simply editing the identifier won't work. Due to aggressive caching by Apple, you will need to delete the identifier and create a new one with the updated values.
## Get Your Client ID
As mentioned above, for an iOS application, you can use the Bundle ID you created as your Client ID in Sequence Builder. For a web application and Android application, you can use the Service ID you registered with Apple.
If you ever need to update the domains or redirect URLs for the Services ID, simply editing the identifier won't work. Due to aggressive caching by Apple, you will need to delete the identifier and create a new one with the updated values.
## Get Your Client ID
As mentioned above, for an iOS application, you can use the Bundle ID you created as your Client ID in Sequence Builder. For a web application and Android application, you can use the Service ID you registered with Apple.