> ## Documentation Index
> Fetch the complete documentation index at: https://docs.sequence.xyz/llms.txt
> Use this file to discover all available pages before exploring further.
# Google Configuration for Embedded Wallet
> Learn how to configure Google OAuth client for your Embedded Wallet instance. Follow steps to create OAuth Client ID for web, Android, or iOS applications.
In order to have Google auth integrated into your Embedded Wallet instance, you should configure a Google OAuth client in the Google Developer Console. Depending on whether you are integrating Embedded Wallet into a native mobile, desktop, or web application, you should pick the correct configuration accordingly.
## Create OAuth Client ID
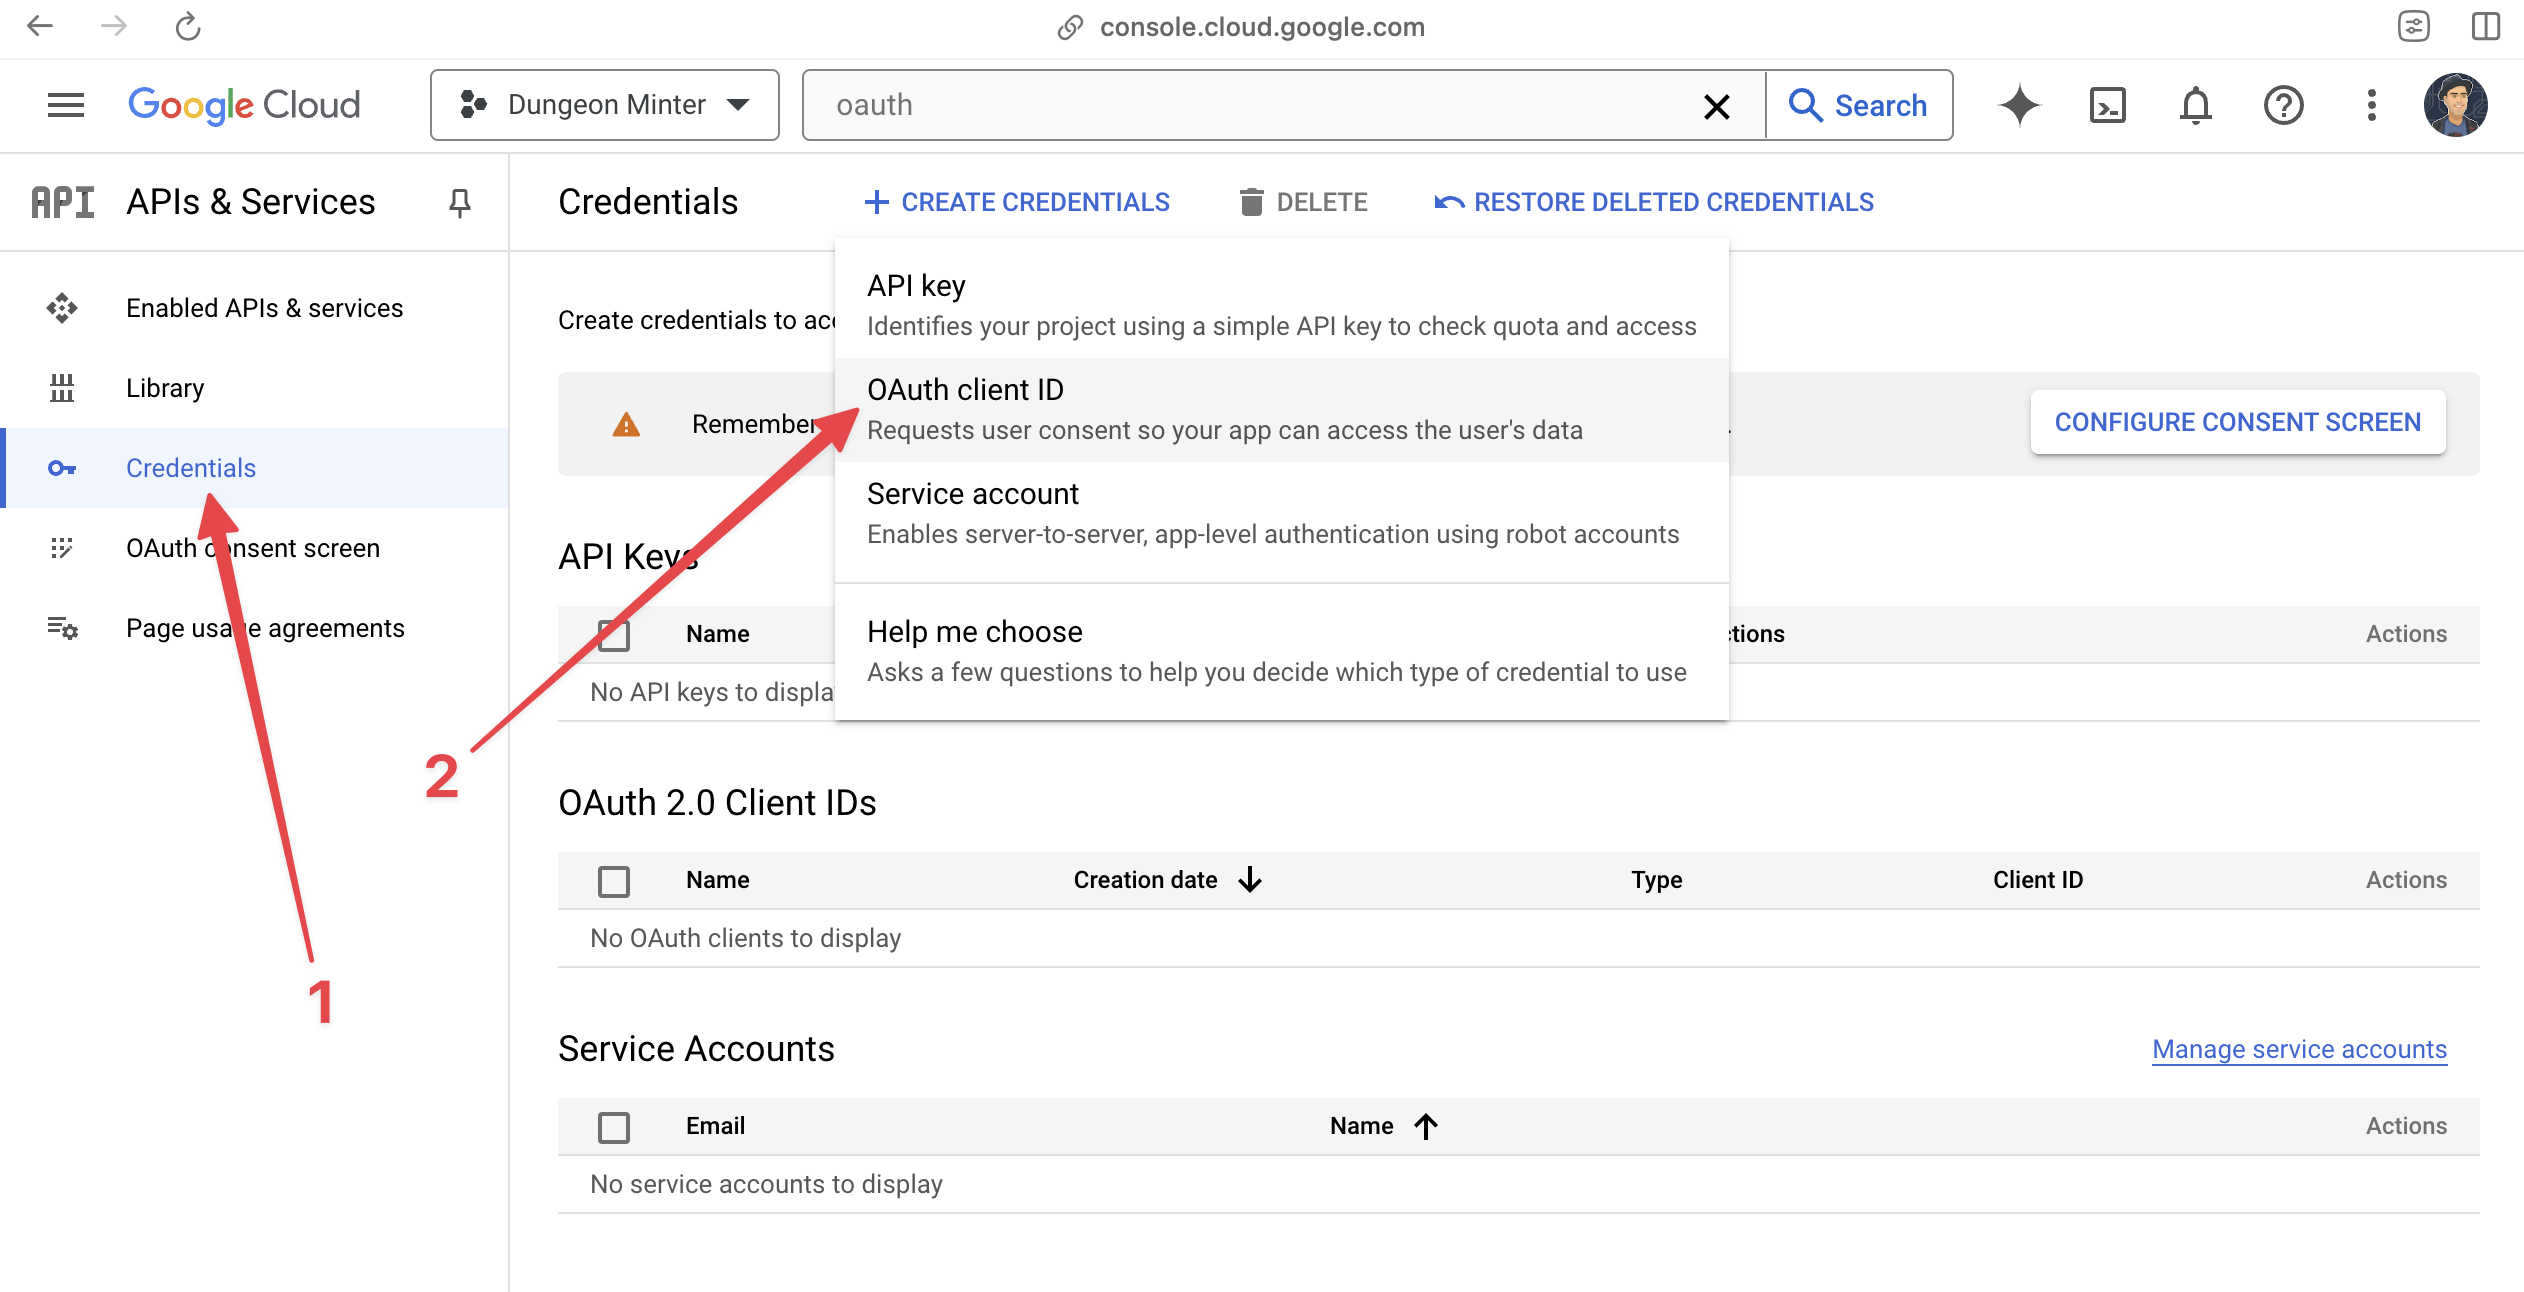
To start with, access the [Google Developer Console](https://console.cloud.google.com/) and navigate to APIs & Services > Credentials. Once there, select Create Credentials > OAuth Client ID. If you haven't yet, you might have to also configure your OAuth Consent Screen to be able to move forward.
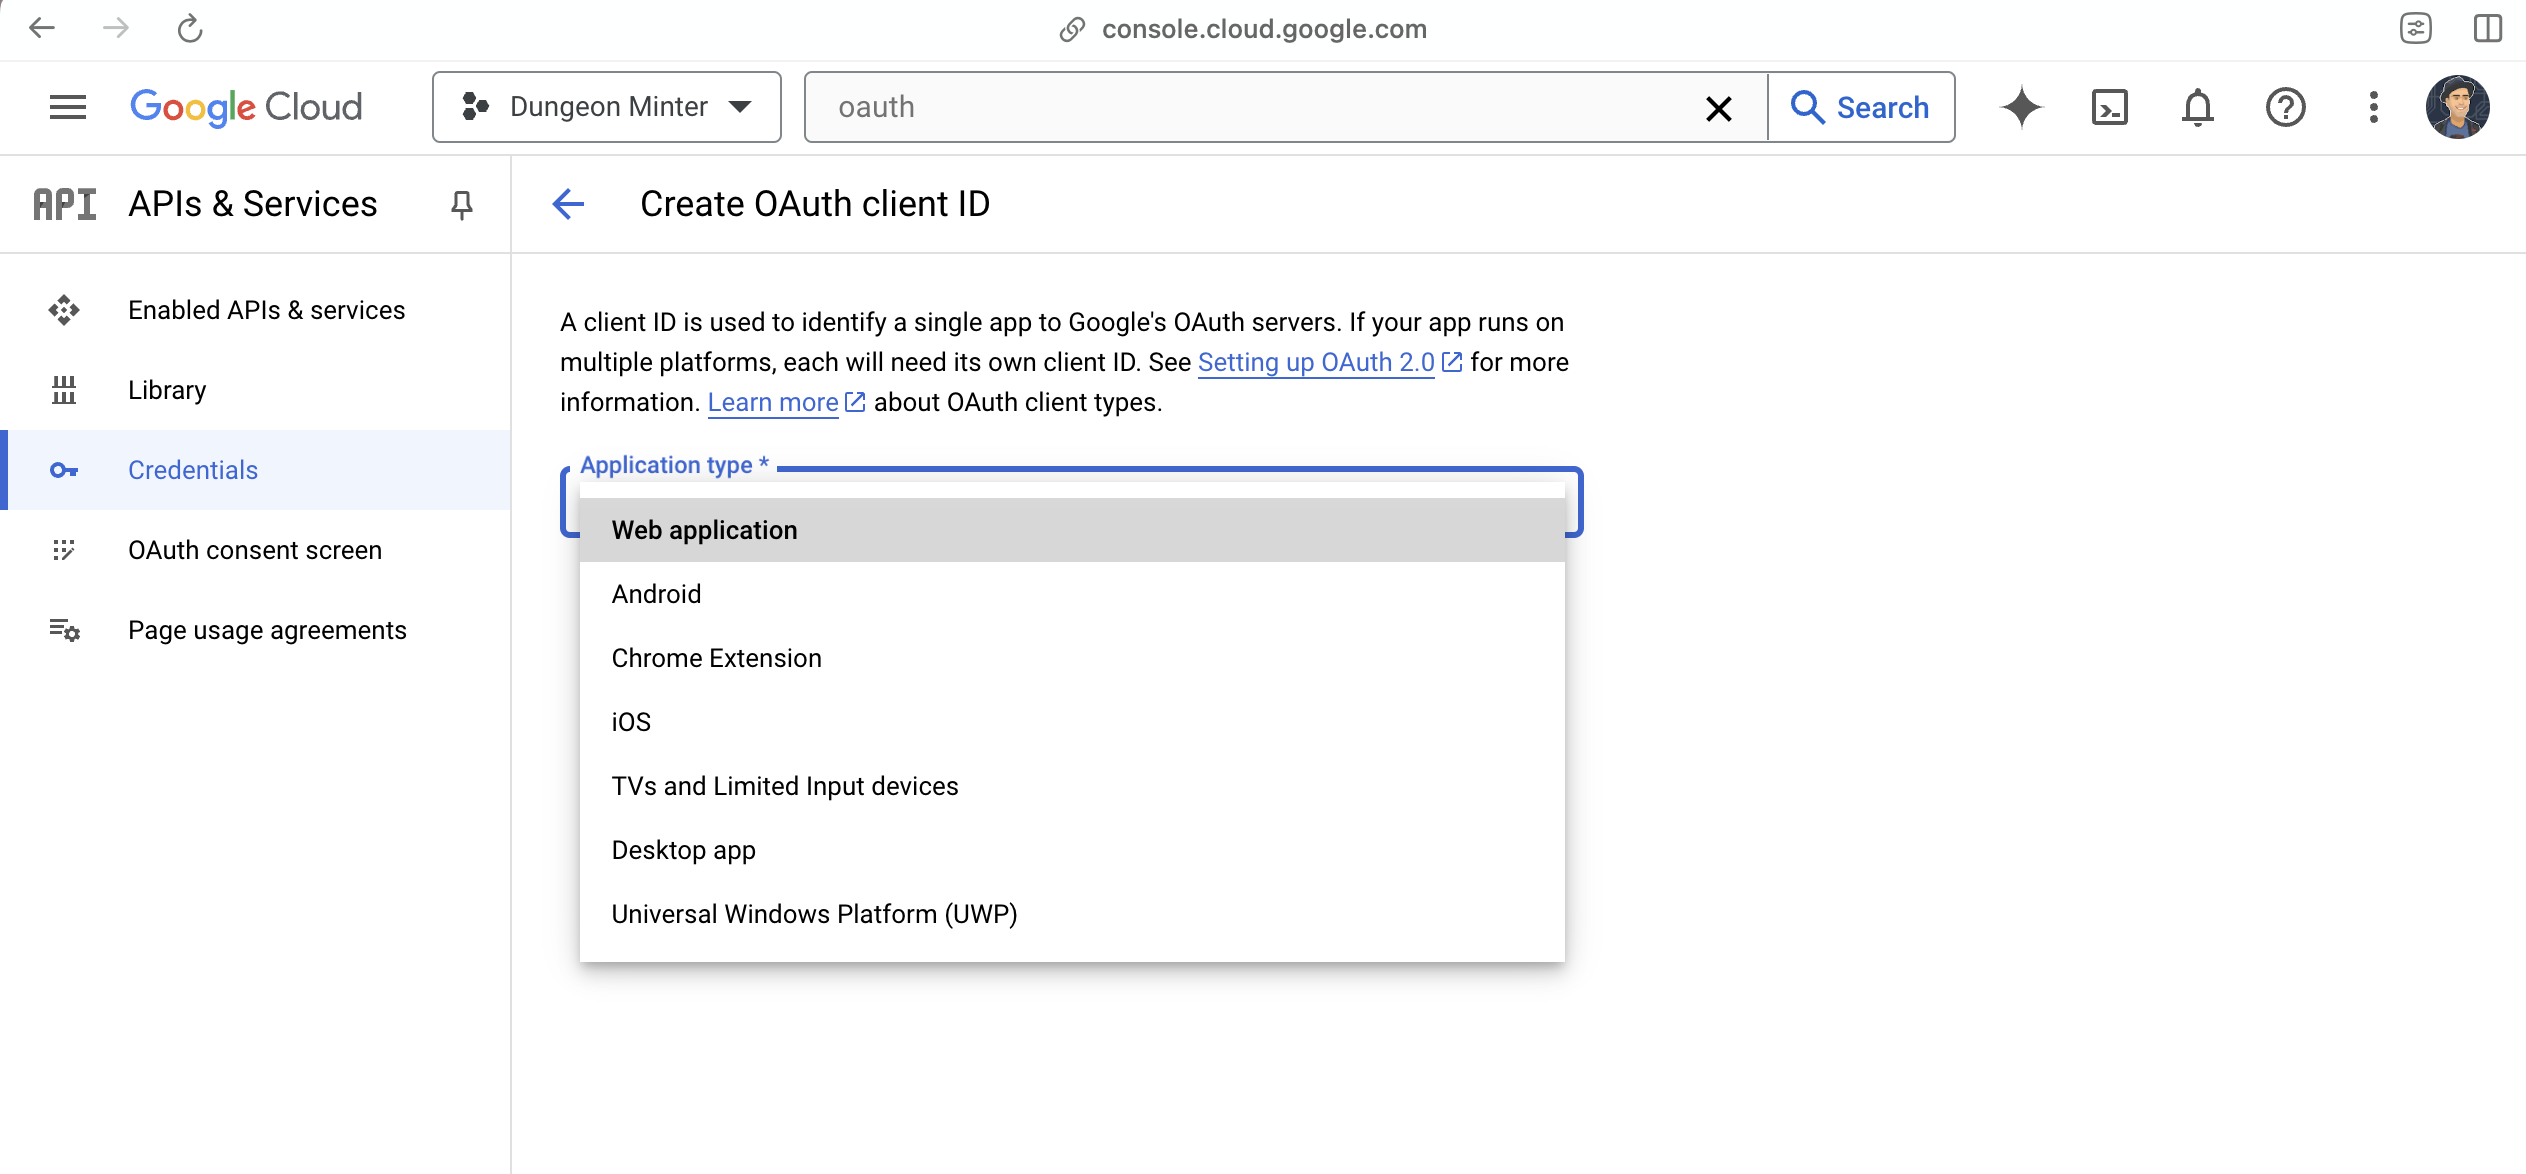
 Depending on your application type, pick the Web Application, iOS or Android option:
 Remaining steps will depend on the application type you are configuring for.
## Configure Web Application
If you are configuring your Client ID for a web application, you must provide the following:
1. Application name
2. Authorized JavaScript origins: A list of domains that will be whitelisted for interacting with this Client ID.
3. Authorized redirect URIs: A list of redirect URIs that the user will be redirected to on successful authentication, Sequence SDKs will by default redirect to the same page that loads the SDK.
Remaining steps will depend on the application type you are configuring for.
## Configure Web Application
If you are configuring your Client ID for a web application, you must provide the following:
1. Application name
2. Authorized JavaScript origins: A list of domains that will be whitelisted for interacting with this Client ID.
3. Authorized redirect URIs: A list of redirect URIs that the user will be redirected to on successful authentication, Sequence SDKs will by default redirect to the same page that loads the SDK.
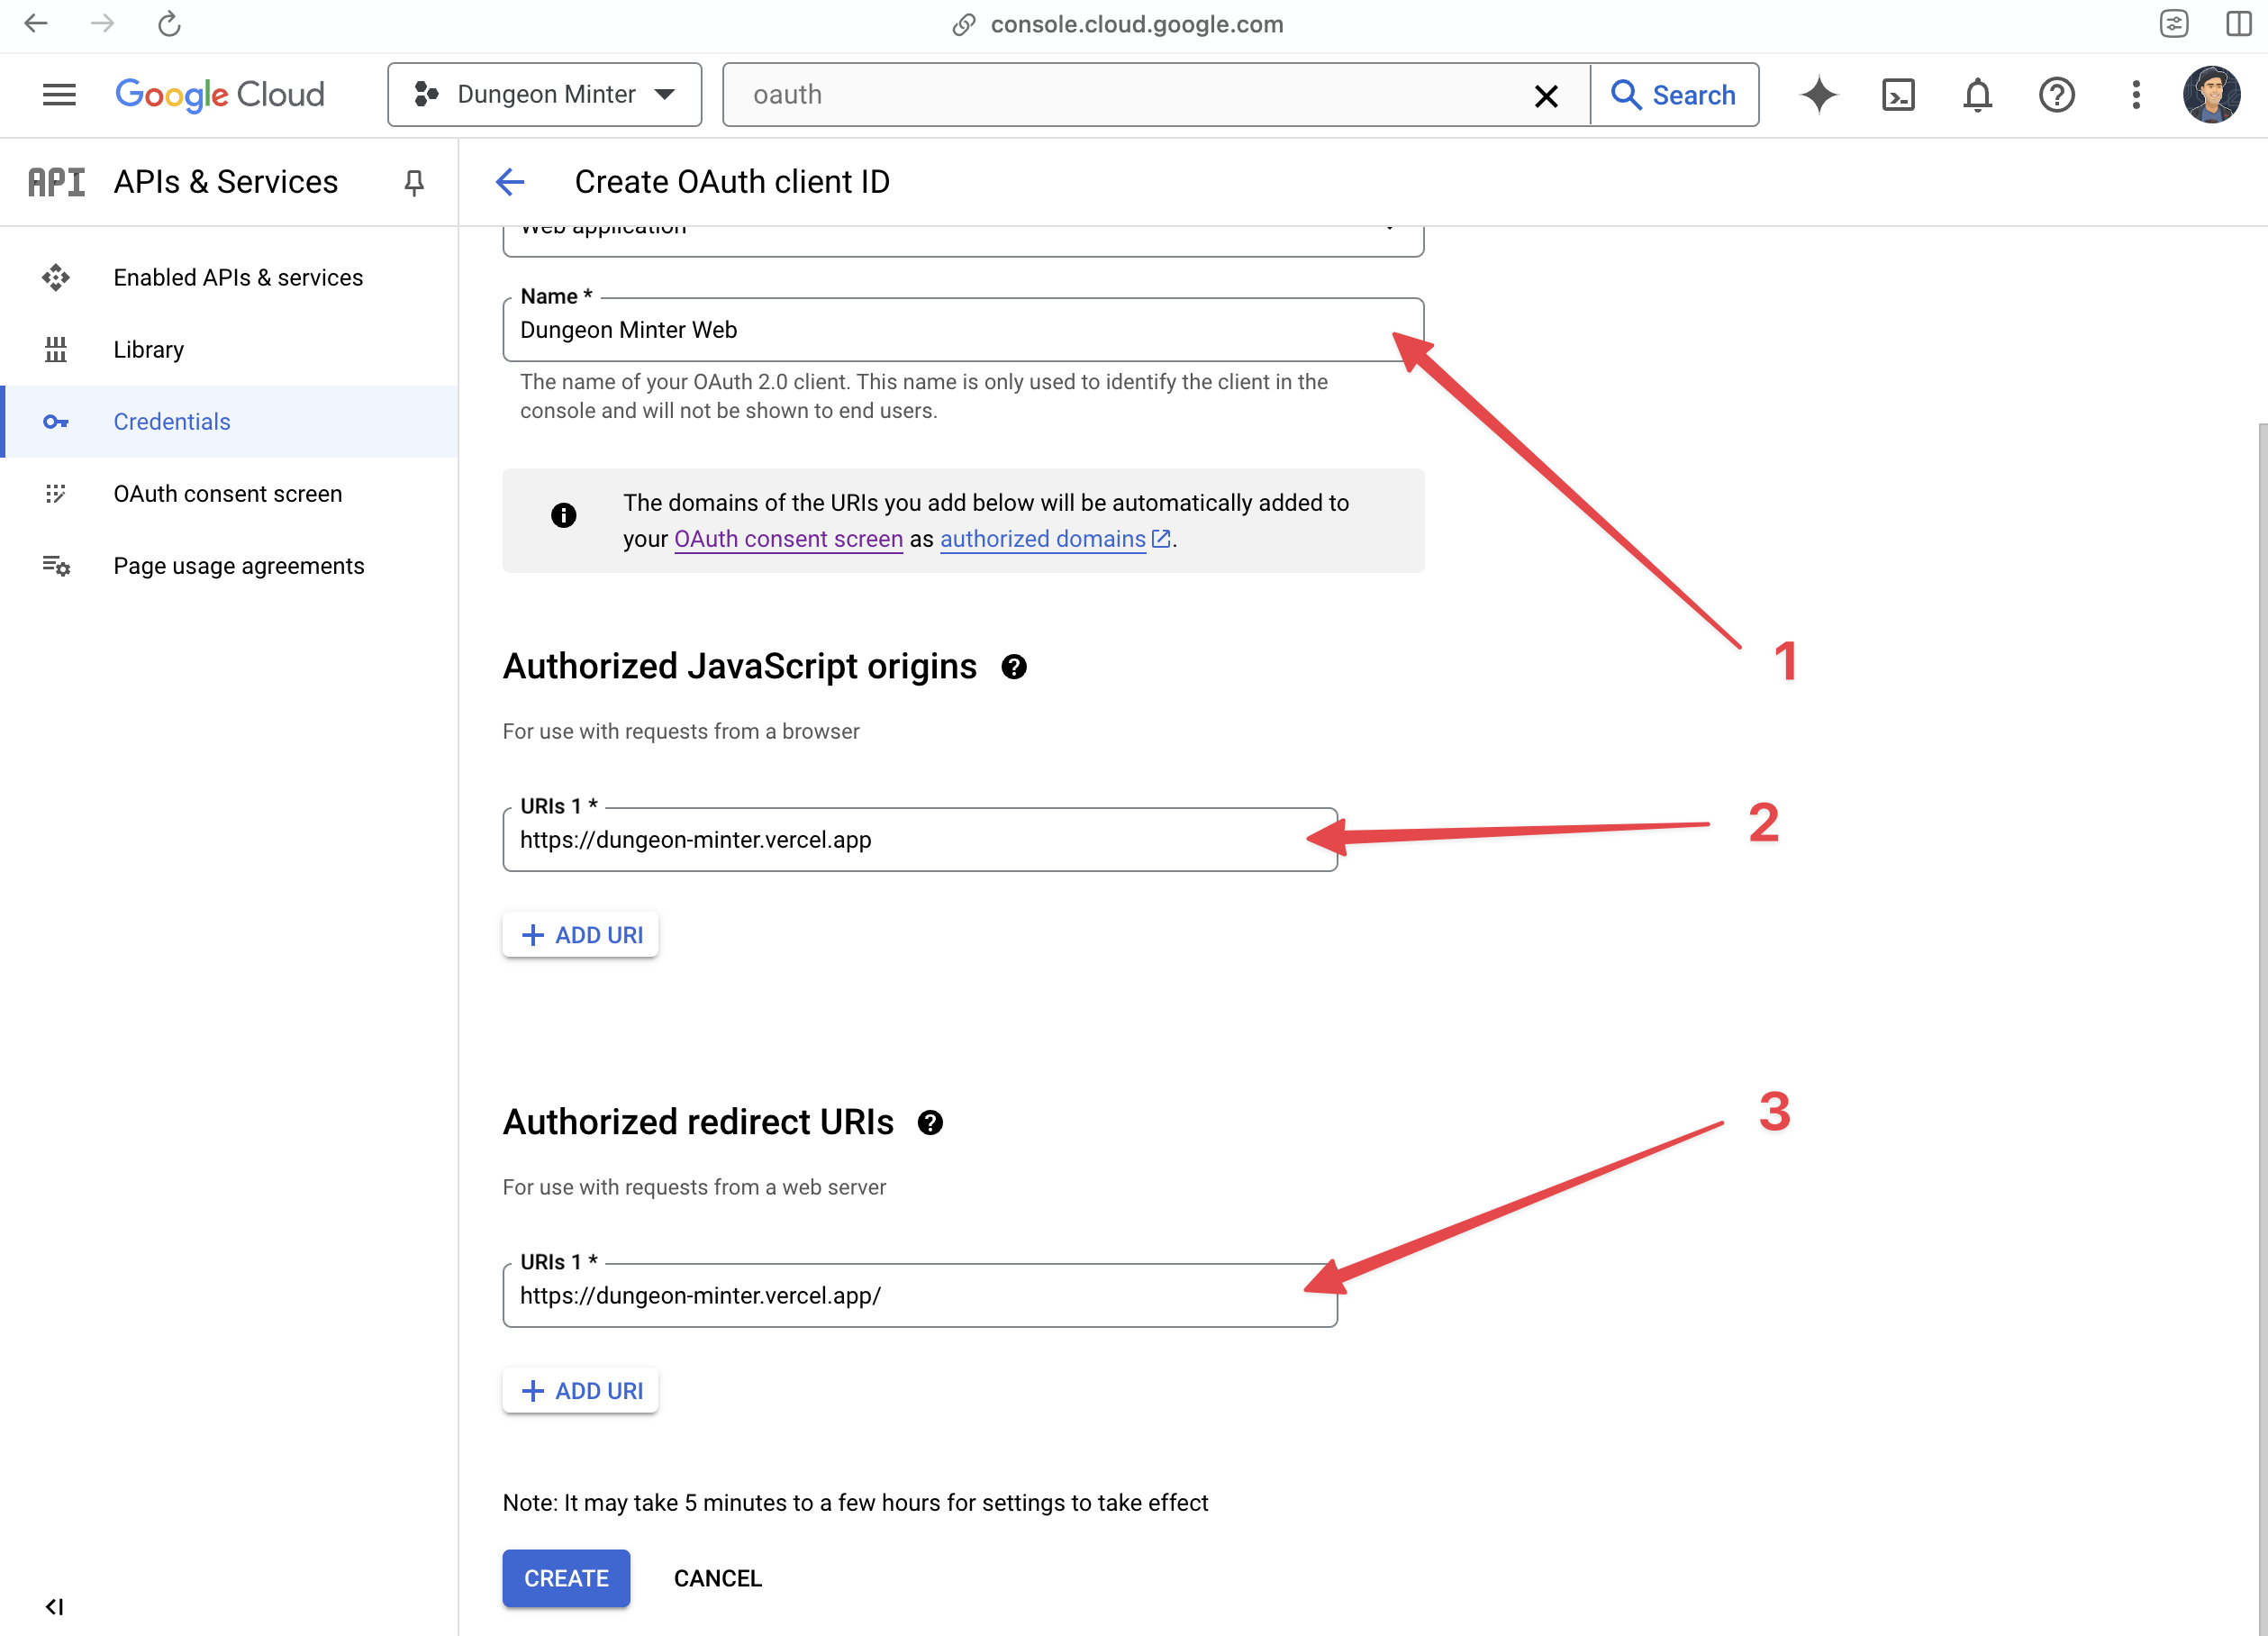 If you are adding a localhost address with a port (i.e. `localhost:4444`) to the list of authorized origins, you must also add `localhost` only without the port name for it to work during testing.
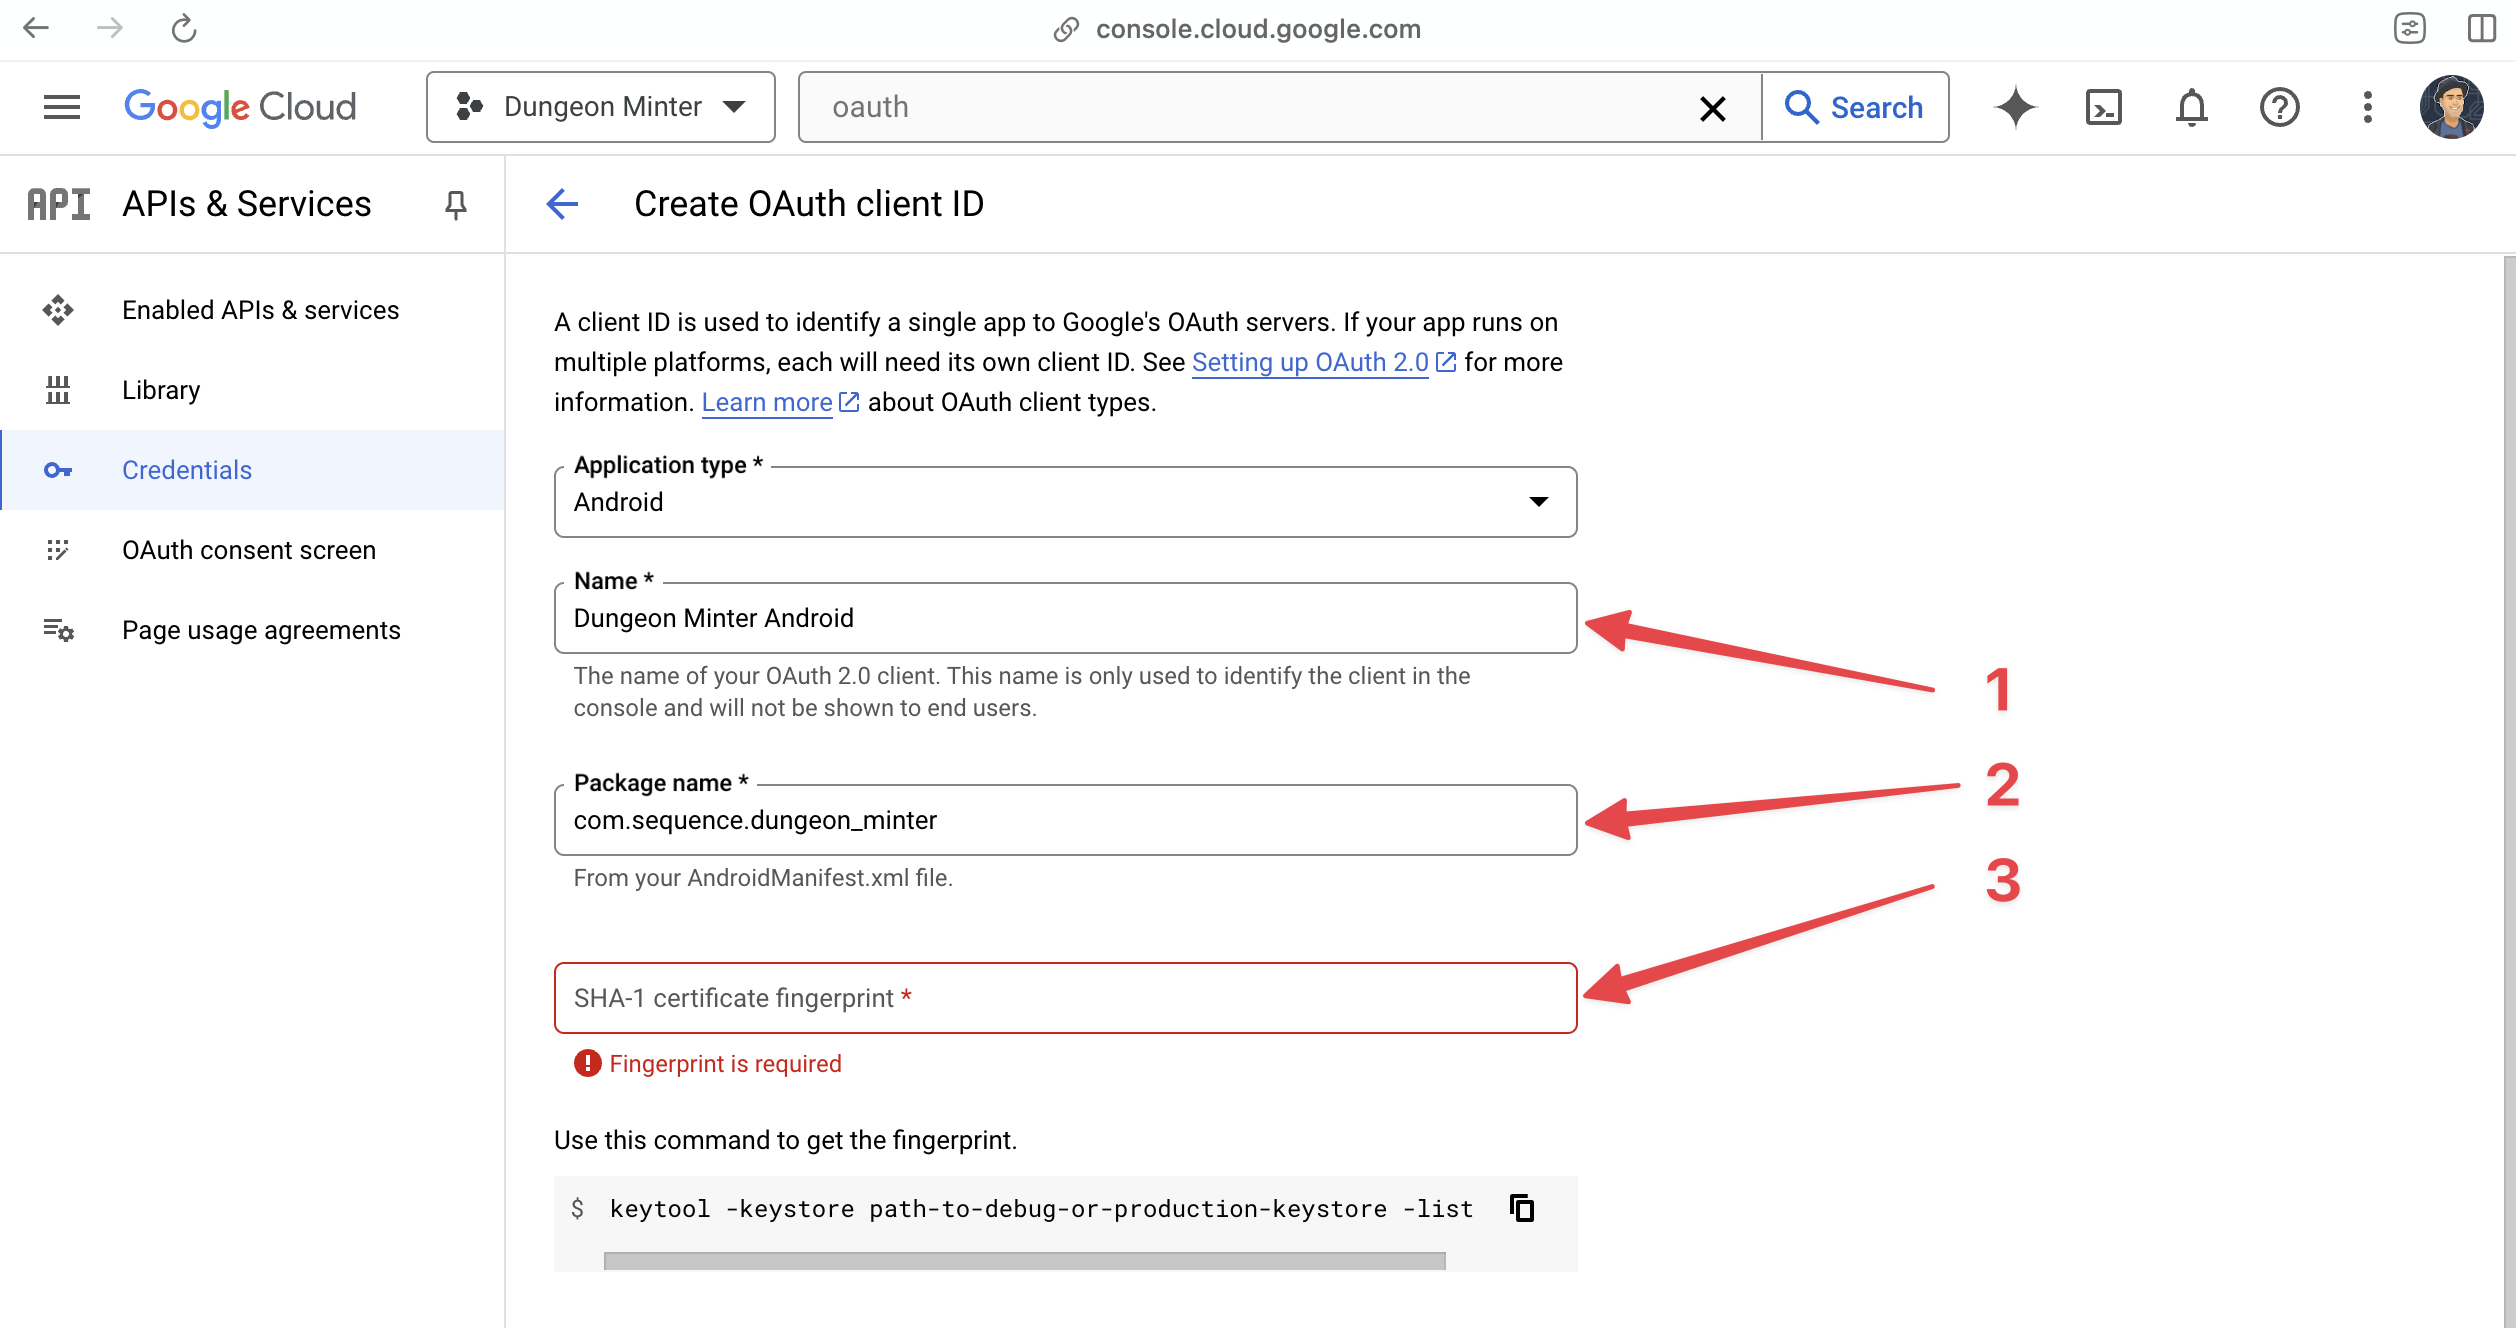
## Configure Android Application
If you are configuring your Client ID for an Android application, you must provide the following:
1. Application name
2. Package name: This is the unique application package name for your Android project.
3. SHA-1 Certificate Fingerprint: This is the SHA-1 fingerprint for your application bundle, you can follow the instructions on the screen to generate this using `keytool`.
If you are adding a localhost address with a port (i.e. `localhost:4444`) to the list of authorized origins, you must also add `localhost` only without the port name for it to work during testing.
## Configure Android Application
If you are configuring your Client ID for an Android application, you must provide the following:
1. Application name
2. Package name: This is the unique application package name for your Android project.
3. SHA-1 Certificate Fingerprint: This is the SHA-1 fingerprint for your application bundle, you can follow the instructions on the screen to generate this using `keytool`.
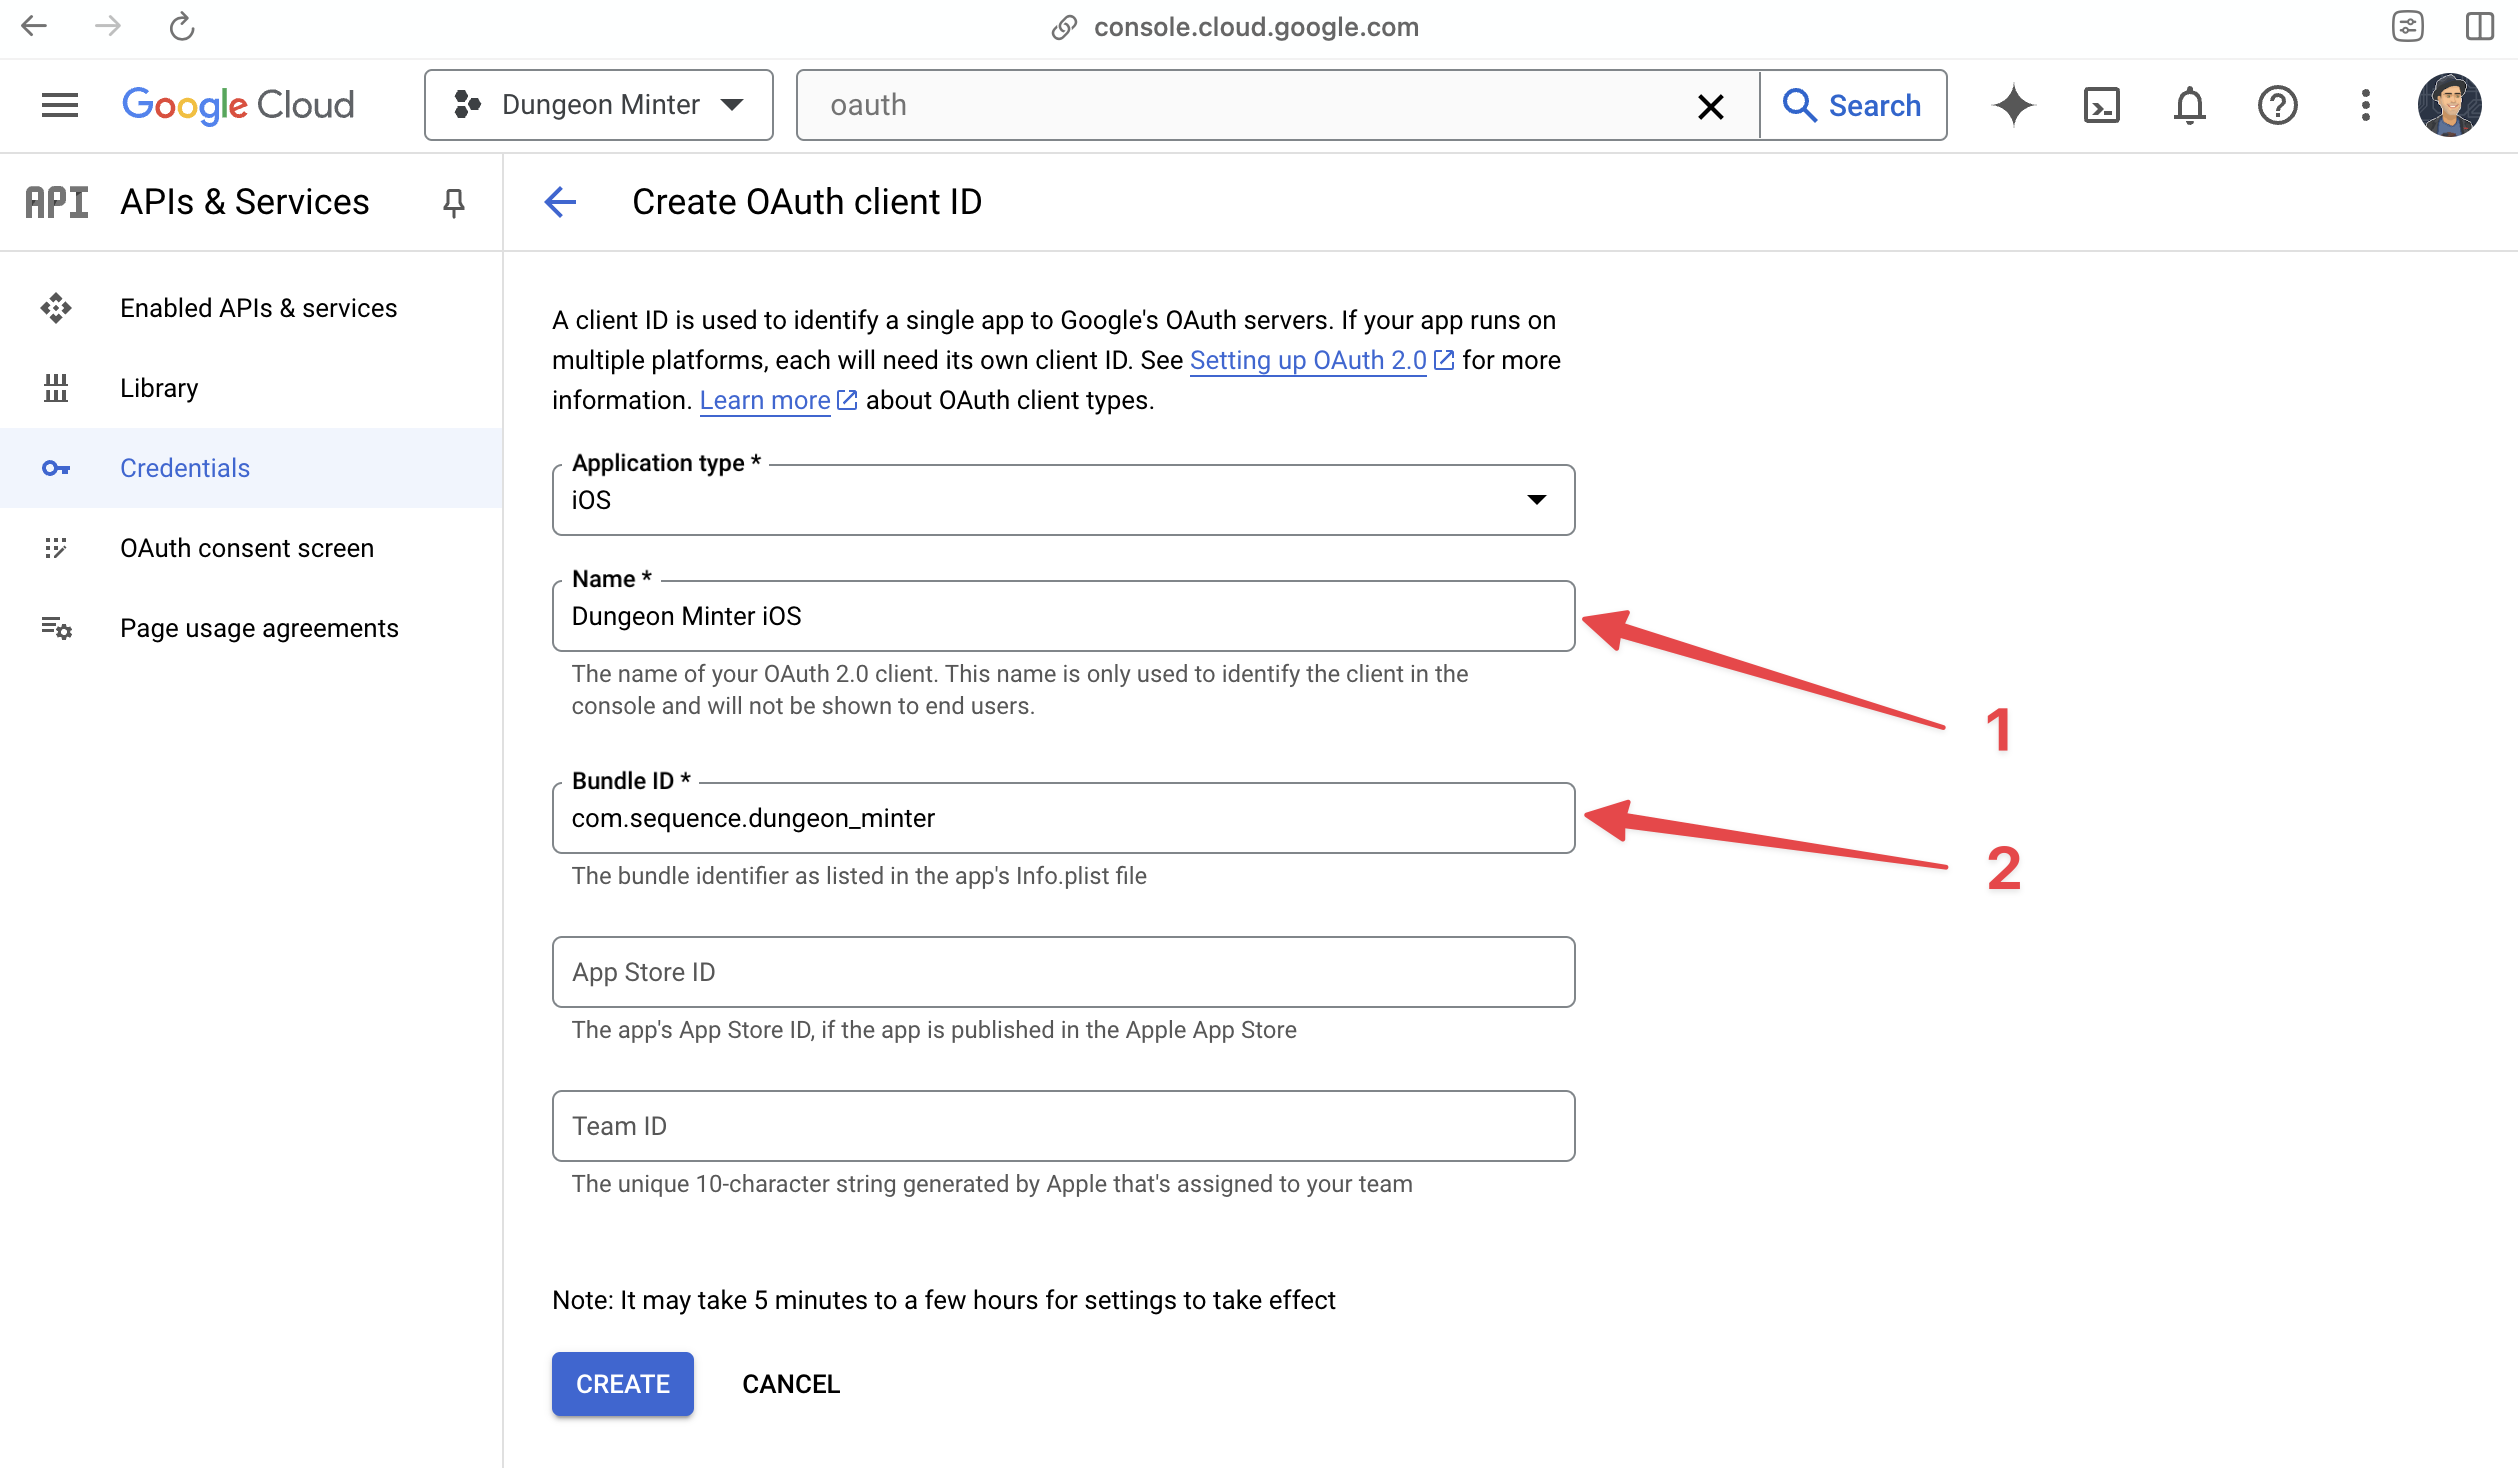
 ## Configure iOS Application
If you are configuring your Client ID for an iOS application, you must provide the following:
1. Application name
2. Bundle ID: This is the unique bundle identifier for your iOS project.
## Configure iOS Application
If you are configuring your Client ID for an iOS application, you must provide the following:
1. Application name
2. Bundle ID: This is the unique bundle identifier for your iOS project.
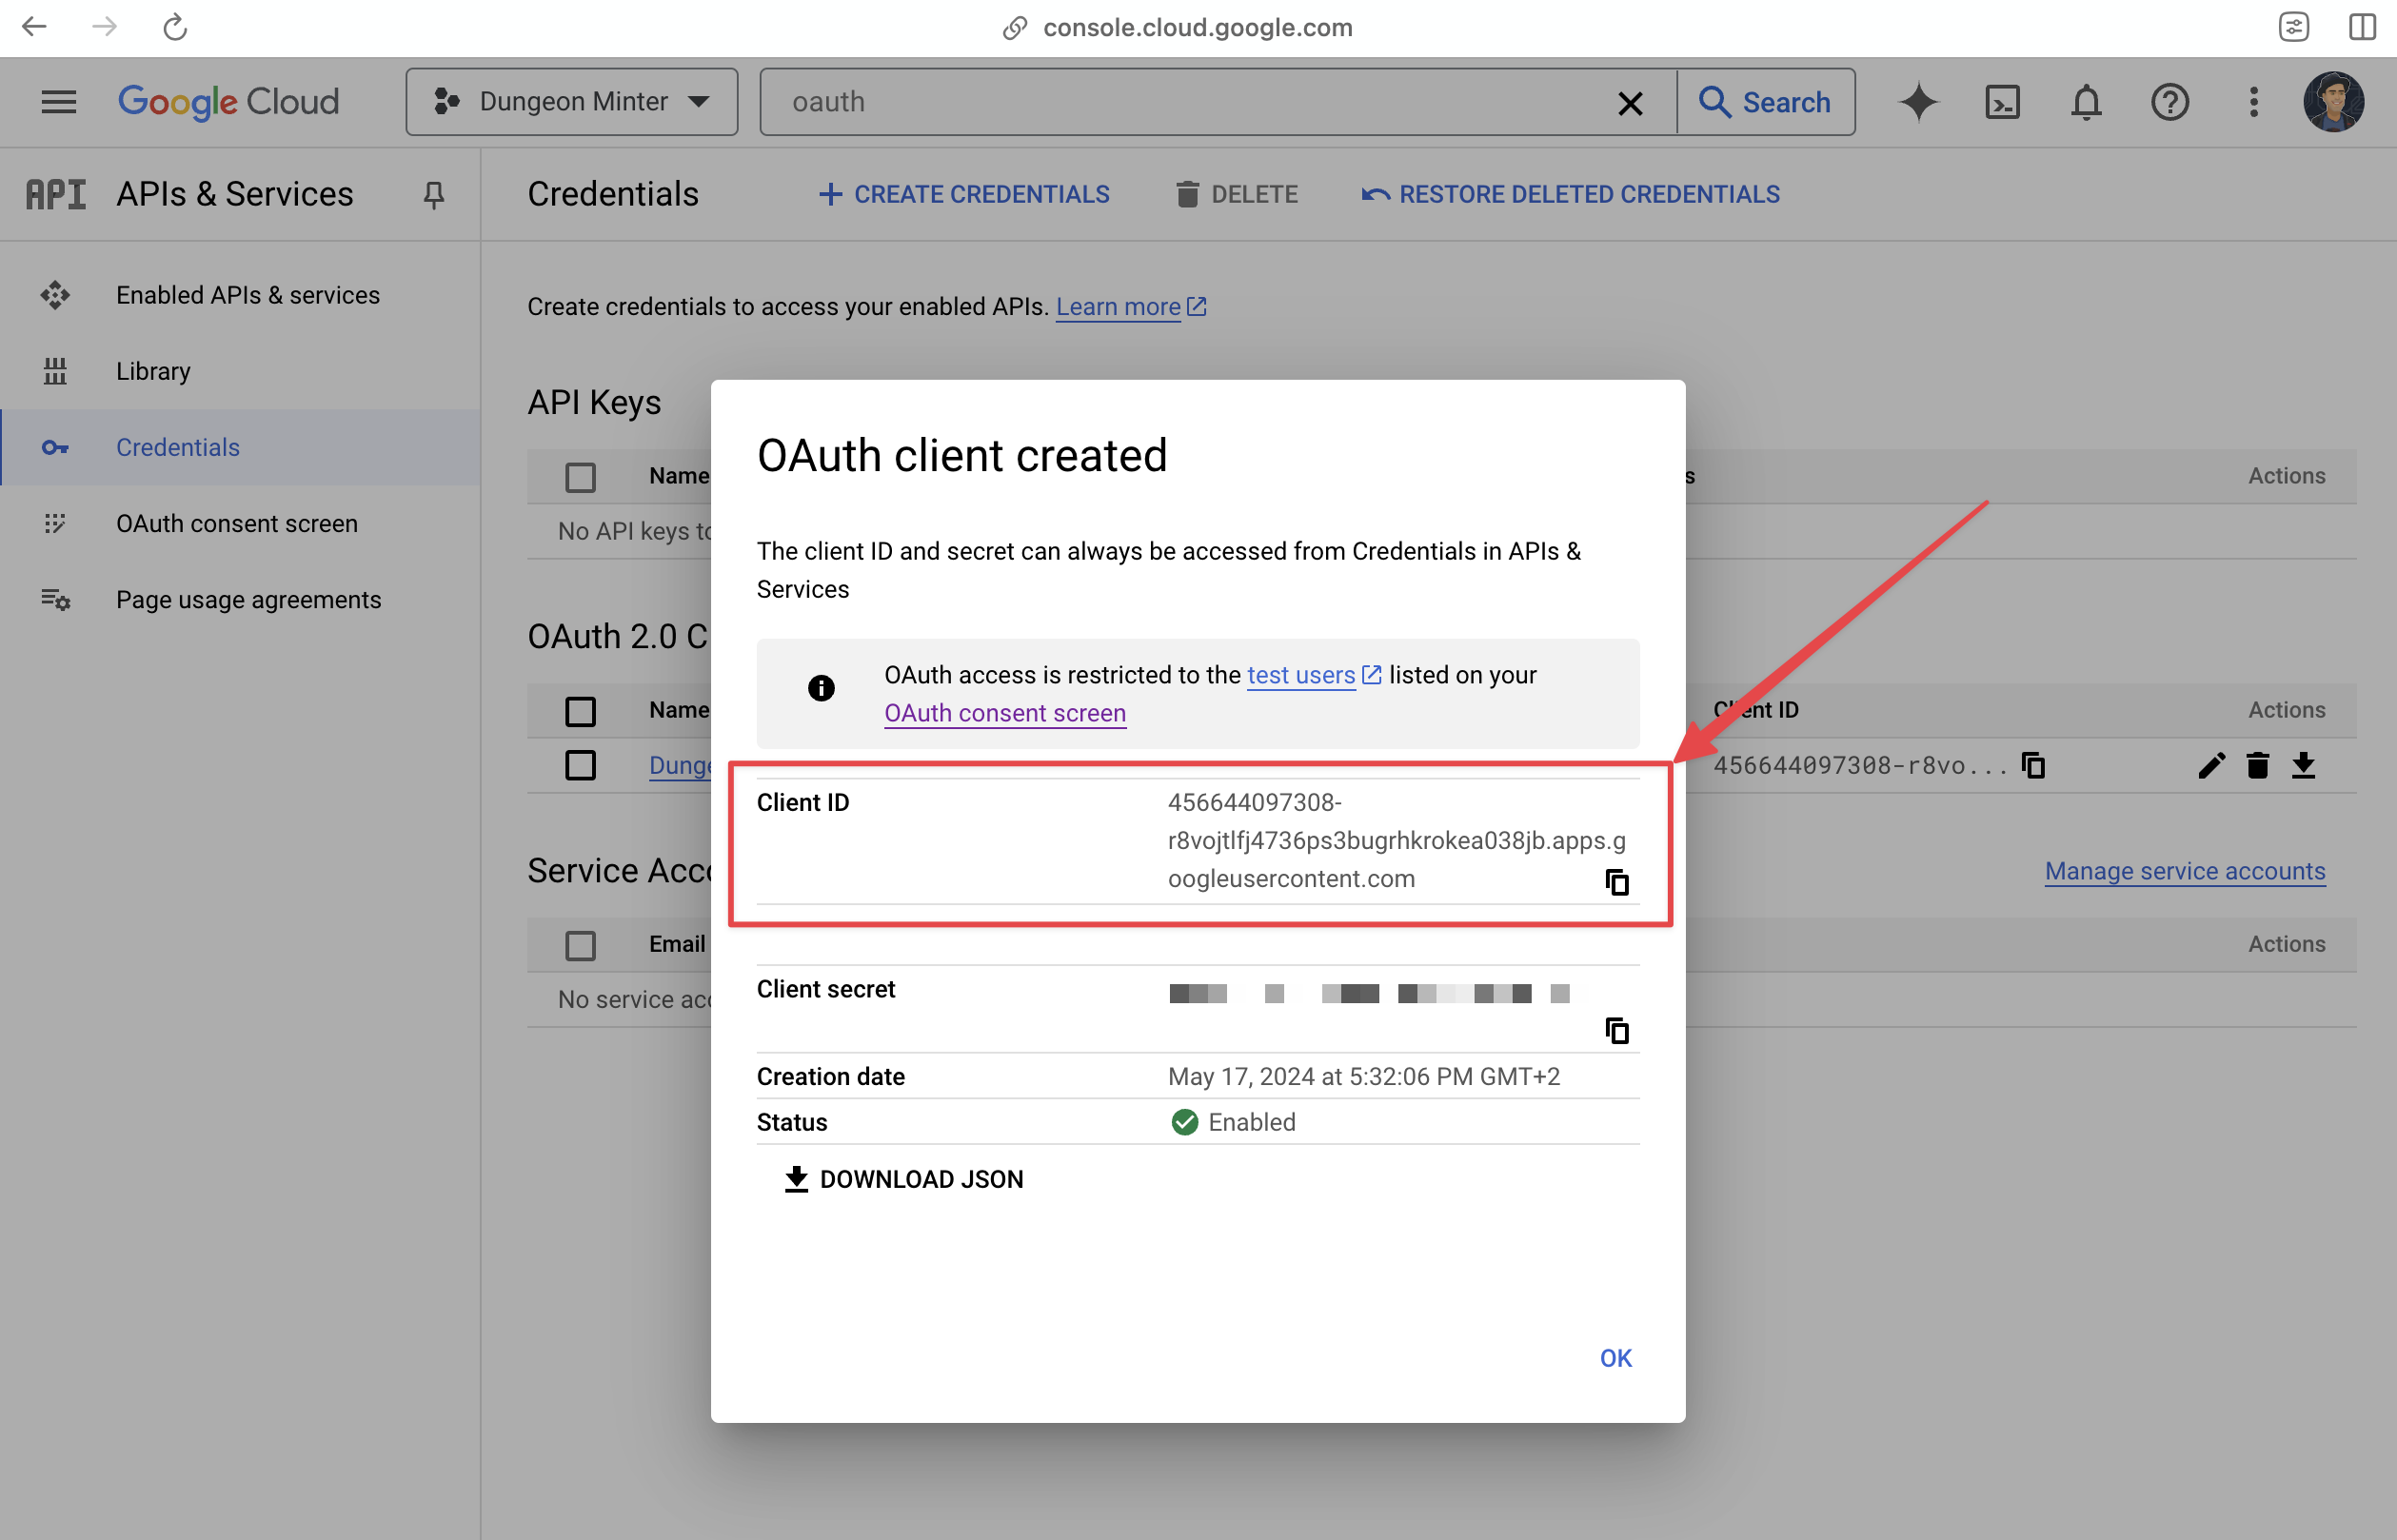
 ## Get Your Client ID
Once you create your application, you will be presented with a Client ID. Copy it and use it as your login provider Client ID in Sequence Builder.
## Get Your Client ID
Once you create your application, you will be presented with a Client ID. Copy it and use it as your login provider Client ID in Sequence Builder.