

Settings in Sequence Builder
Settings Options
There are various actions available for your project in Settings of Sequence Builder.
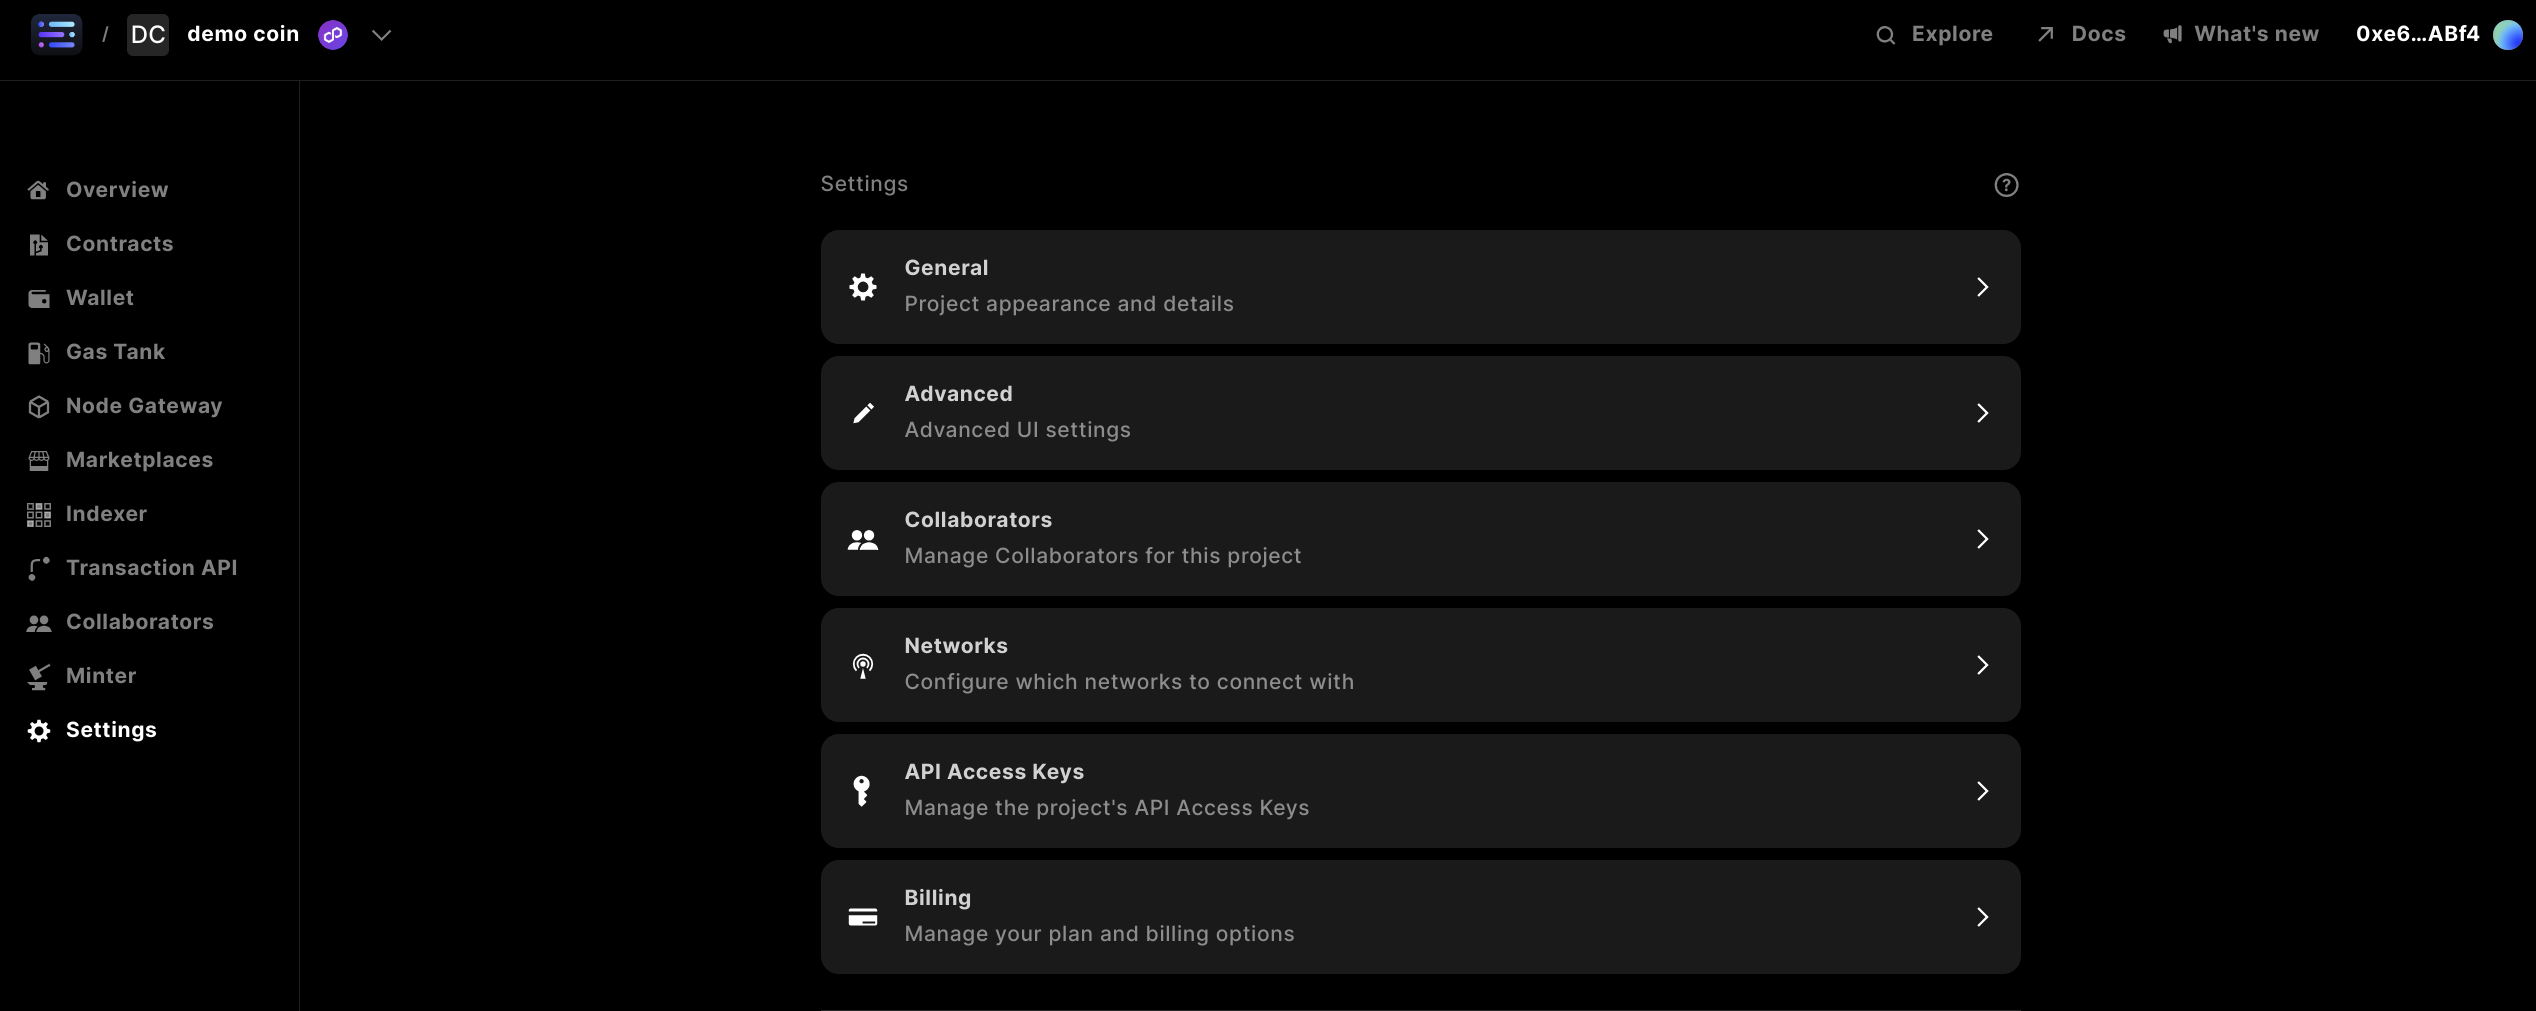
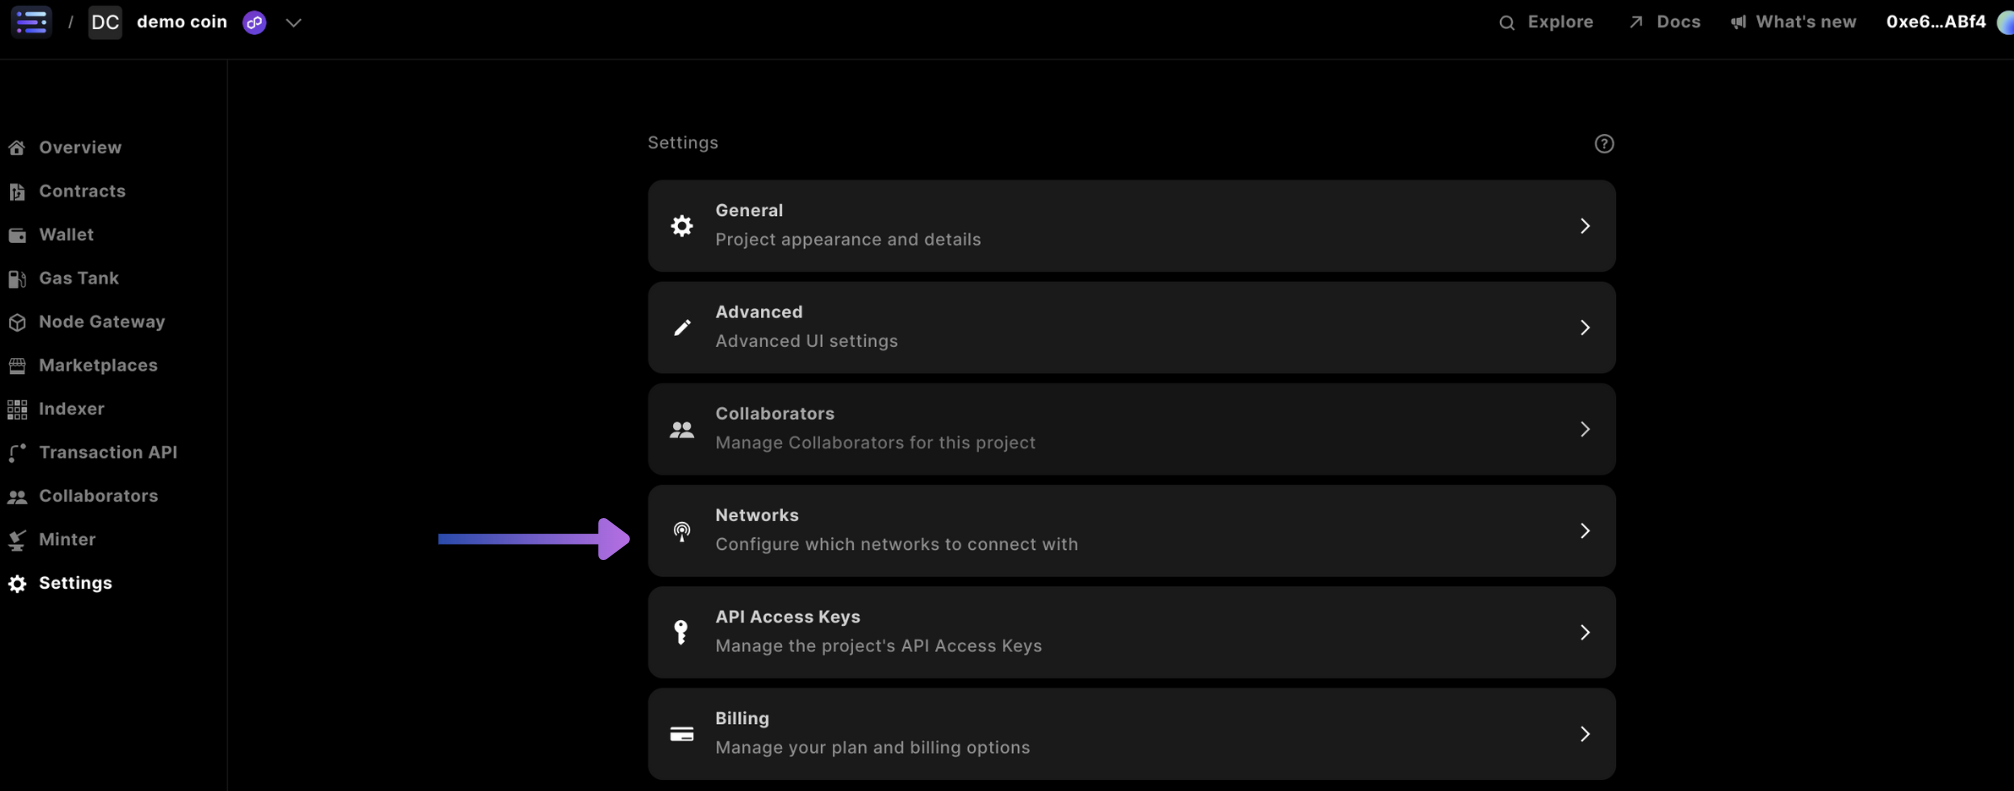
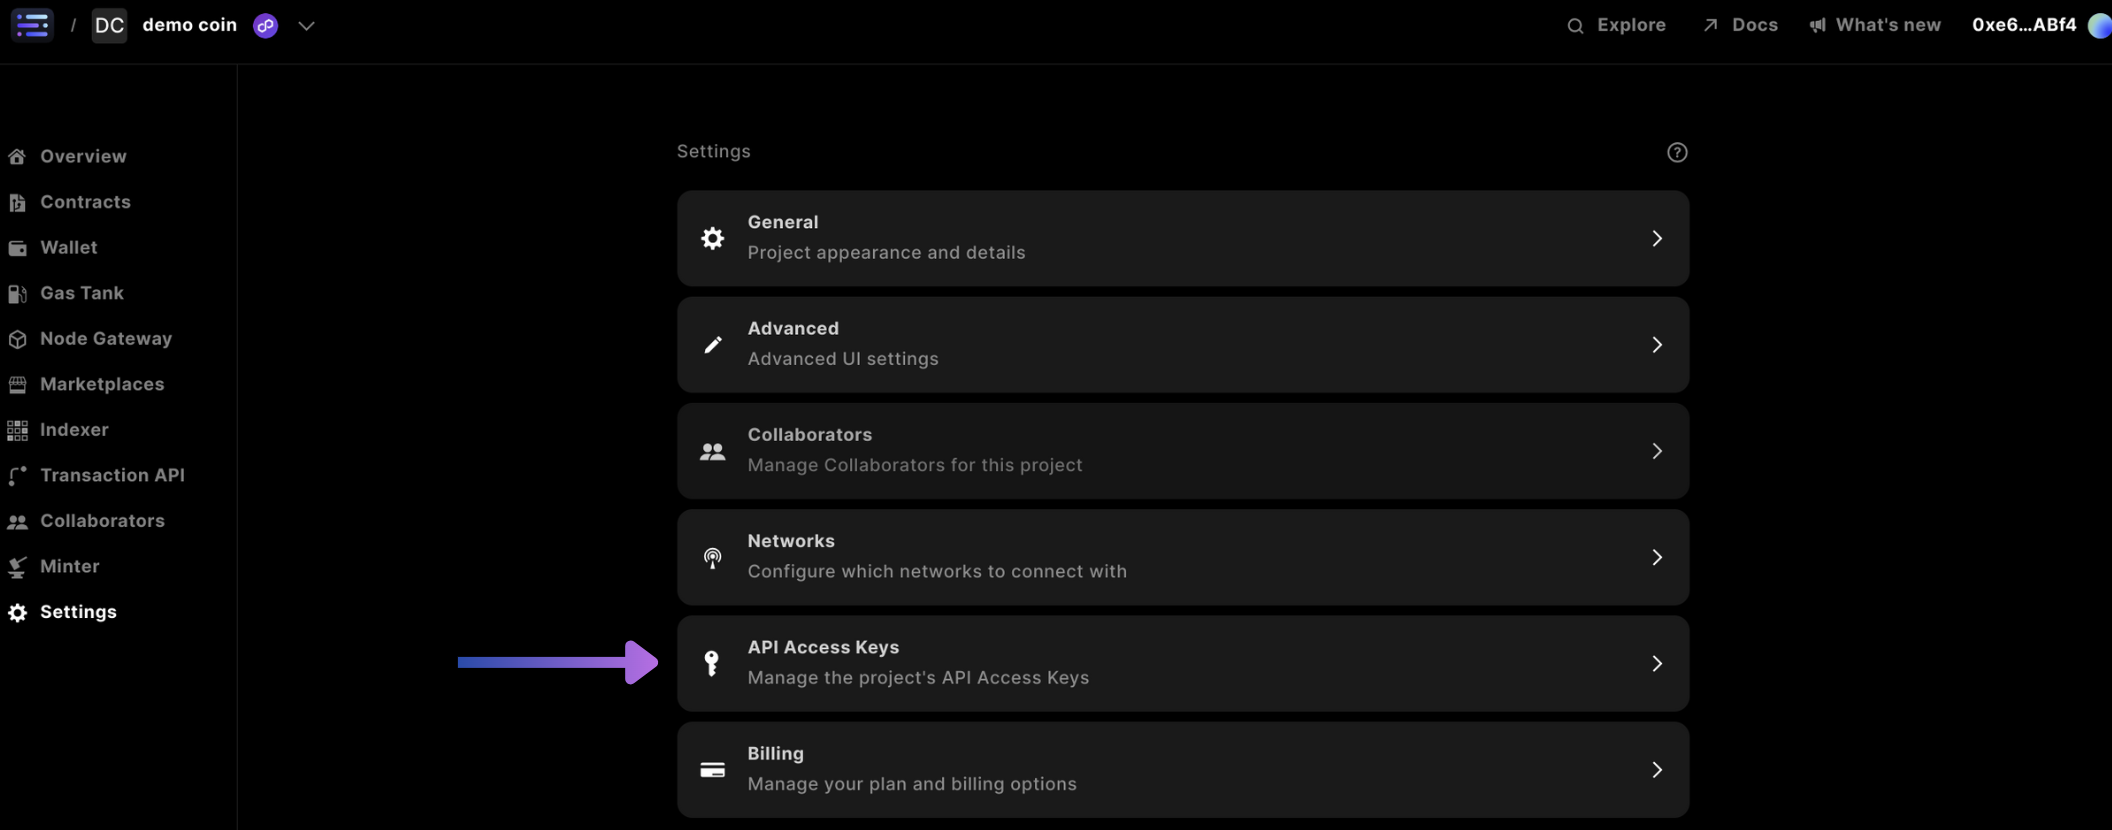
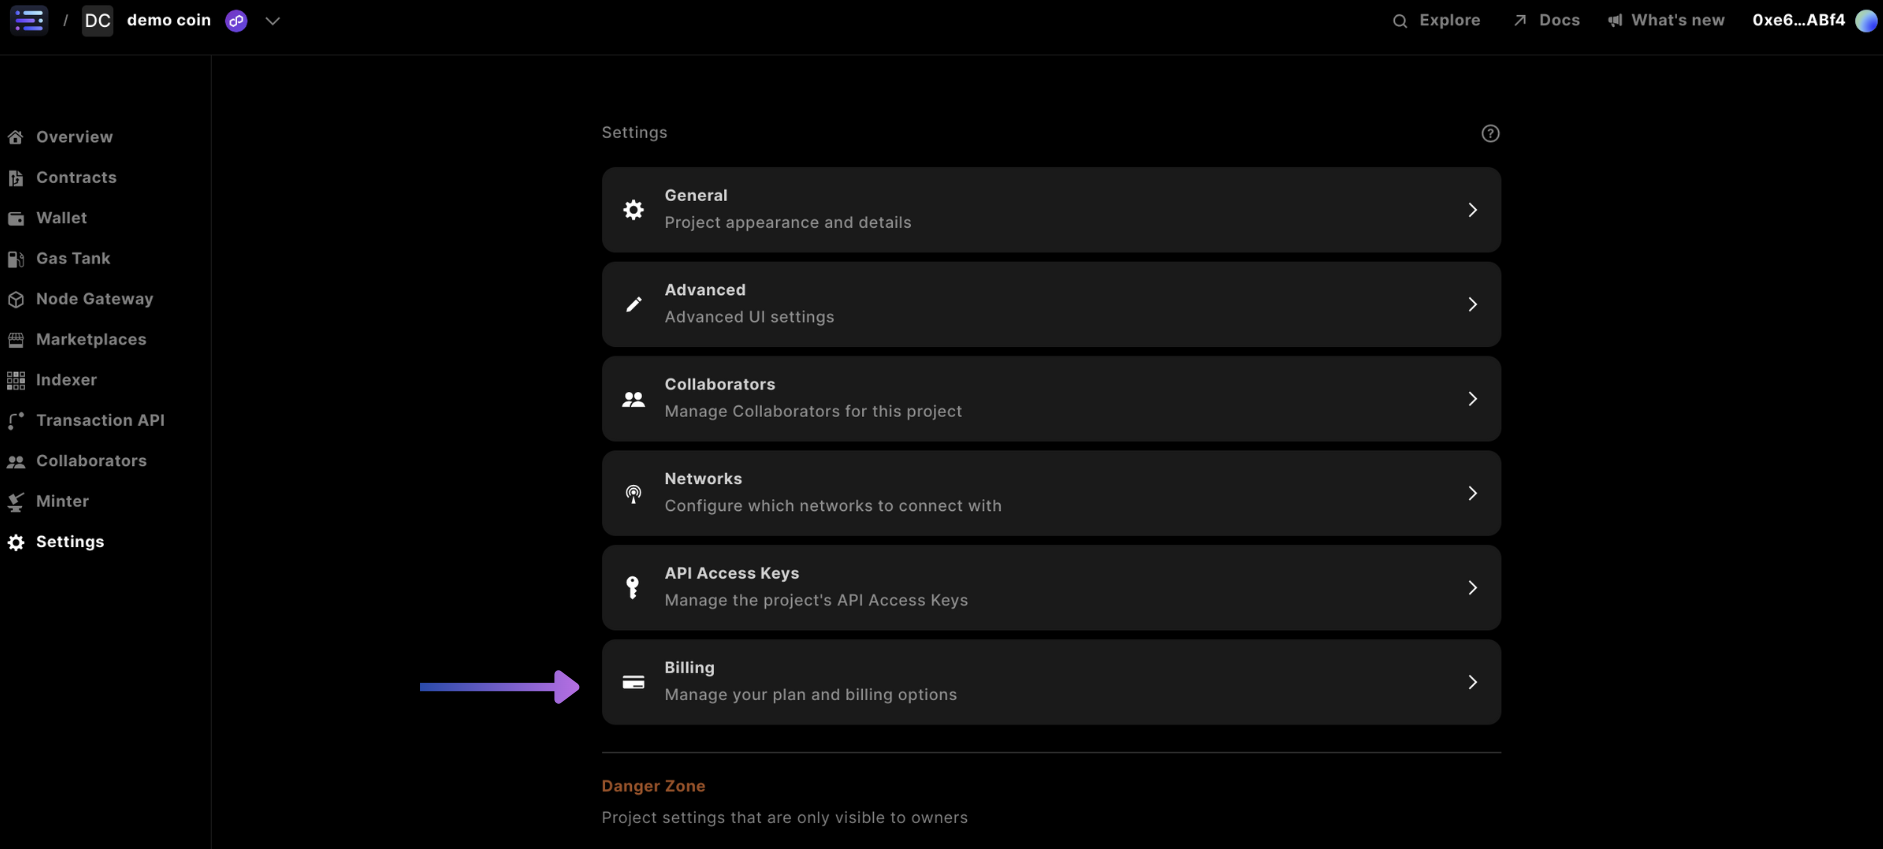
The Settings section in Sequence Builder is categorized into six sections:
- General: Update your project name or avatar
- Advanced: Update your theme
- Collaborators: Add collaborators or create invite links
- Networks: Update the networks your project is using
- API Access Keys: Copy keys and configure existing keys
- Billing: Update your project plan or set overage limits
The final action you can take in settings is to delete your project.
Settings are configured per project, so let's start by navigating to the settings of a specific project.
Getting to Settings in Builder
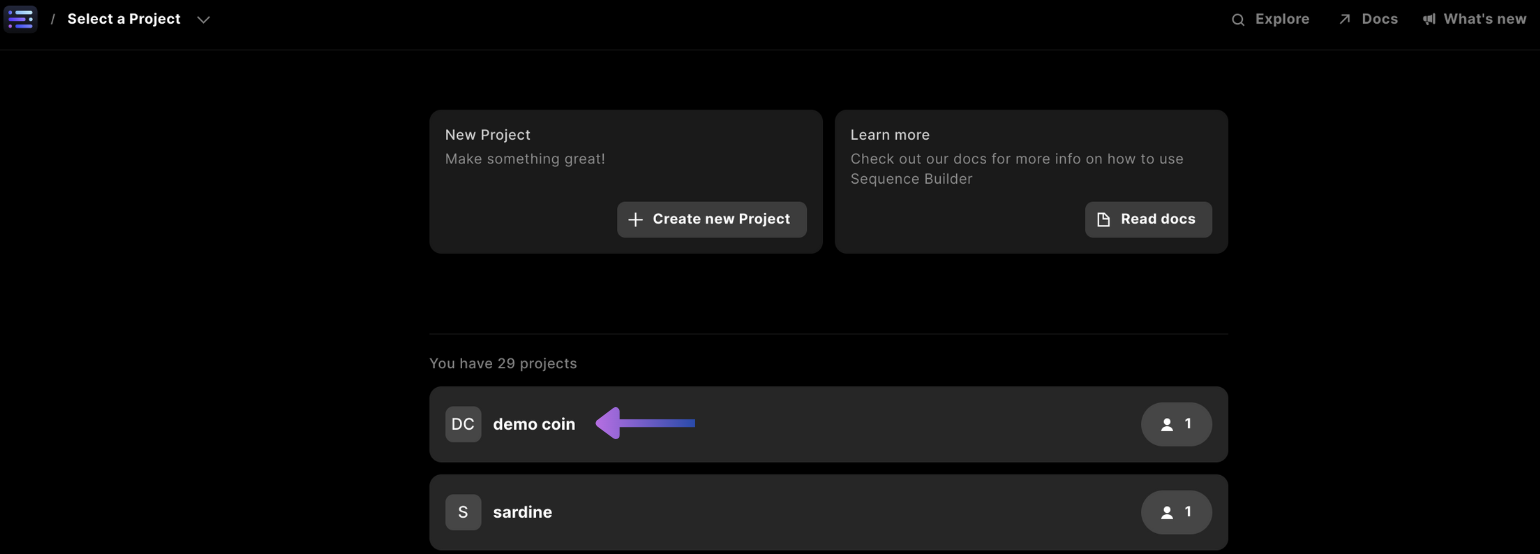
Select a Project
When you log into Sequence Builder, you will see a list of projects. If you haven't created a project yet, do so now.
Begin by selecting a project.
Go to Settings
Now that you are in your project dashboard, click on Settings on the left side of the screen.
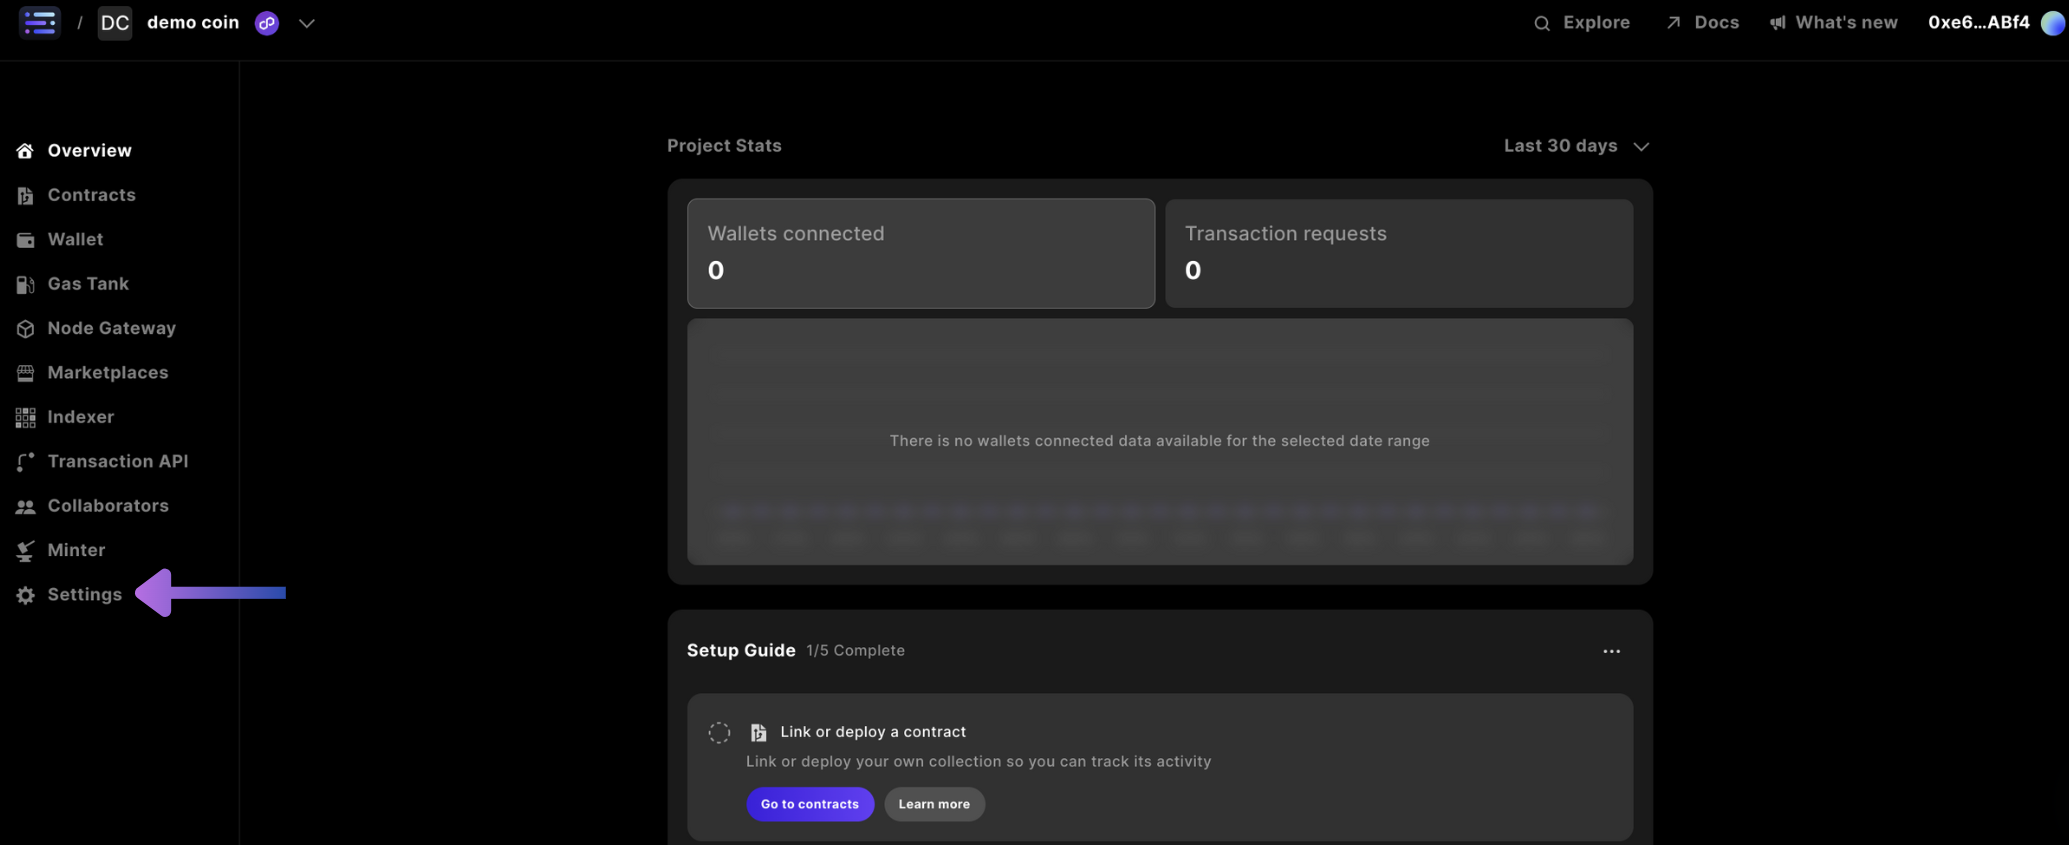
Within settings, you will find the six sections covered in this guide.
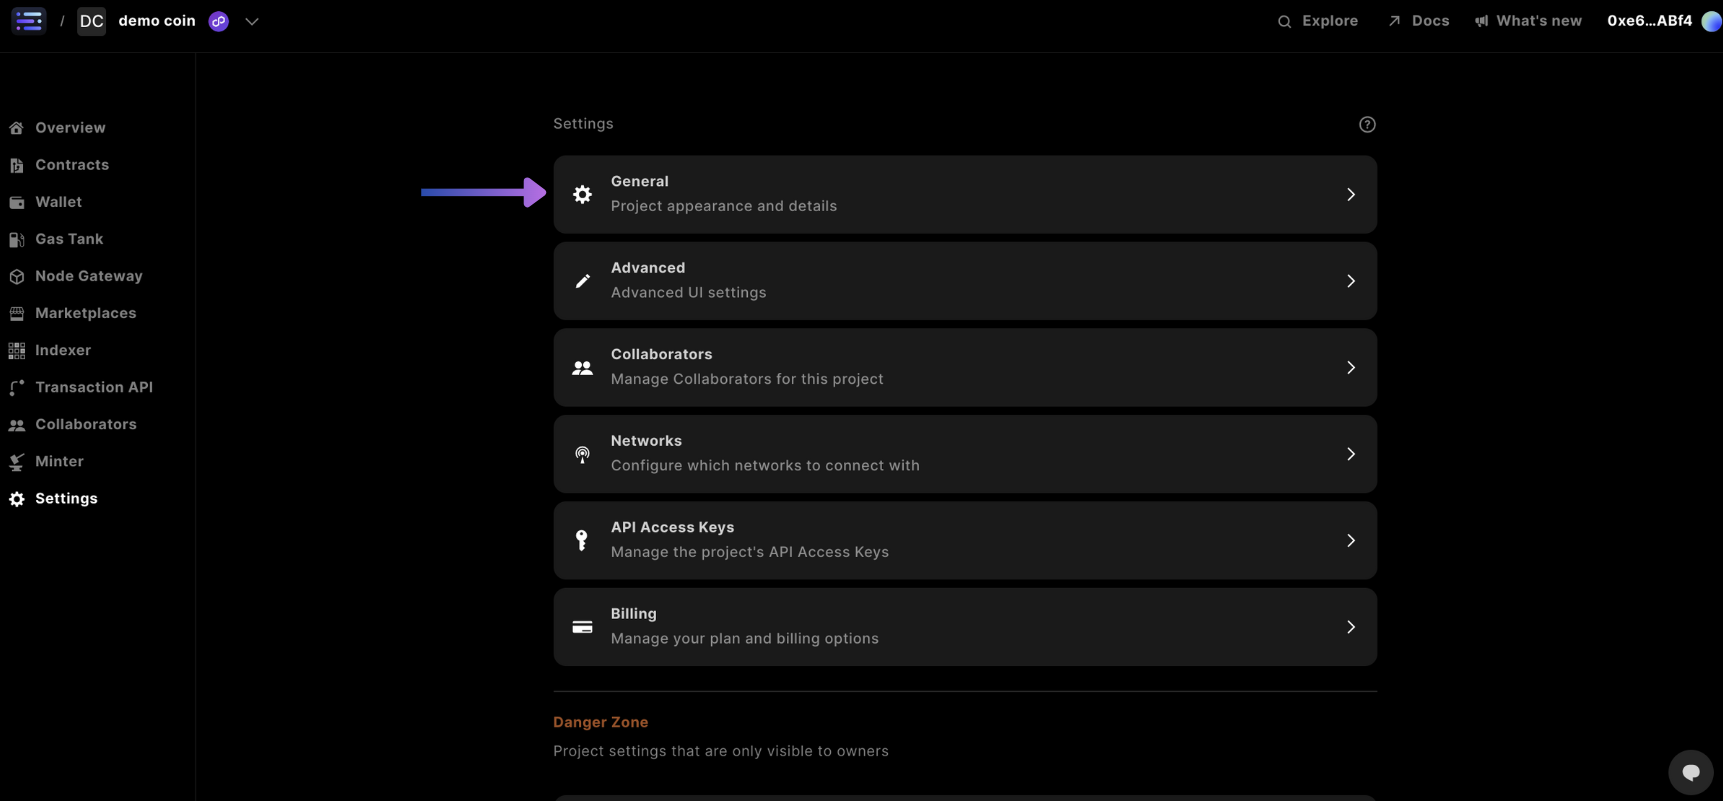
1. General Settings
Open your General settings.
In General settings, you will find a couple of options.
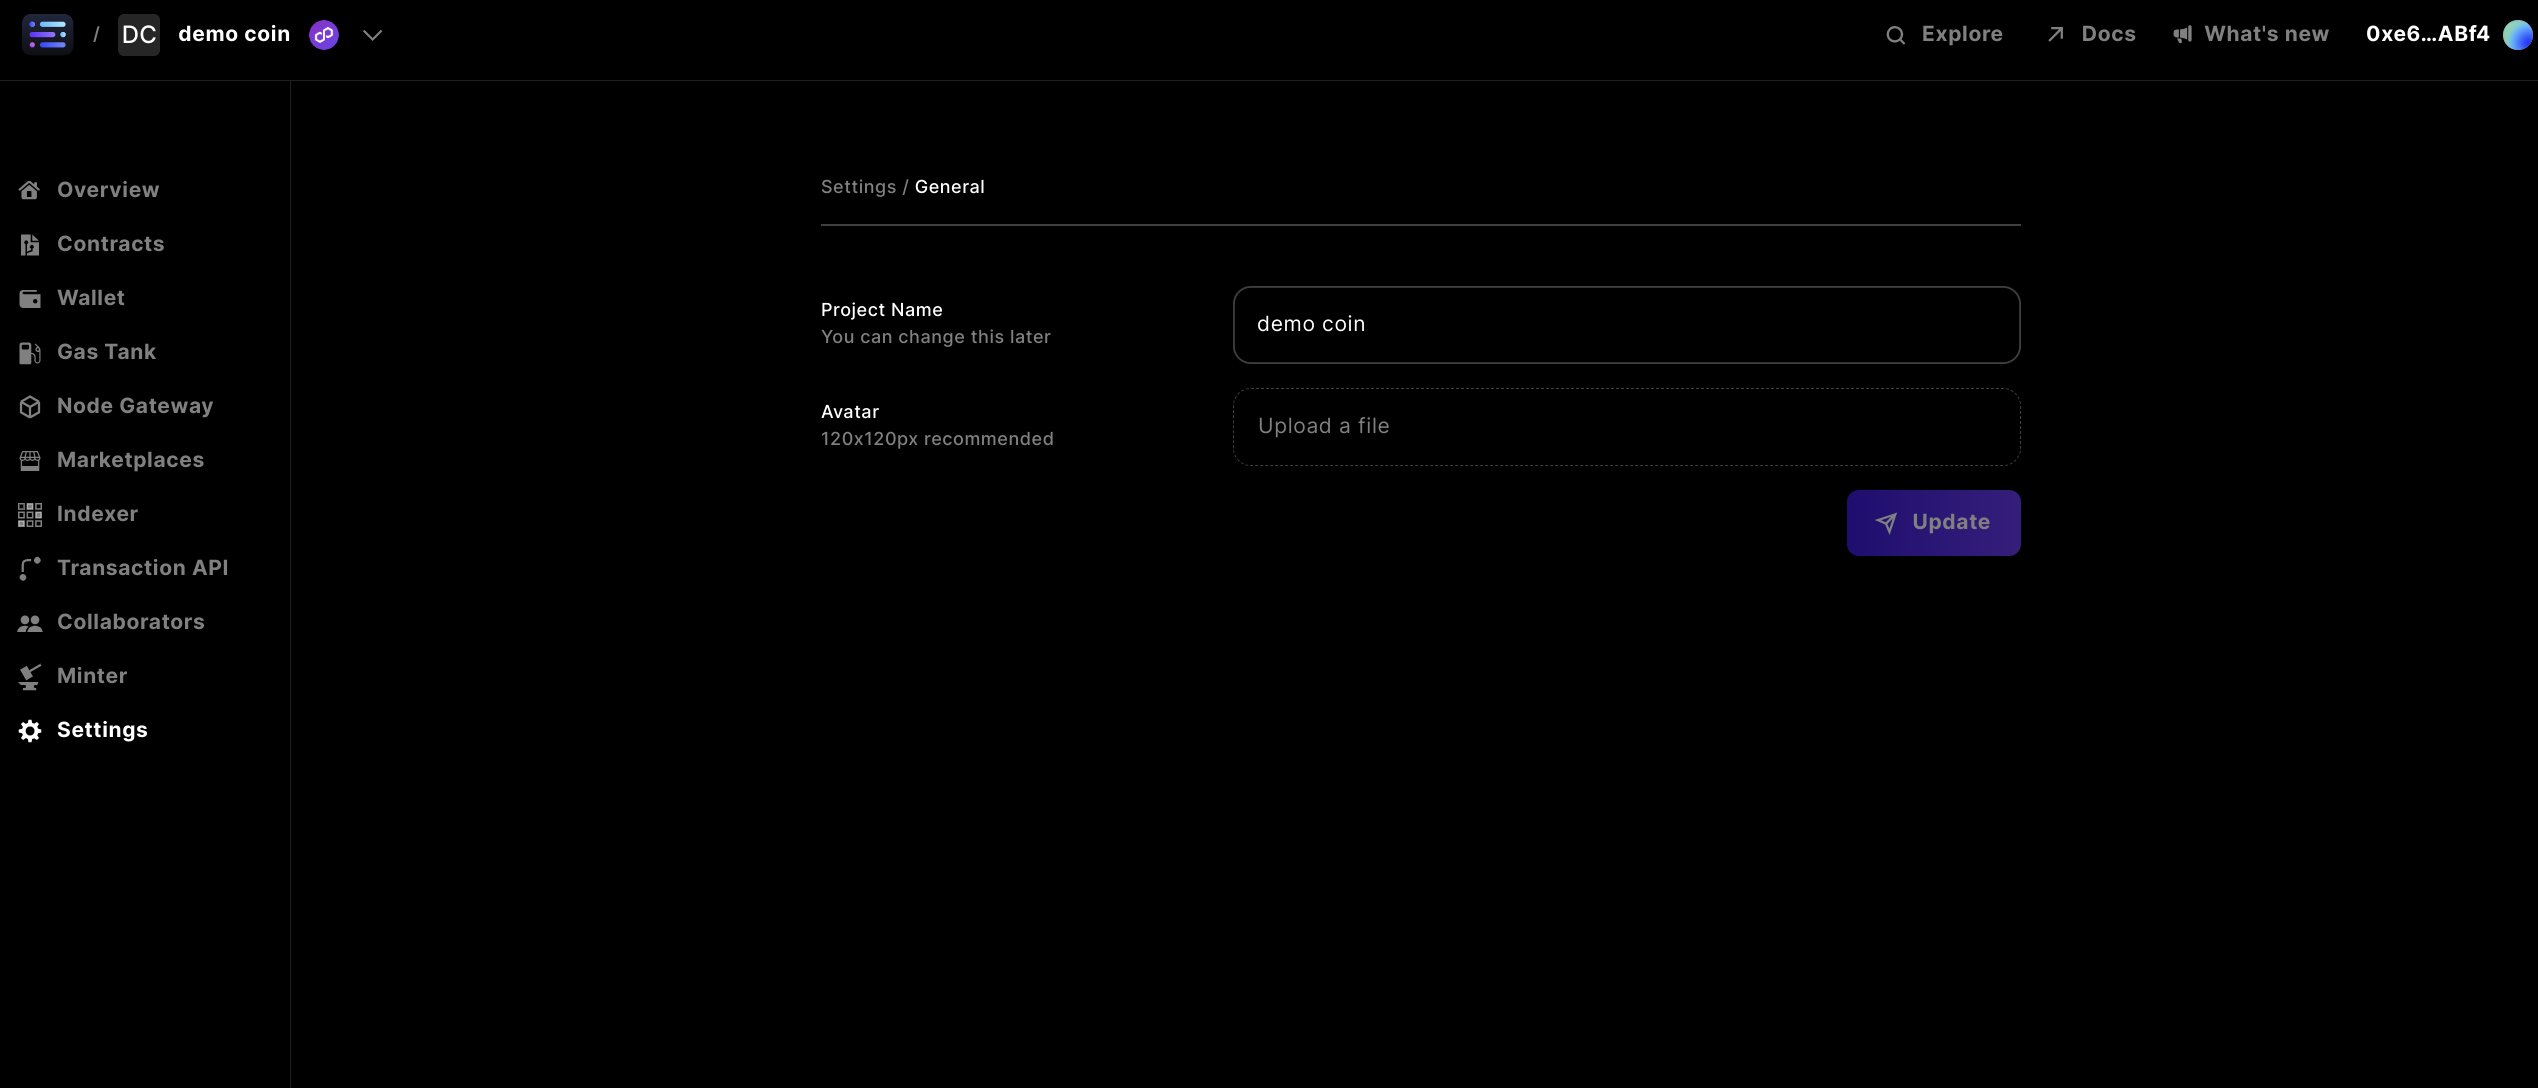
Project Name
The first option is to change your Project Name. To do so, enter a new project name in the field and hit the Update button to save.
Avatar
The second option allows you to modify your Project Avatar, visible in the top left corner of your project on the dashboard. Click the Avatar field to choose an image and then press the Update button to save your changes.
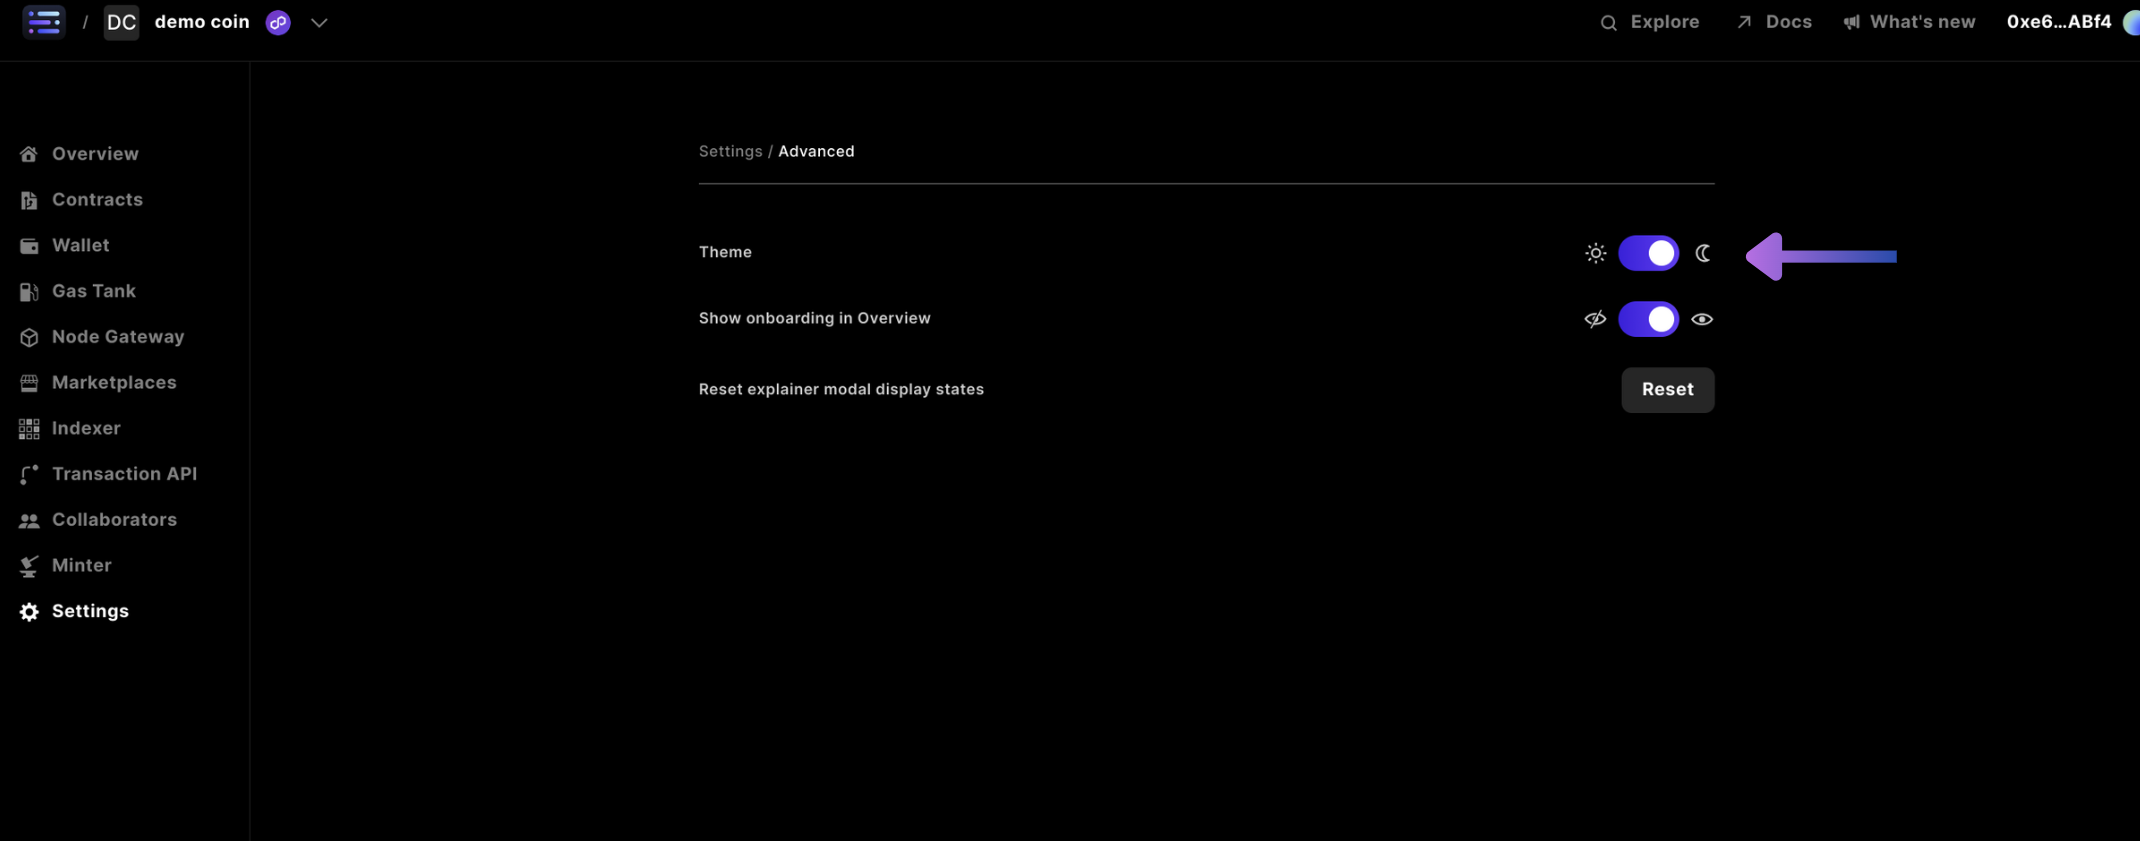
2. Advanced settings
Currently there's not much to do in Advanced settings, but the most important thing is you can update the Theme between ☼ and ☾ for light and dark, respectively
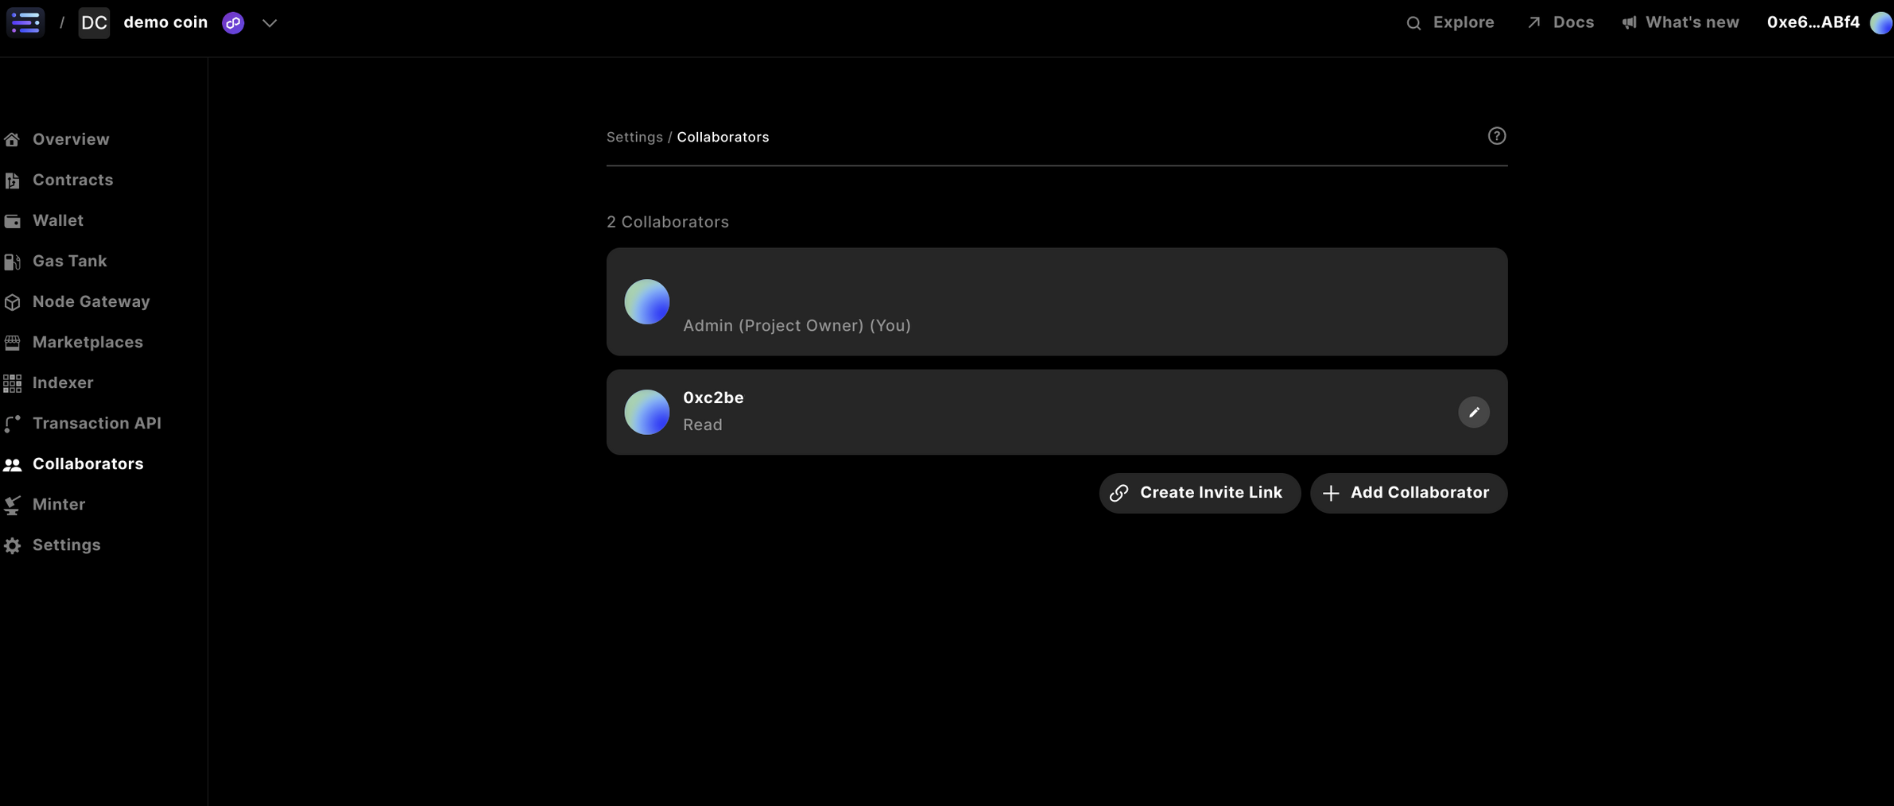
2. Collaborator Settings
Collaborators for any project can be added and deleted.
You can either follow this below section, or, skip ahead to the video for inviting collaborators.
Start, by opening your Collaborators settings.
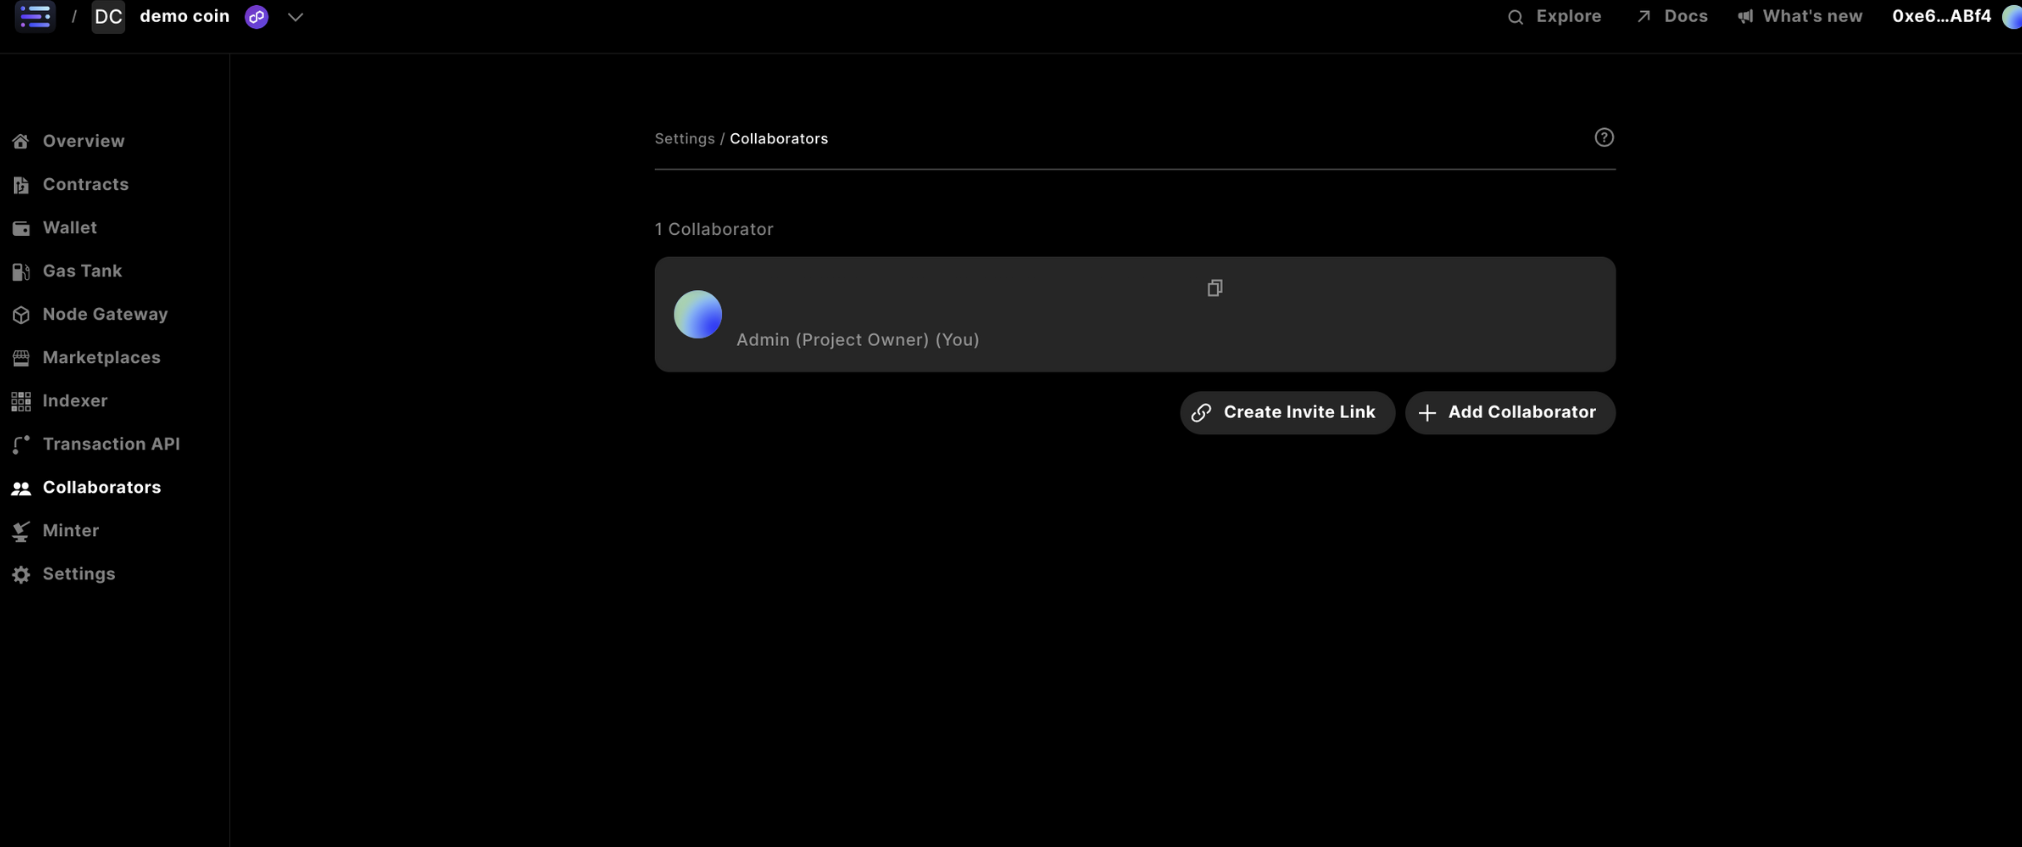
In the Collaborator settings, you have two methods to add collaborators to your project.
The first method is to directly add collaborators by entering their information and selecting their access level.
The second method is to create an invite link. When using this option, you can specify the access level, link duration, and optional usage limits.
Let's walk through each of these.
Add a Collaborator
To add a collaborator, make sure you have selected the correct project, accessed Settings, and are in the Collaborators section.
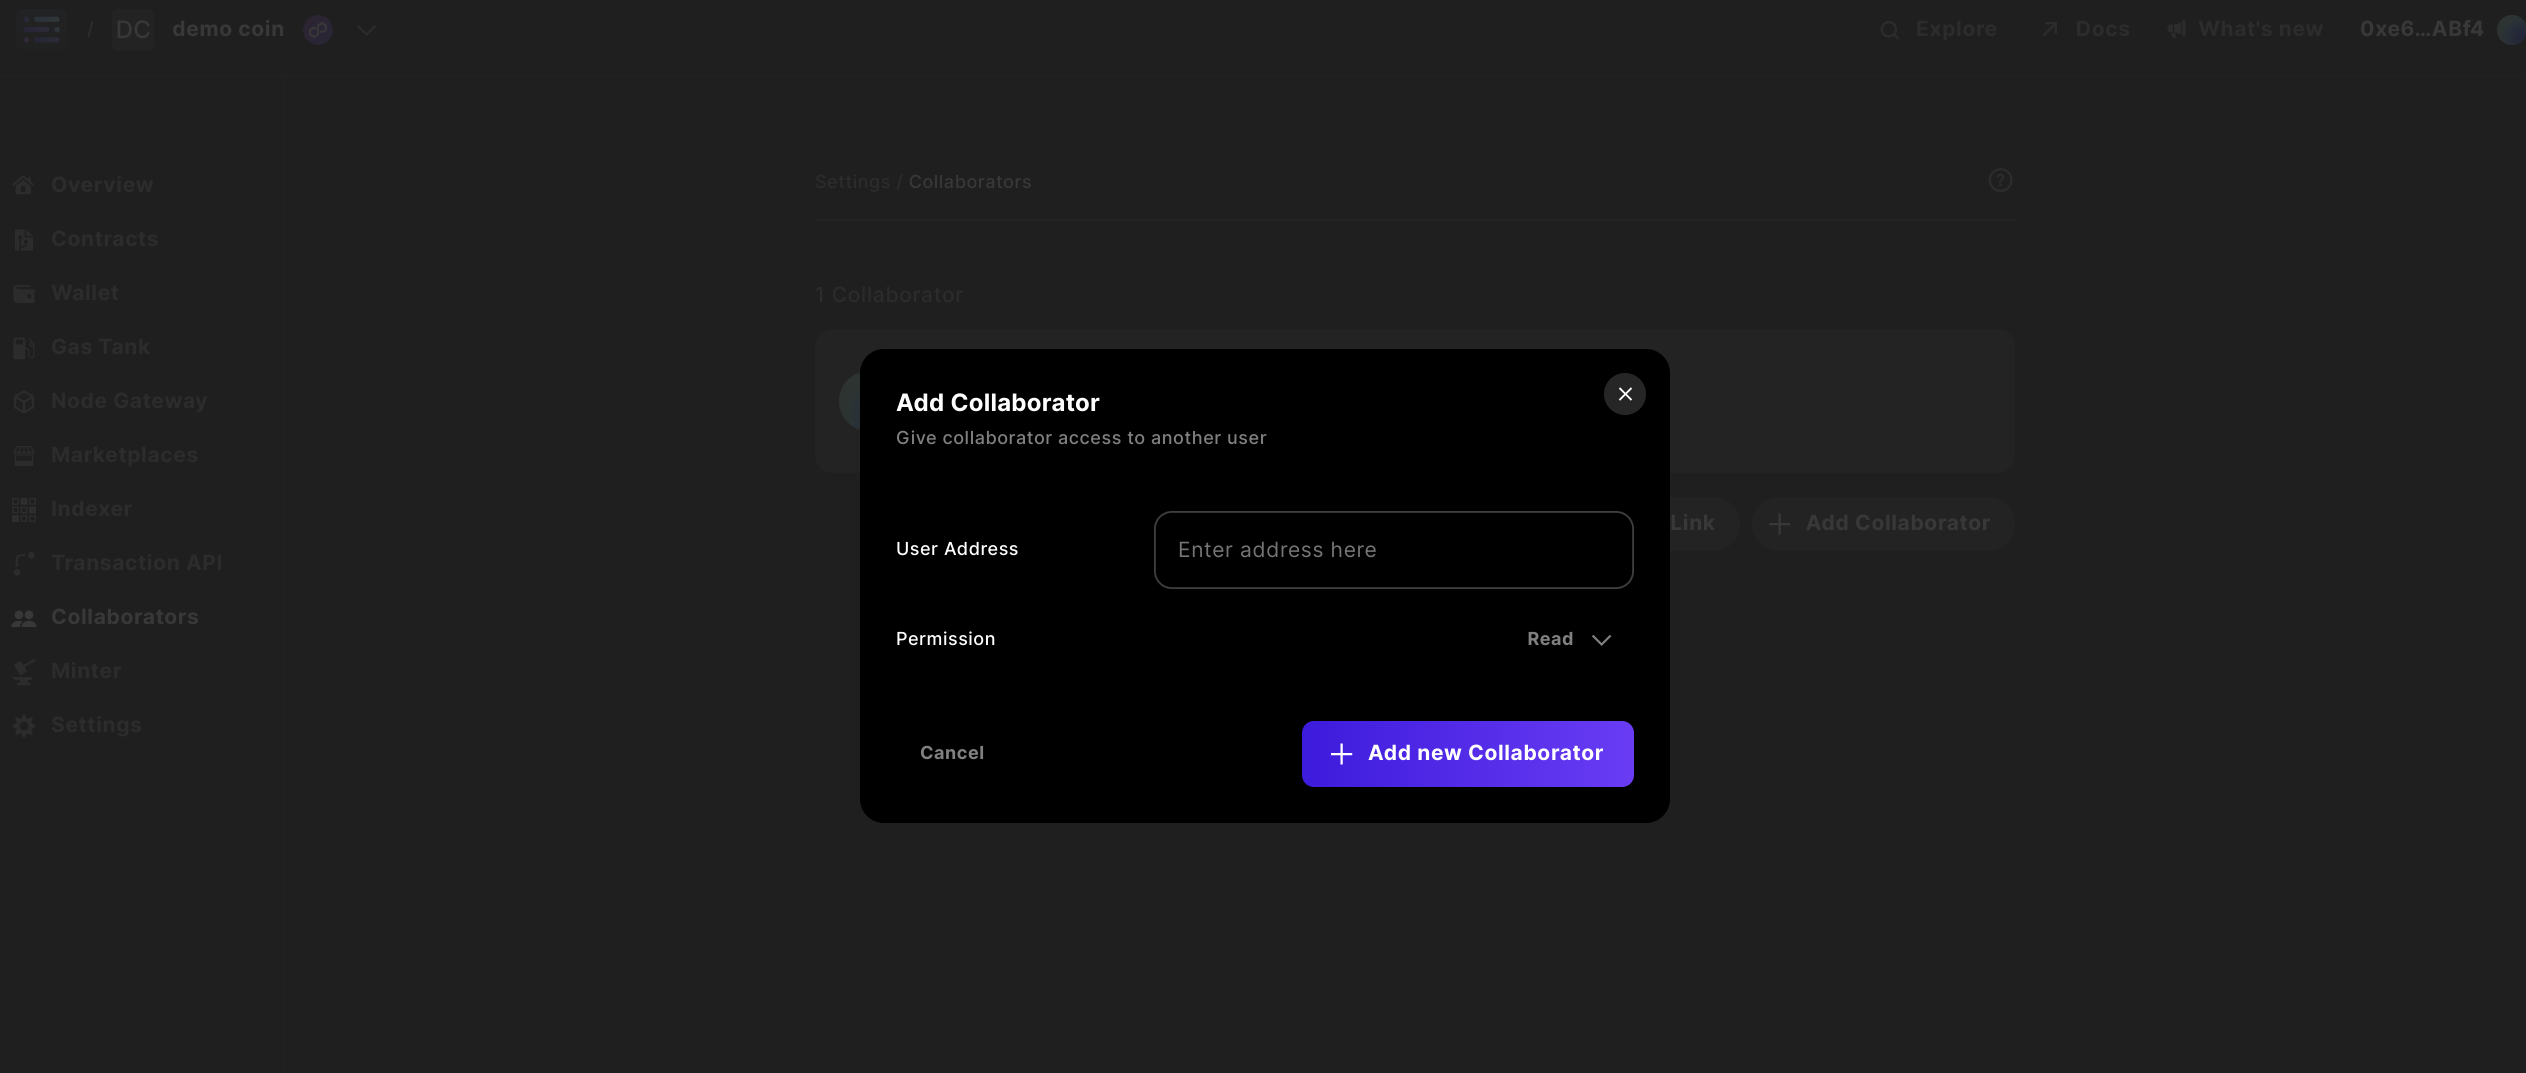
Start by clicking on the Add Collaborator button.
Enter a wallet address in the user address field, and then select the access level you want using the role dropdown.
Finish by clicking the Add new Collaborator button.
To confirm, you should see your new collaborator in the dashboard, including their wallet address and access level.
Create an Invite Link
Start by clicking on the Create Invite Link button and the following modal should appear
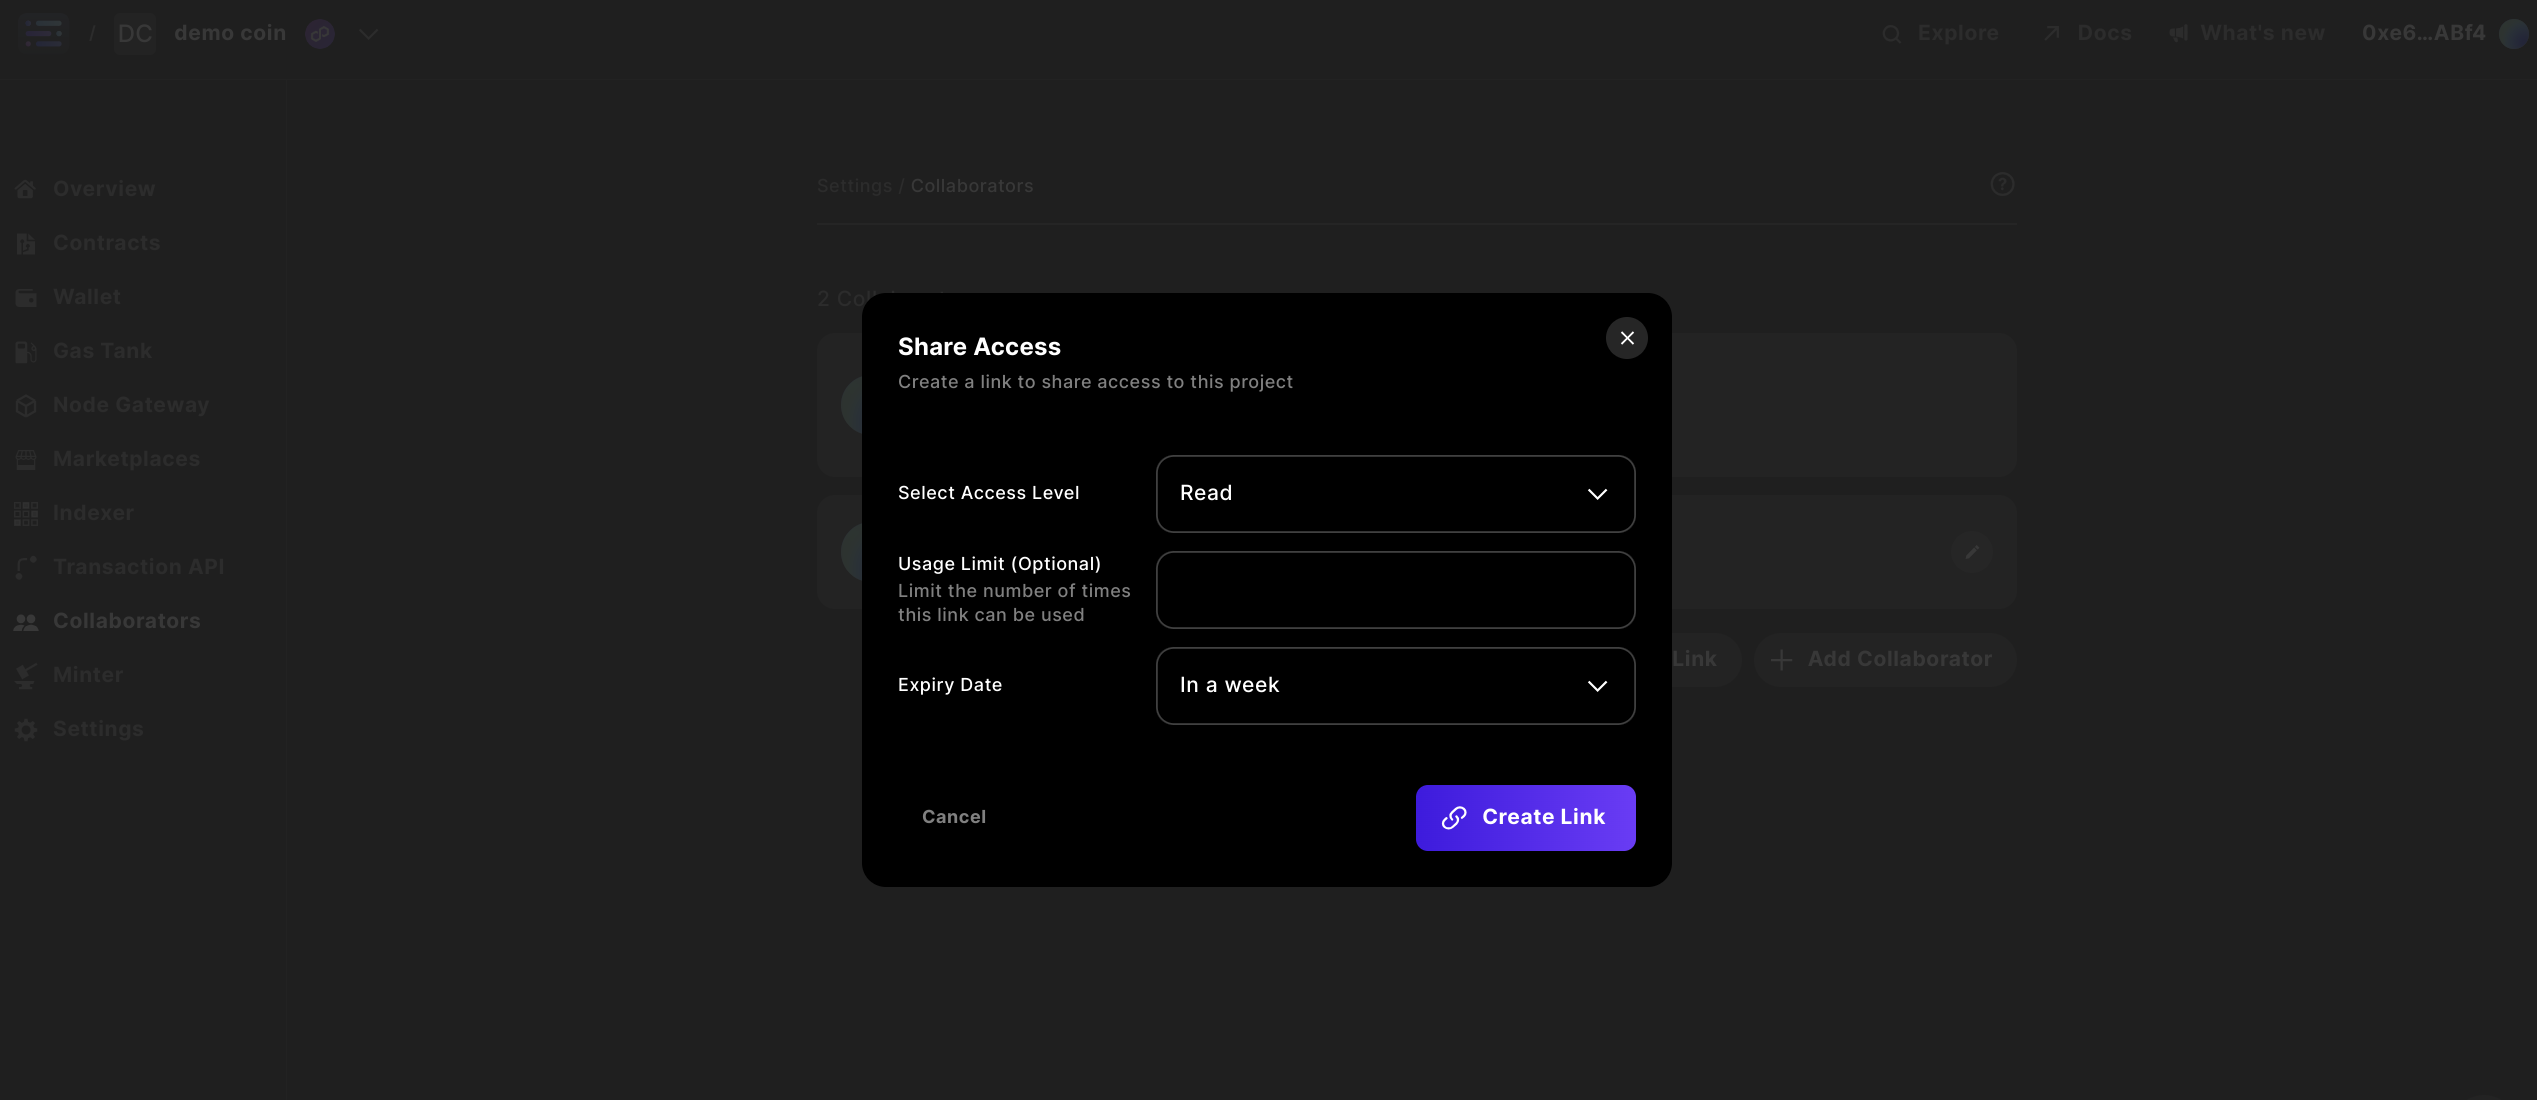
Then, select the access level you want your invite link to give: Read, Write, or Admin.
Enter the number of collaborators you want this link to be limitted to (setting a limit is optional).
Finally, select the amount of time you want this link to be valid: a day, 3 days, or a week.
Finish by clicking the Create Link button.
To confirm, you should see your invite link in the dashboard, including the access level, limit, date created, and time remaining until it expires.

Sharing an Invite Link
To share an invite link, click the Copy Link button.
Go to where you want to share the link, paste it, and send it to your collaborators.
Deleting an Invite Link
To remove an invite link, click the Delete Link button.
You will be prompted to confirm the deletion; click Yes to delete.
After deleting the link, you'll get a success notification at the bottom right of your dashboard, and the link will no longer be visible.
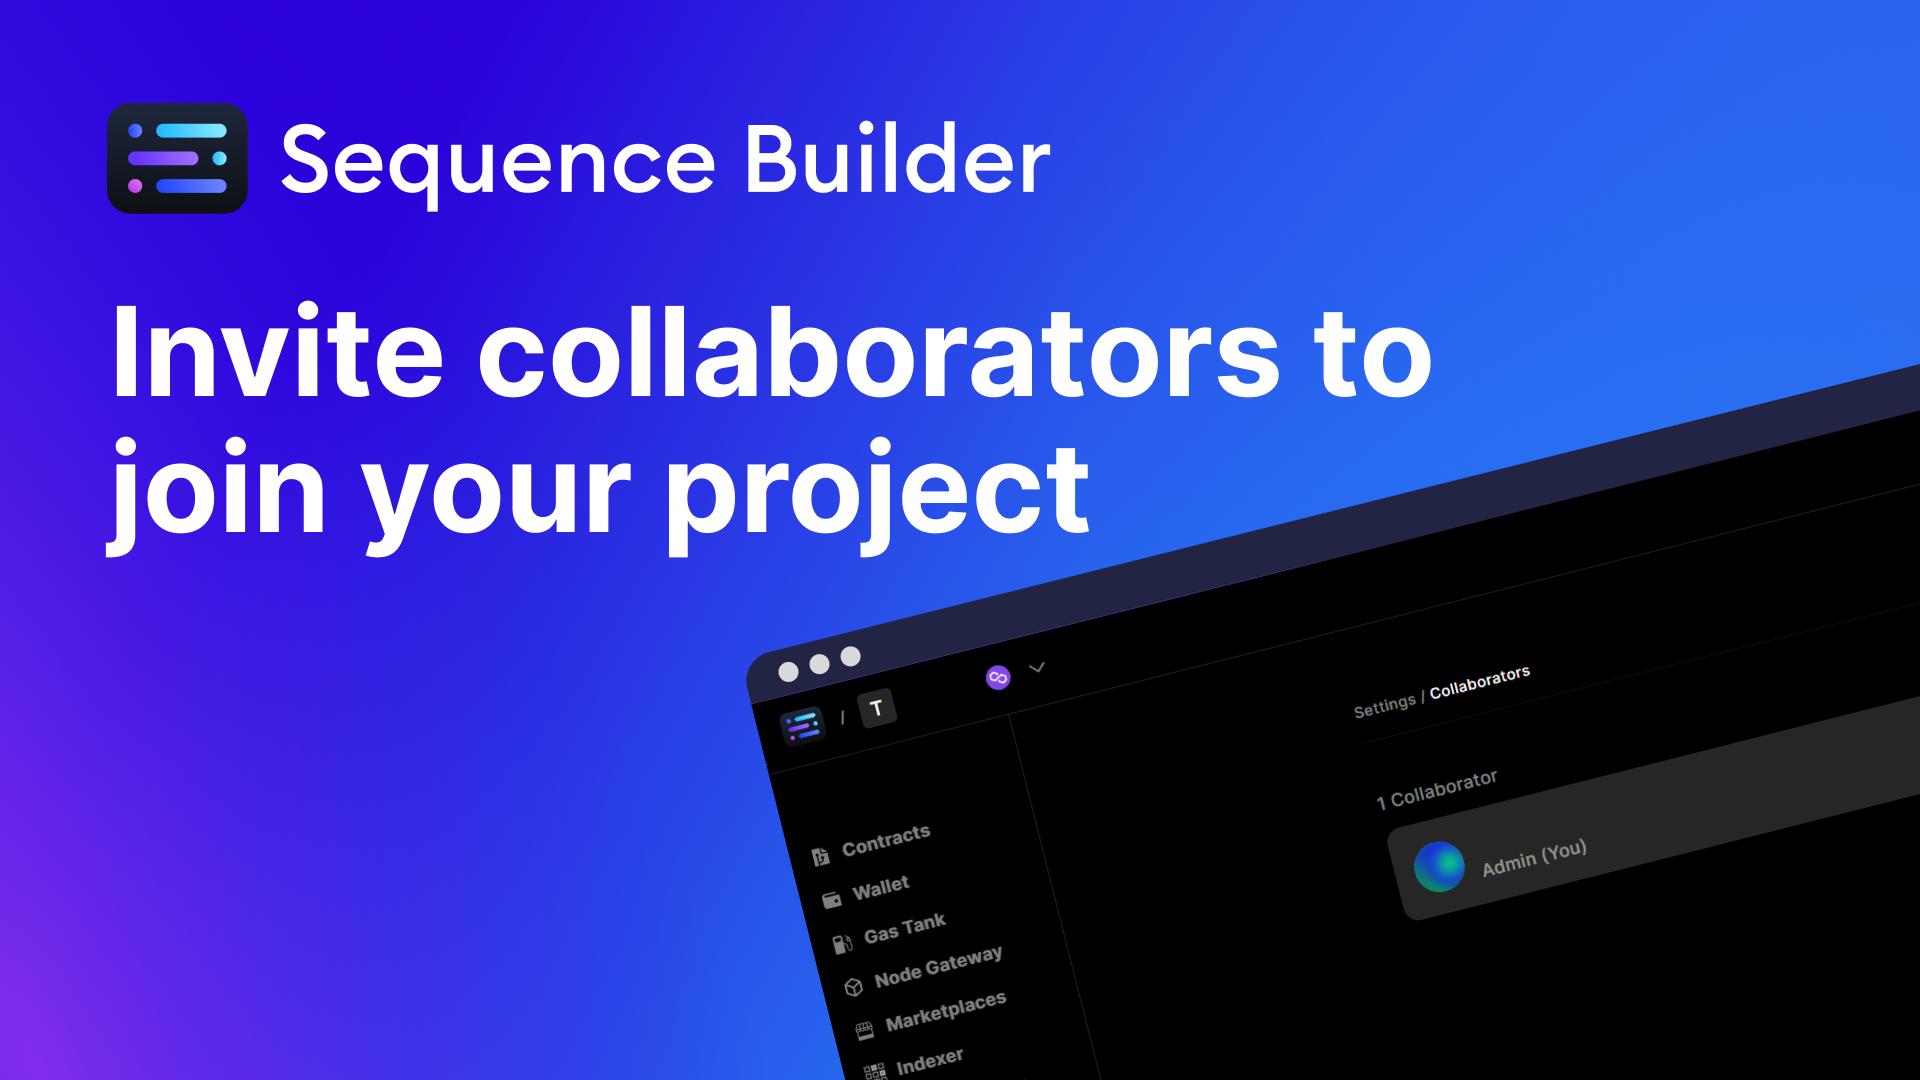
Watch how to invite Collaborators
If you prefer to watch a video for how to invite Collaborators to join your project, watch here:
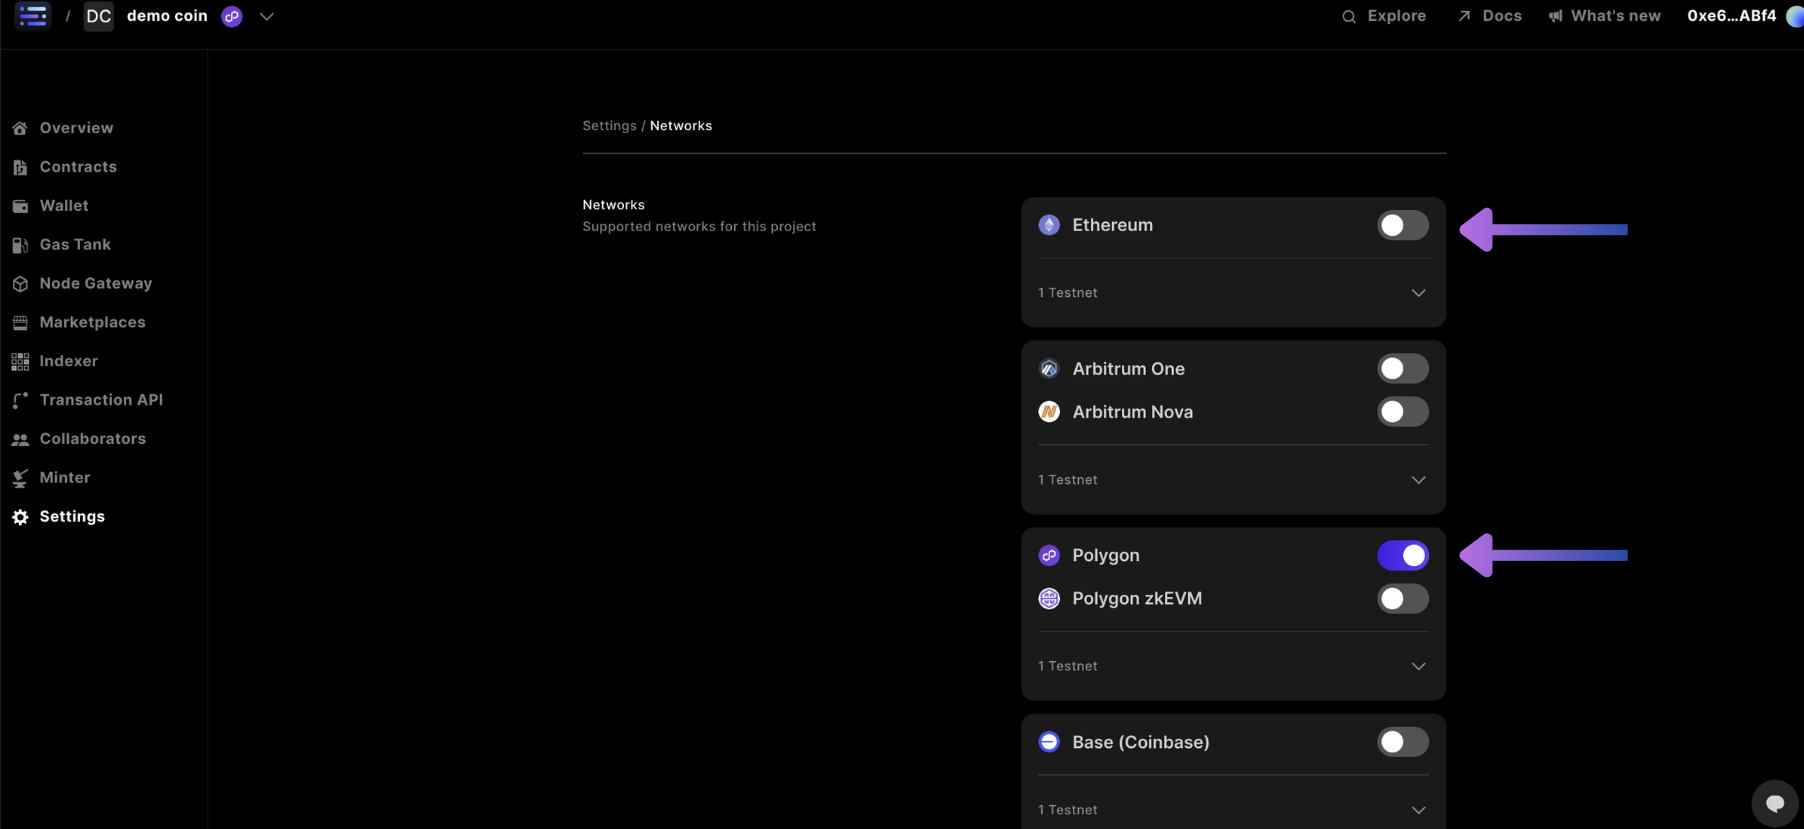
3. Network Settings
Open your Network settings.
In the network settings, you'll see a list of supported networks in Sequence. Here, you can choose which networks you want to access through the Node Gateway and deploy smart contracts on.
Toggle the networks you wish to use and then click the Update button.
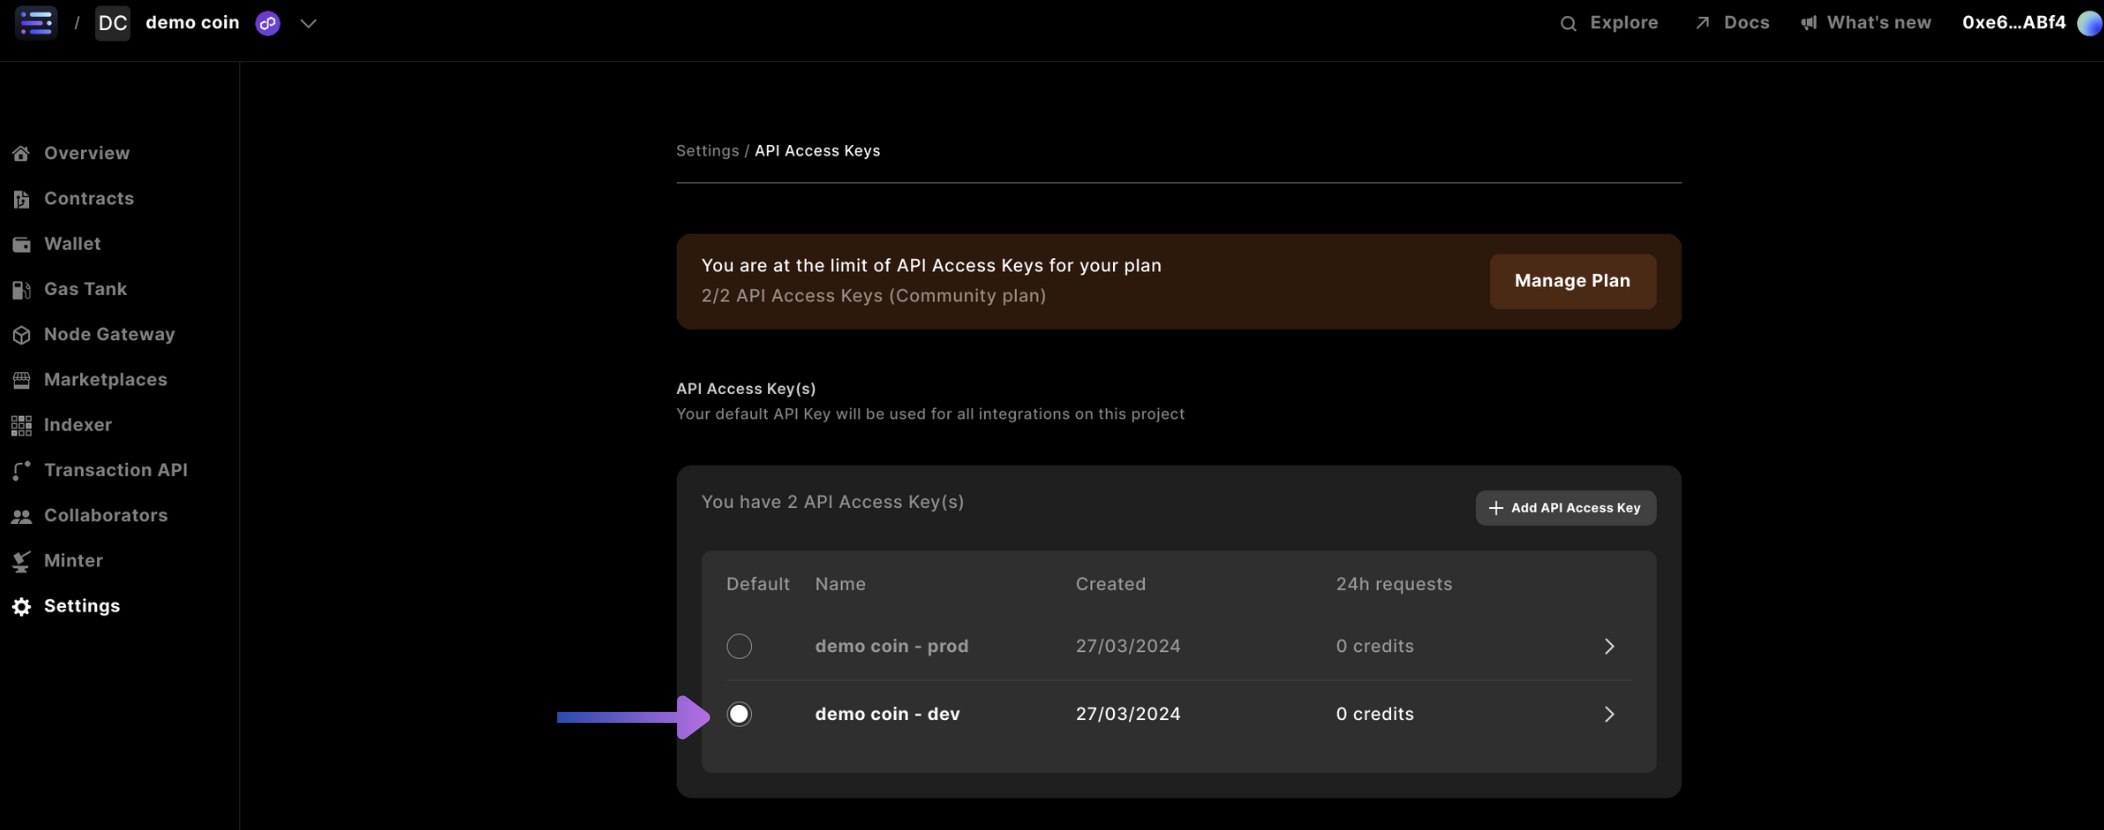
4. API Access Keys Settings
Open your API Access Keys settings.
In the API Access Keys section, you will find a dashboard with several options: monitor the usage of each key, set your default key, or expand the details of a specific key.
You can also add a new key or edit the details of an existing key.
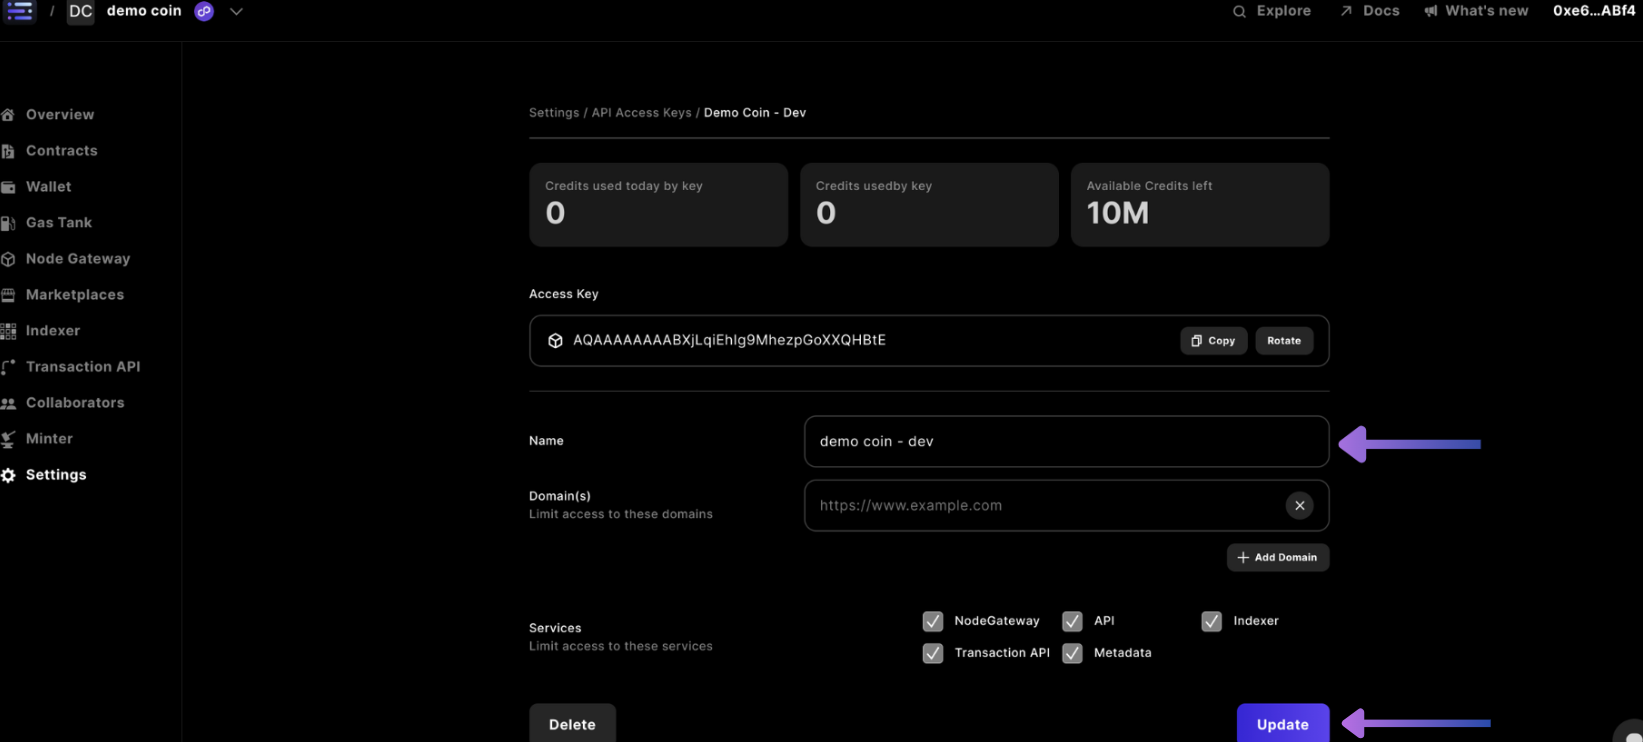
For each key, there are specific actions you might want to take, such as:
- Rename or delete your key
- Copy or change the code of your key
- Configure how and where your key can be used
Rename or delete an API Access Key
To rename or delete one of your keys, make sure you have selected the correct project, accessed Settings, and are in the API Access Key section.
Start by selecting the key you want to edit.
Renaming your key
In the name field, and enter a new name.
Then click the Update button.
Deleting your key
Click the Delete button in the bottom left.
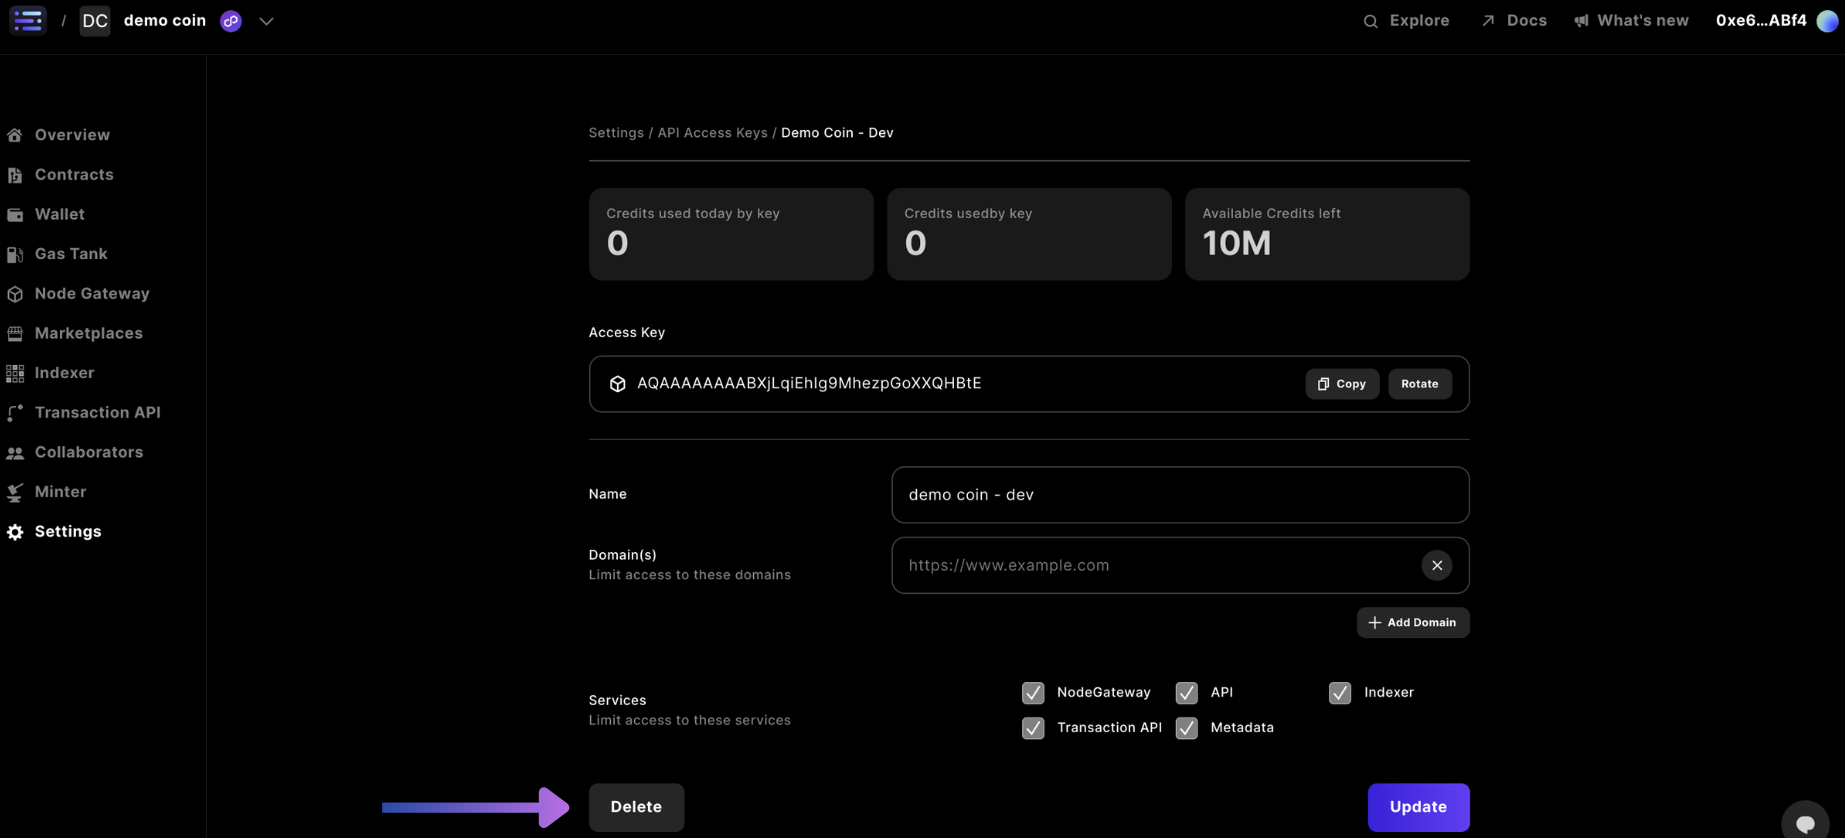
You will be prompted to confirm the deletion; click Yes to delete.
Copy your Access Key
Your API key is designed to be used in another location or application. To use it, you need to copy it and paste it into your application or code.
To copy your access key, click Copy in the Access Key field.
After clicking, you'll get confirmation when the button briefly changes to ✓ Copied.
Your project access key is now copied to your clipboard.
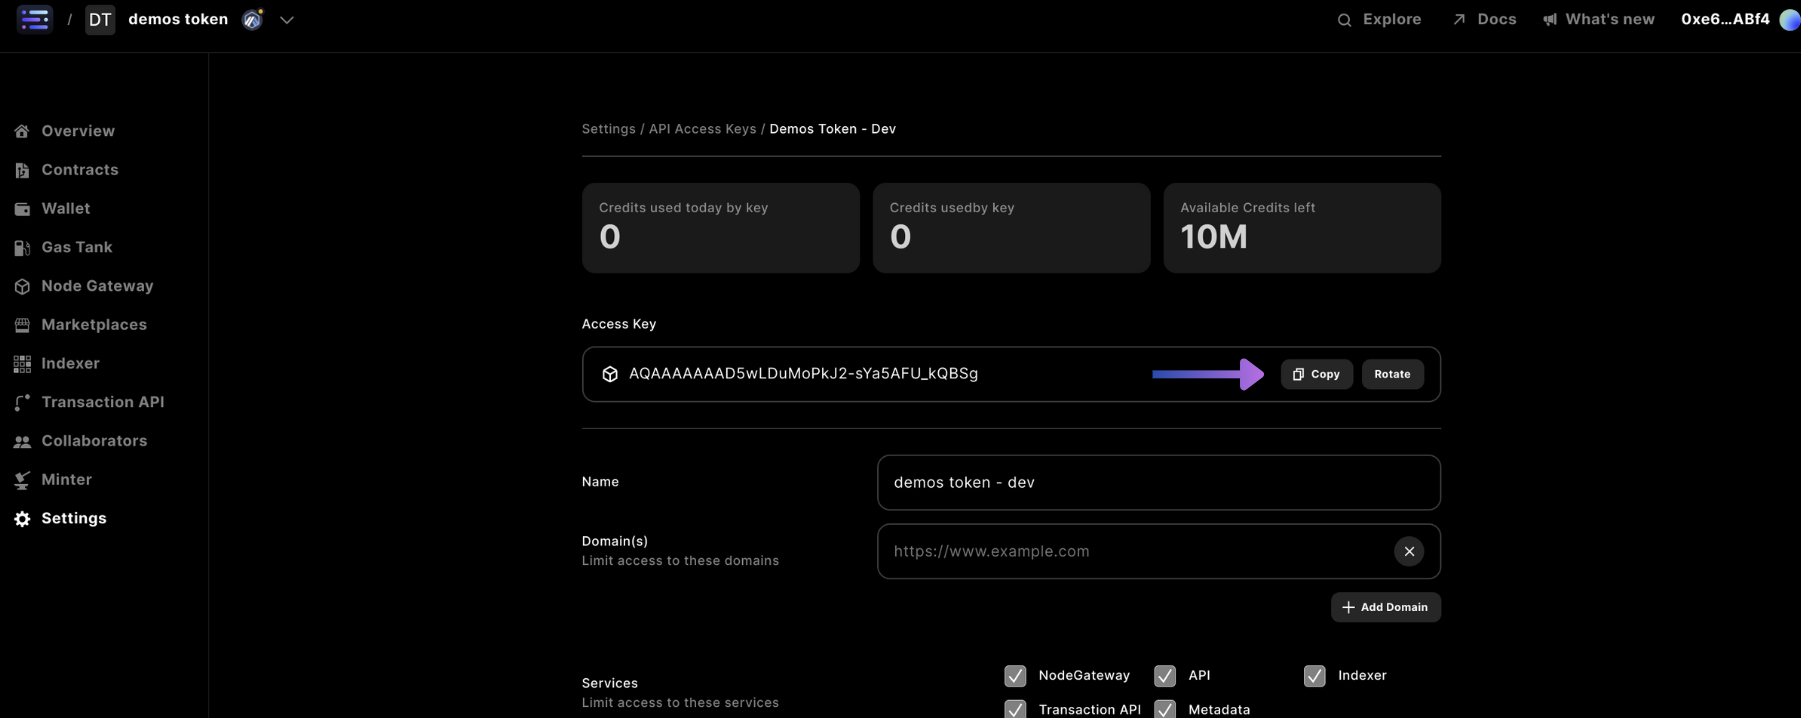
Rotate your Access Key
You may want to change your access key, if for some reason your key was leaked, or, your preference is to observe what generates as context for your project
By rotating your key you will not lose any of your project's usage history
To do this, click the Rotate button in the Access Key field
After clicking, you'll see the key transform with a success notification in the bottom right.

Update API access settings of a Key
To update API access settings of a key, make sure you have selected the correct project, accessed Settings, and are in the API Access Key section.
Start by selecting the key that you want to update the access to.
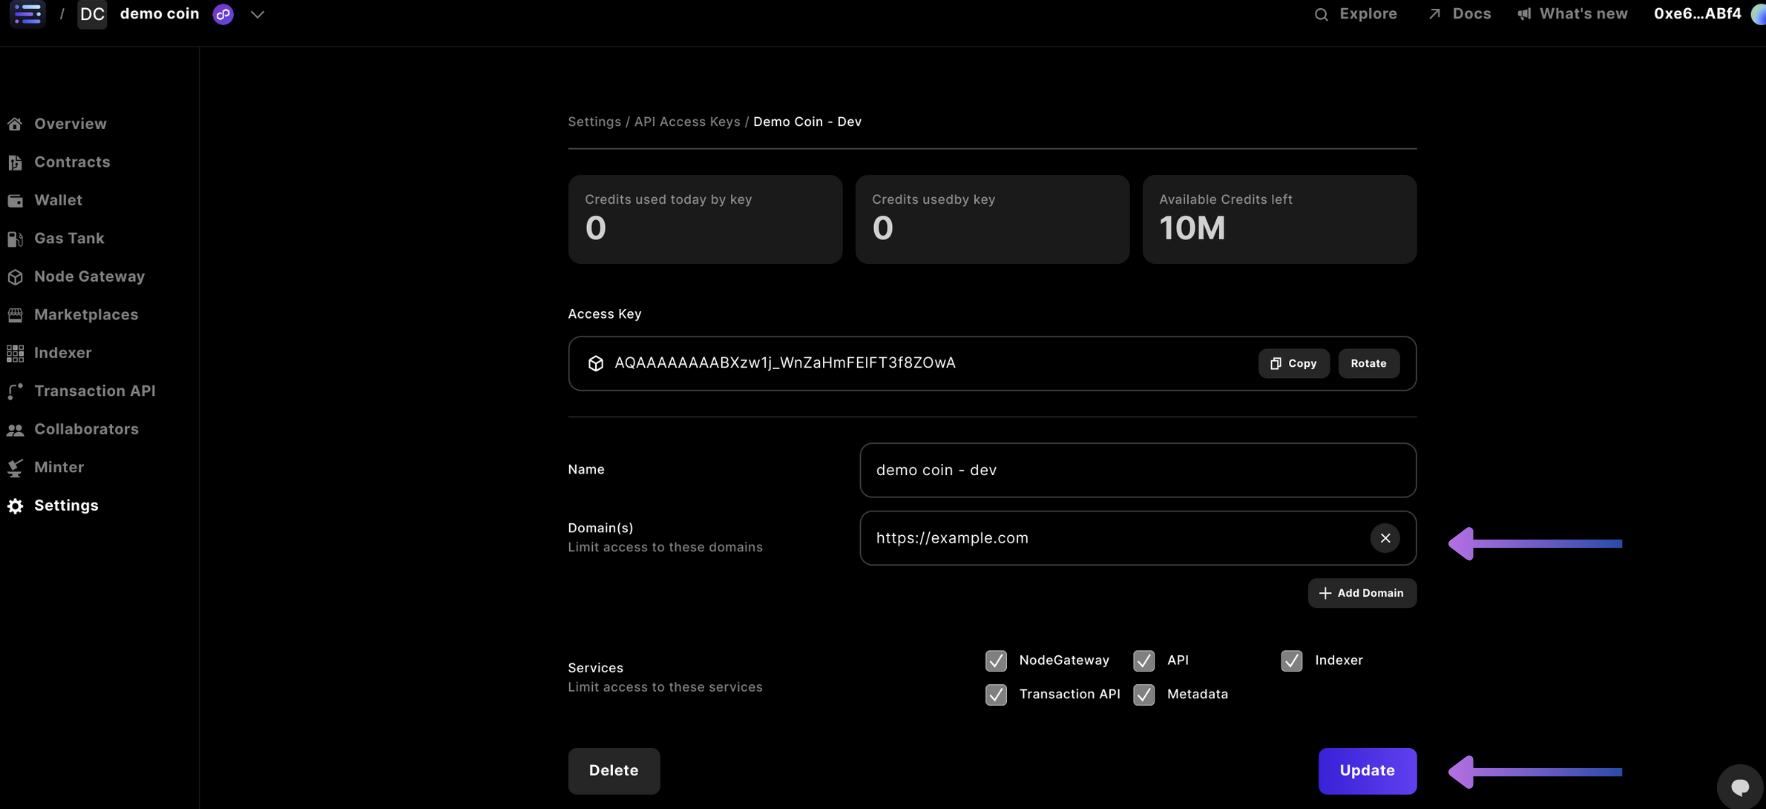
Set domain access
You can ensure that the services linked to your API key are only utilized on domains connected to your game or app by enabling specific domains where your keys can be used.
To do this, enter a domain you want to enable access to into the domain field.
If you want to include another domain, click the Add Domain button and add it too. You should now have a list of domains your key can be used with.
Continue adding to this list until you have included all of the domains that you need.
Complete your update by clicking the Update button to save.
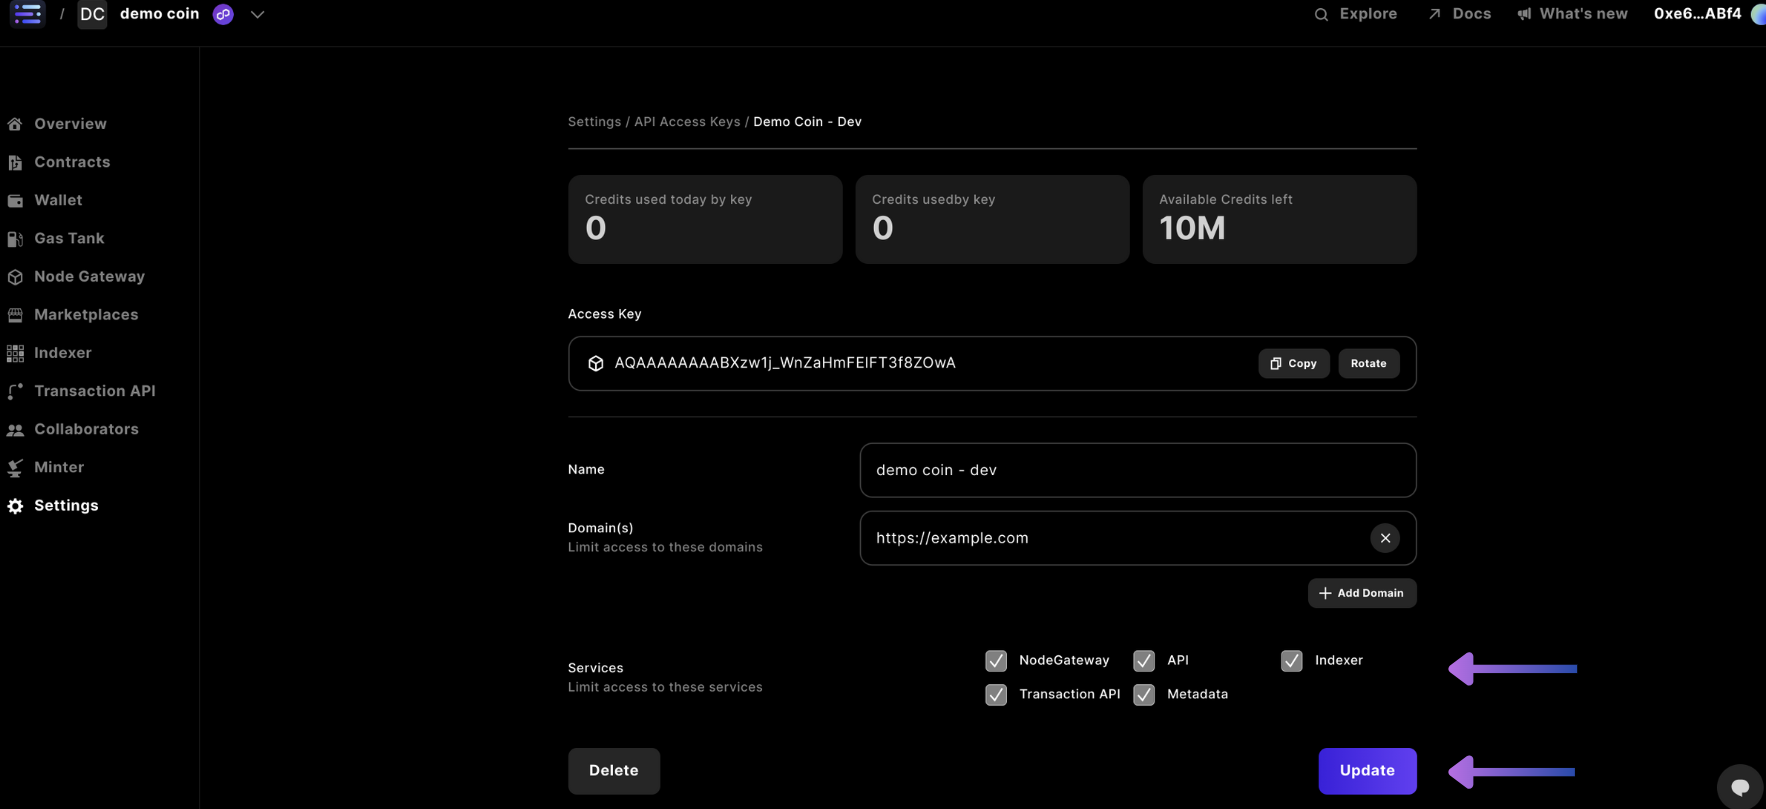
Set service access
You can set your API key to enable only specific services rather than all the services we offer.
To do this, look near the bottom right you will find several services listed with checkboxes.
Check the box for each service that you want your key to have access to.
Complete your update by clicking the Update button to save.
5. Billing Settings
Open your Billing settings.
In here, you are given all of subscription plan information that you need.
You can also update your subscription, and set your overage limits.
Billing information
In the billing section, you can quickly access key information about your subscription plan:
- Current subscription plan
- Current billing period dates
- Monthly billing amount
- Next renewal date
- Monthly credits issued
- Credits used in the current period
- Remaining credits
- Overage settings status
Update your project subscription plan
To update your project subscription plan, make sure you have selected the correct project, accessed Settings, and are in the Billing section.
Start by clicking on the Upgrade Plan button.
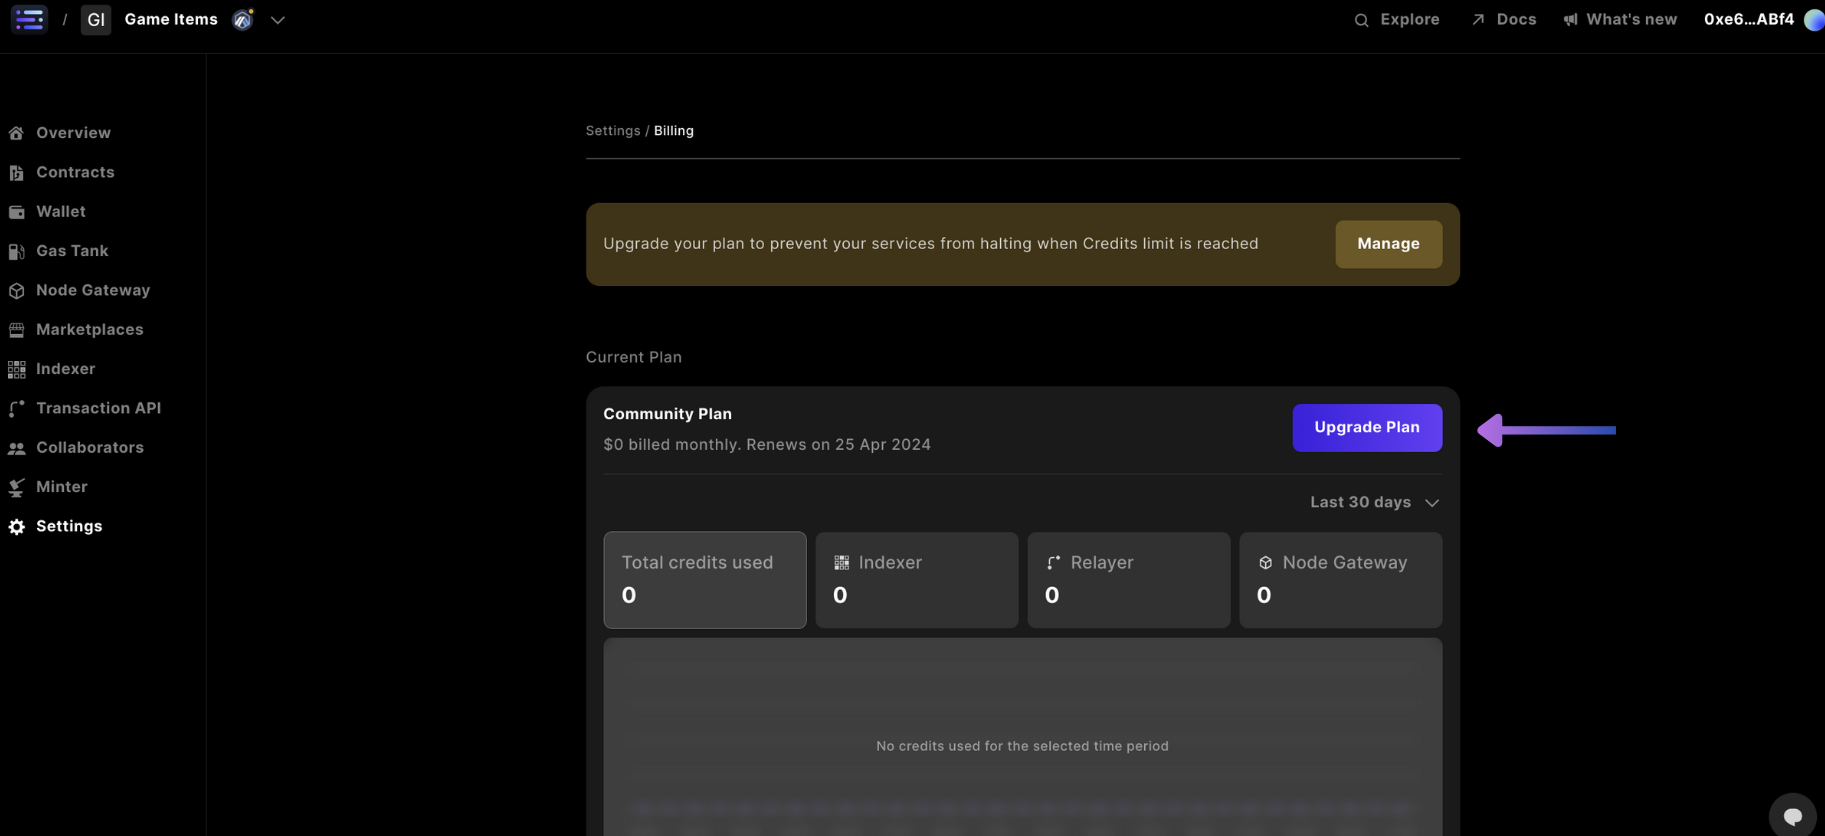
This will take you to our plans dashboard, where you can review the plans and select the one that works best for you.
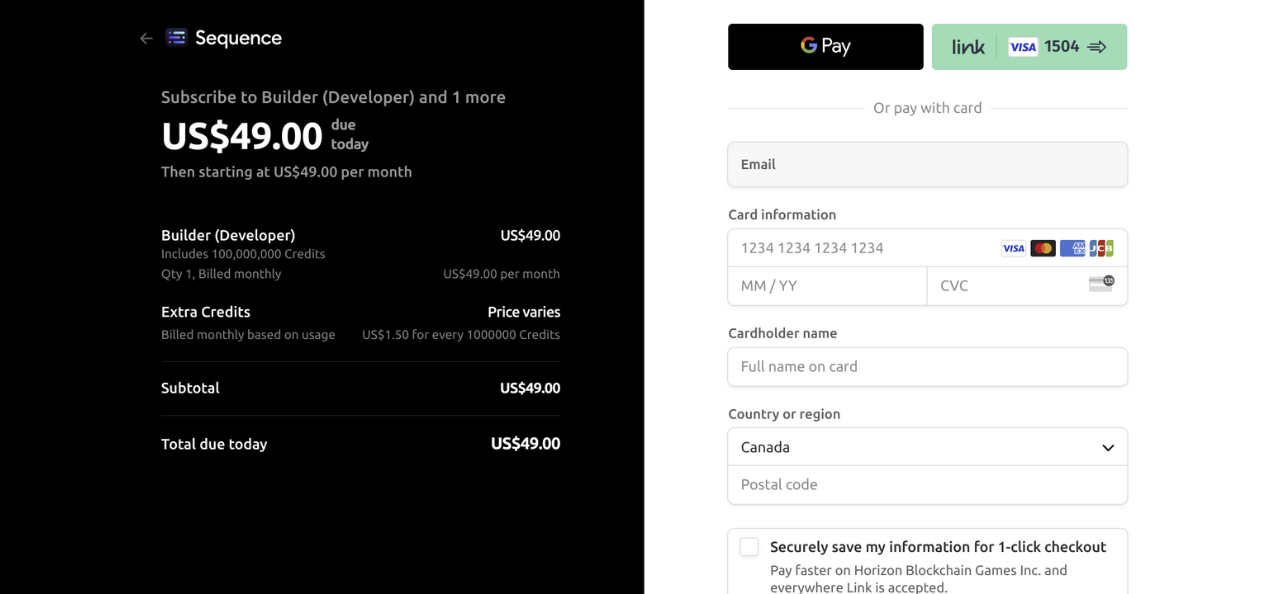
Once you know which plan you want, click the Select Plan button.

This will take you to a checkout screen where you can enter your payment information.
Set your overage limit
To set your overage limit, make sure you have selected the correct project, accessed Settings, and are in the Billing section. you will also need a paid plan to set an overage limit.
With a paid plan, start by clicking on the button with the gear icon.
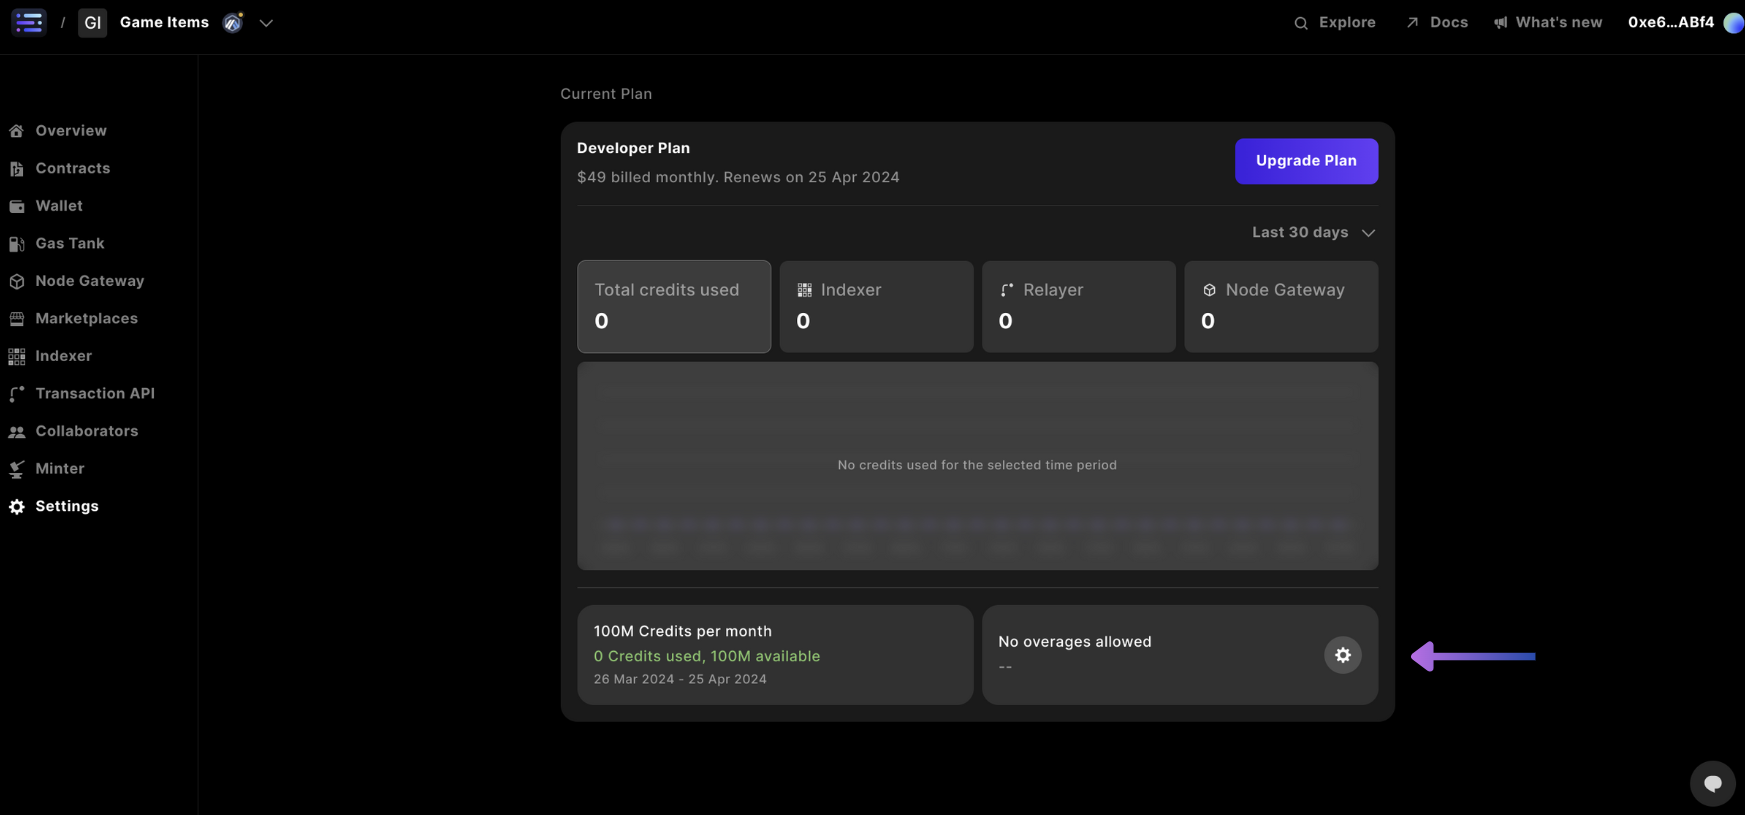
Toggle the Set overage limit option.
Then enter the maximum overage amount that you would like to set.
Finish by clicking the Save changes button.
Delete a Project
To delete your project, make sure you have selected the correct project and are in the Settings section. You will also need administrative-level permissions to delete a project.
If you are an Admin, you will notice a section labeled Danger Zone under all your settings sections.
In this area, you will also find an option to Delete this Project — click that option.
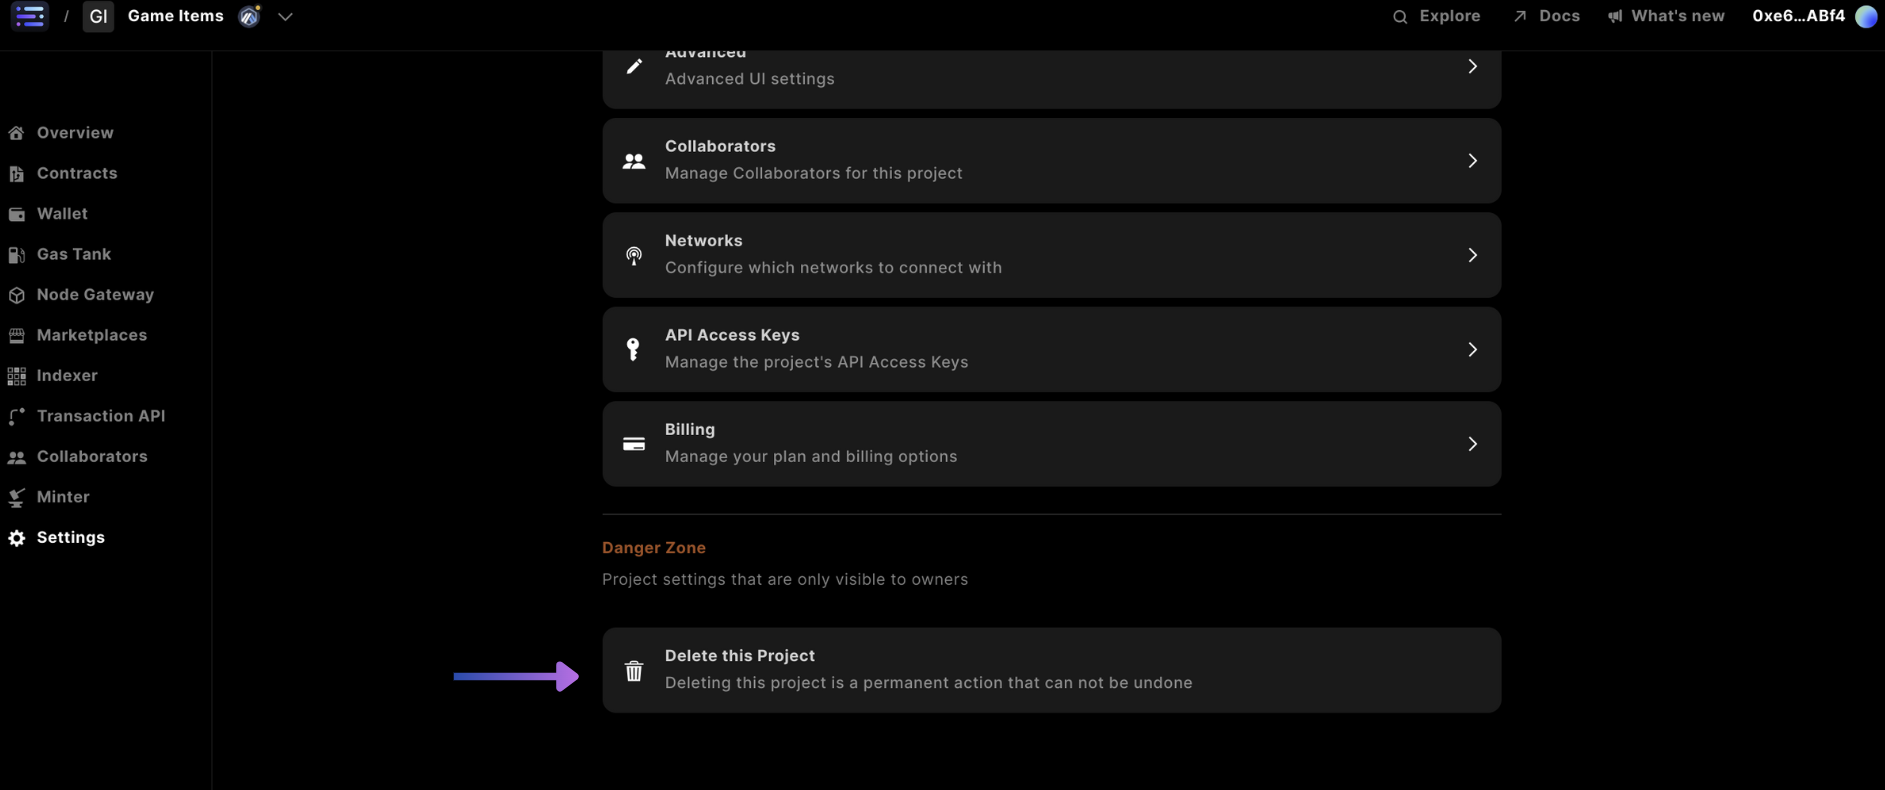
This action will prompt a modal to confirm that you want to delete your Project.
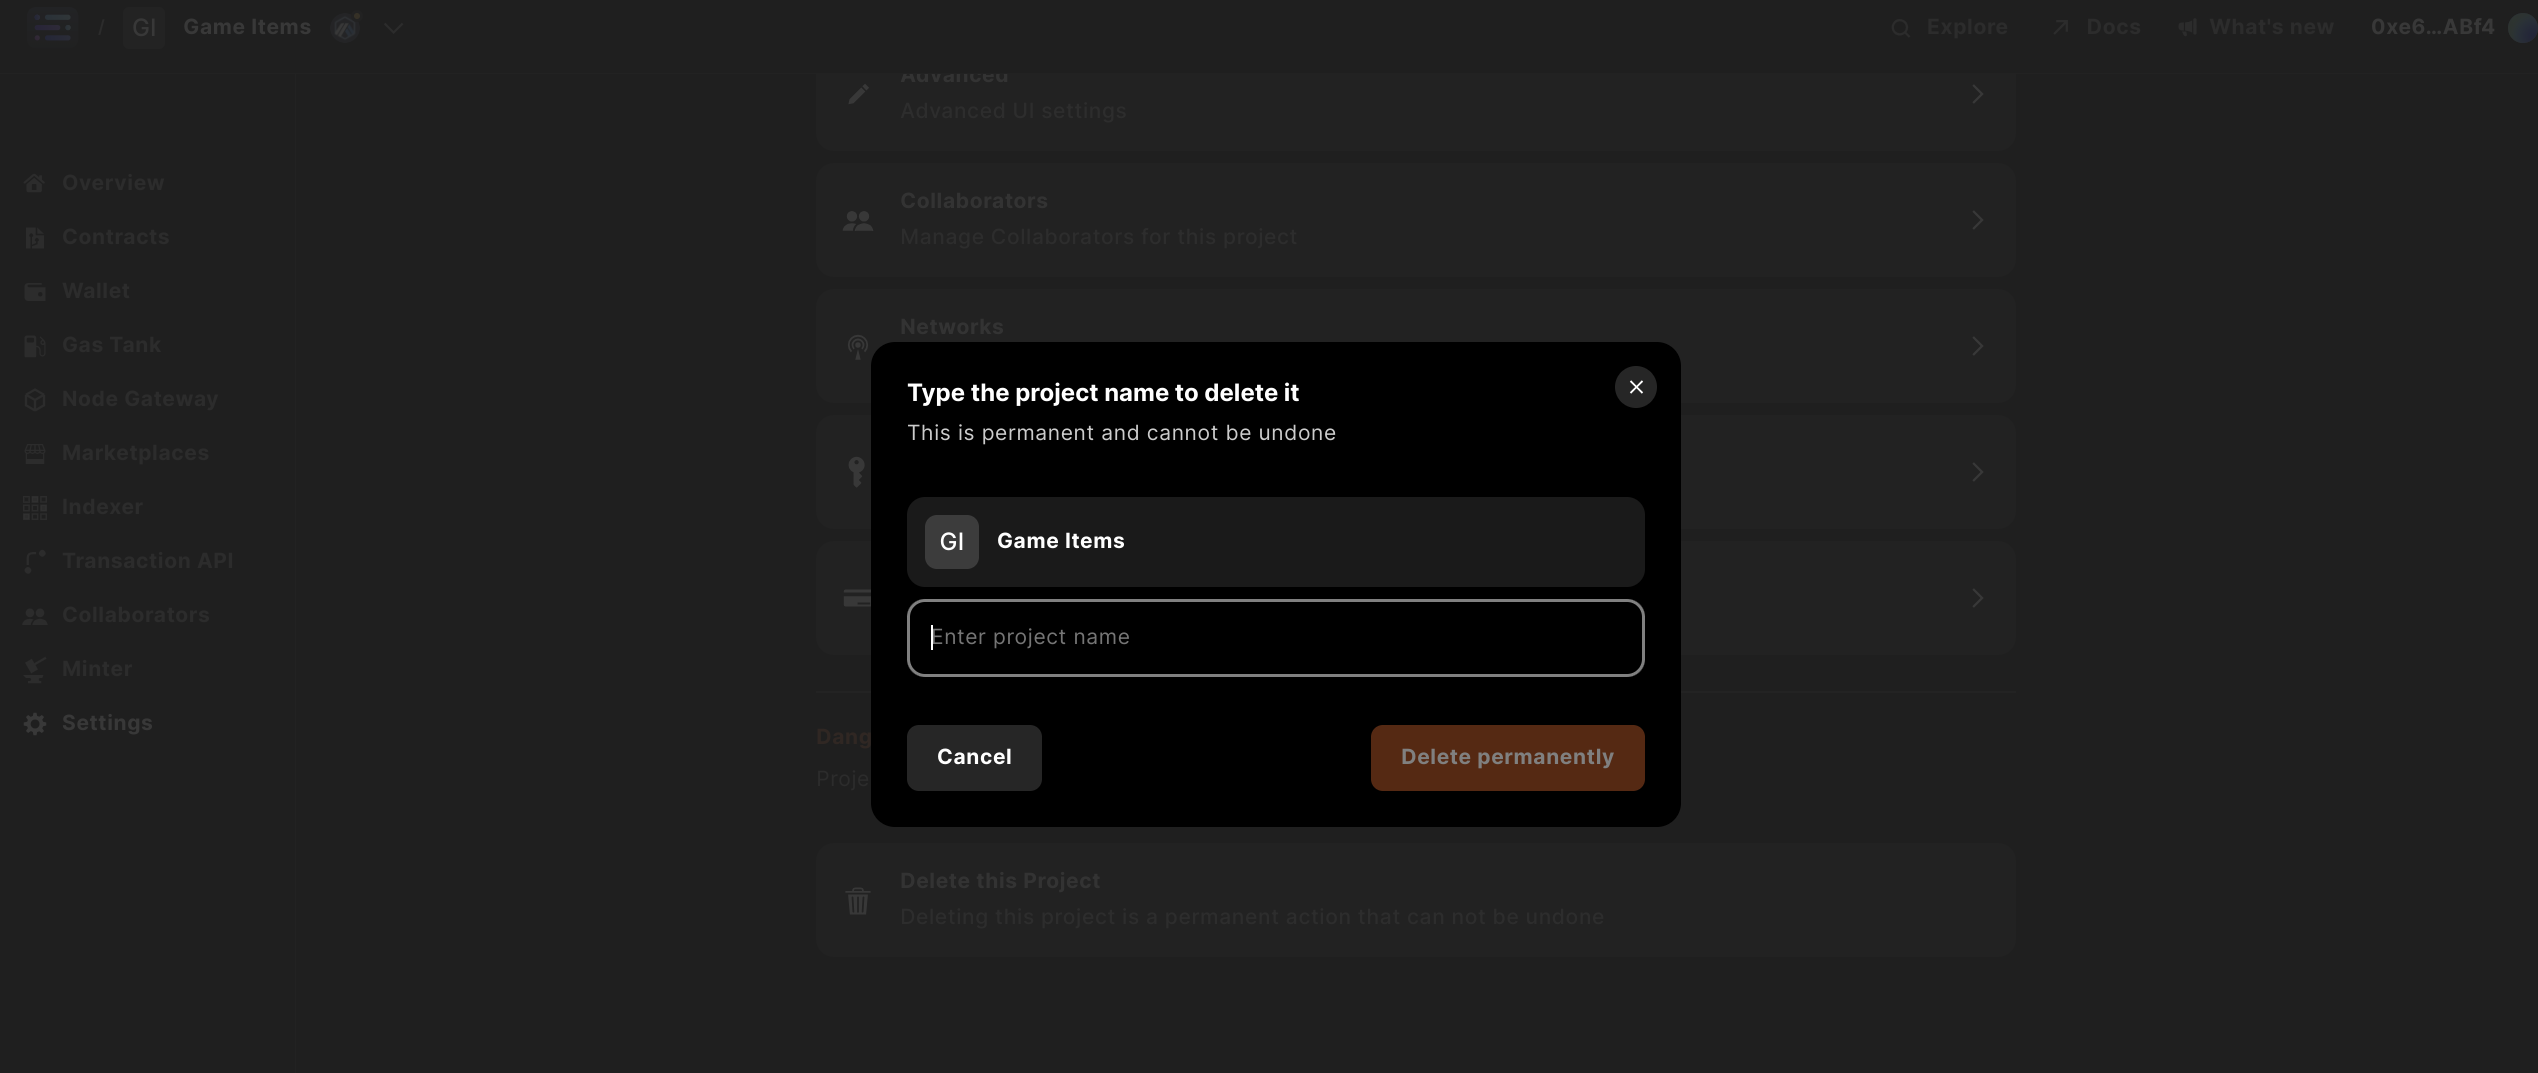
Enter the name of your project and click the Delete Permanently button.