1
Configure your Builder Project
Configure your Embedded Wallet in the Sequence Builder
2
Install the Unity SDK
Install the latest version of Sequence’s Unity SDK from OpenUPM,
or use Unity’s Package Manager UI
and use the following Git URL
https://github.com/0xsequence/sequence-unity.git?path=/Packages/Sequence-Unity3
Configure the SDK
Sign in and create a project on Sequence Builder.Download your config file from Builder as shown below.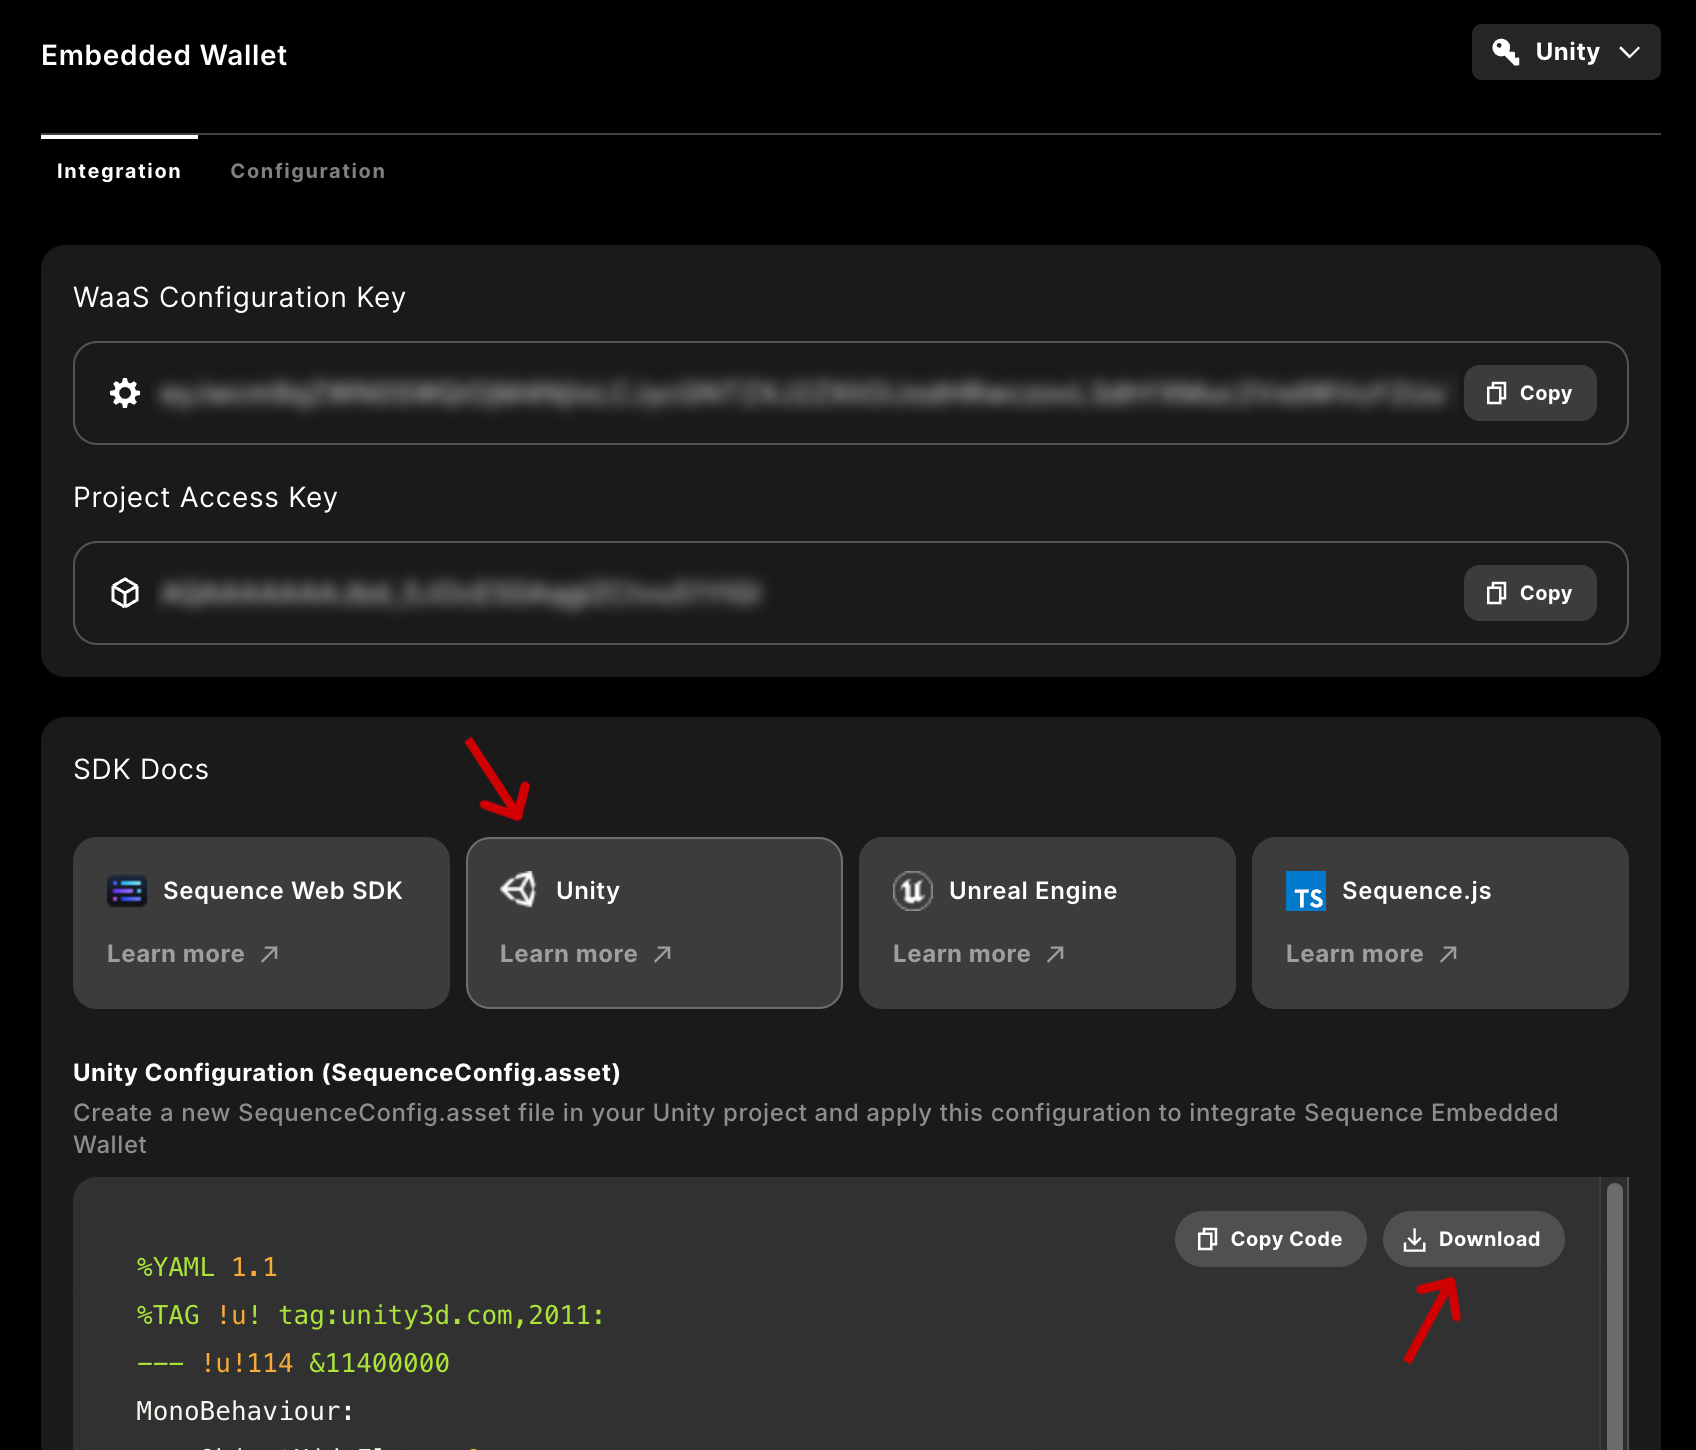
Resources folder.4
Integrate your Login Process
Start by checking if a wallet session is available from storage:If that returns 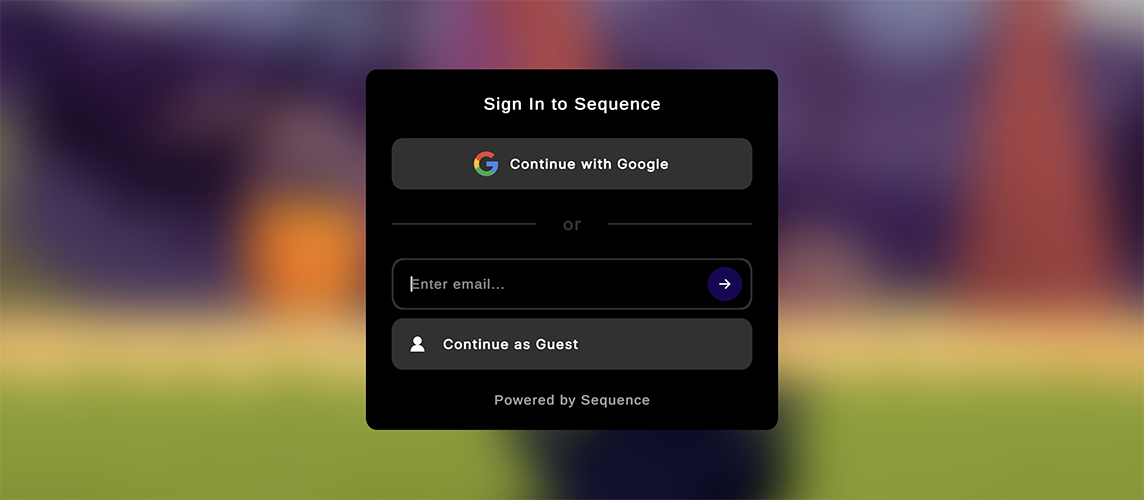
false you should ask the user to sign. Import the Setup Sample from the Package Manager UI
which will place a set of boilerplates into your project in a Resources/ directory.
Create the Login Boilerplate to send a one-time password to the specified email address.Once you’ve your first features integrated, you can continue with additional login providers
such as Google, Apple, or PlayFab.5
Test Sequence's Features
Sequence’s Unity SDK includes a variety of Boilerplates to help you quickly start your game.
Once everything is configured, you can create prefabs to display an Player Profile, Inventory, or In-Game Shop.
Checkout how to integrate a Player Profile.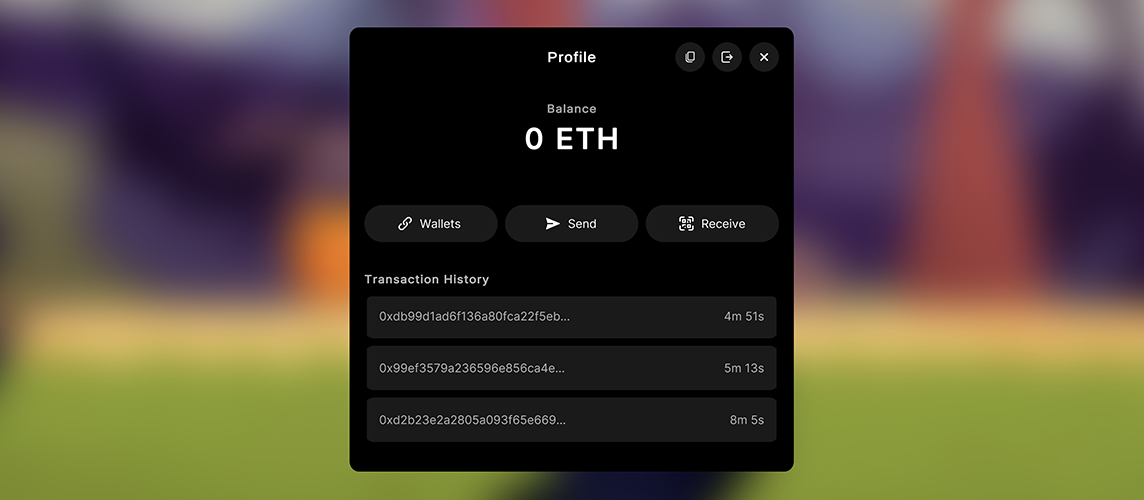
6
Integrate it on your own
Start with the
EmbeddedWalletAdapter to quickstart your integration with a few one-liners and you are ready to go.
When you want to customize your integration, checkout our other docs such as authenticating users or how to send transactions.Configuration Parameters
Url Scheme - You must replace this with a string that is unique to your application. This is very important. Failure to do so will cause unexpected behaviour when signing in with social sign in and it will not work.
StoreSessionPrivateKeyInSecureStorage - Available on select platforms: we have integrated with the platform’s native secure storage system. If enabled, we will store session wallet info (including the private key) in secure storage and automatically attempt to recover the session for the user after closing the app (so they won’t need to login again). With this disabled (default) or on an unsupported platform, the session wallet’s private keys never leave the application’s runtime memory; however, your user will need to sign in again anytime they close the app. The default SequenceLoginWindow Boilerplate (see Bootstrap your Game) will handle this behaviour for you automatically, navigating to the appropriate page.
EnableMultipleAccountsPerEmail - By default, the SDK will only allow users to create one account per email. The account is initially associated with the login method used (email + OTP, PlayFab, Google, etc.); the user can associate additional login methods with their account (more on this in the Authentication section). If EnableMultipleAccountsPerEmail is enabled, users have the option to create multiple accounts per email address (associated with different login methods). While we have enabled this functionality, we, in general, feel this behaviour may be confusing to end-users and recommend integrators keep this option in the default disabled status.