msg.sender is one of the Sequence Relayers wallet addresses. For Sequence Builder standard contracts, this is not a problem when combined with a relayed Transactions API request.
By default, Sequence transactions will be executed sequentially.
- Environment Setup with Express Server: Create a NodeJs based server using the library Express to accept HTTP requests
- Project & Access Key Management: Claim a public access key to interact with the Sequence stack
- Deploy Collectible Contract: Deploy a collectible contract in order to be able to submit transactions to the blockchain to mint tokens to a wallet address
- Construct Sponsored Relayer with Transactions API: Craft a function to be used in an Express route to call the Sequence Transactions API from a sponsored contract
- (Optional) Relay with Wallet Owned Currency: Craft a function to be used in an Express route to call the Sequence Transactions API paid for using a wallet owned currency
- (Optional) Relay Parallel Transactions: Perform transaction batching to send a currency
1
Environment Setup with Express Server
Ensure that Then, clone down the following express template codeAfter the code is locally on your machine, run your server and client with the following command:Contained in the code is a route called You should see the following output:
pnpm (or some other node package manager) is installed with the following command:Express is a minimal and flexible Node.js web application framework that provides a robust set of features for web and mobile applications, which will be used in this guide.
/mint that can be called from the cli for testing.Give a try with this example curl request:2
Project & Access Key Management
First start by following this walkthrough for how to sign up to the Sequence Builder and to learn how to create a project.Then, in order to use the Transactions API, you’ll need to upgrade your Billing to
Developer which can be with this walkthrough.Finally, a Public Access Key is required for the Transactions API, which can be acquired following this walkthough.Finally update the update the .env.example to .env with the following:3
Deploy Collectible Contract
Follow this walkthrough to deploy a collectible contract.Finally, update the First, using the template code provided in step #1, we’ll need to add a few packagesThen, your server will need an EOA wallet that will be able to sign messages. It will be the owner of your server-side Sequence
wallet which will be used to dispatch transactions.To implement the Finally, update the 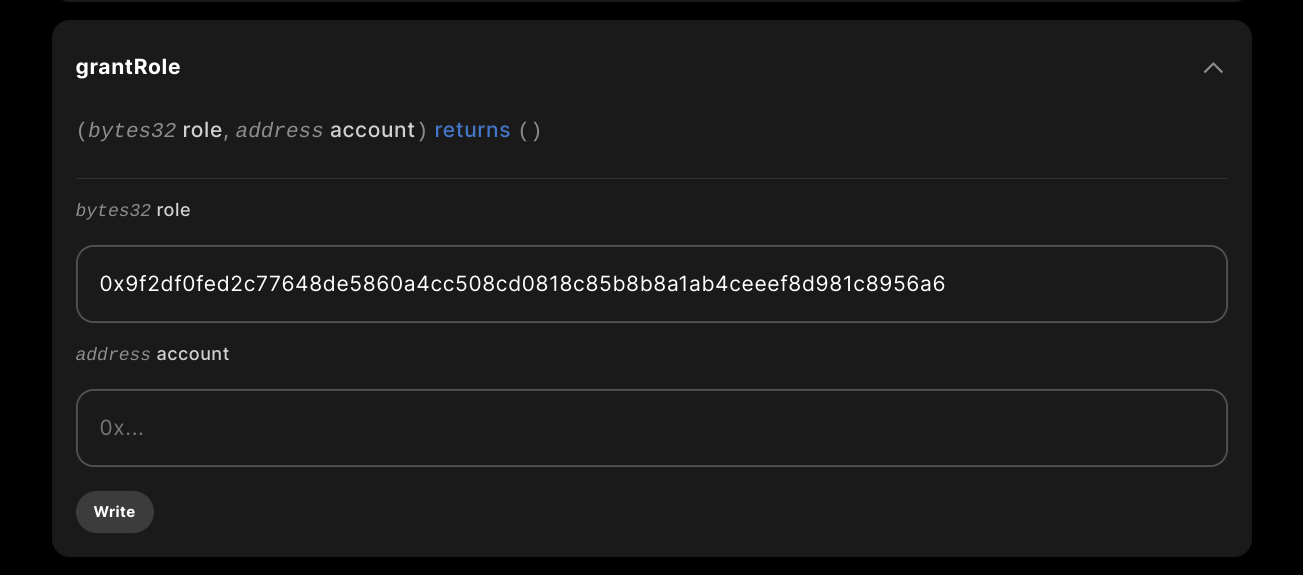
If you’re using a non-testnet and need to sponsor your contract, you can perform this action by following this walkthrough
.env with your deployed collectible contract:Construct Sponsored Relayer with the Transactions API
The full code for this section can be found here
callContract function, include the following code that uses a single signer to relay transactions:.env with a private key for a wallet that can be generated from the following app which is used for demo purposes. For production, we recommend to generate private keys securely locally on your computer via this example script.Then, update the PKEY variable with the key:Grant Minter Role to Relayer Wallet Address
One must update the role access of the contract in the Builder to only receive requests from the minter wallet address.You can do this in Sequence Builder by providingminter permission to your Sequence Wallet Transactions API Address.To do so, open your project, navigate to the Contracts page, select your Linked contracts and under Write Contract tab expand the grantRole method.Complete with the following details:bytes32 role: 0x9f2df0fed2c77648de5860a4cc508cd0818c85b8b8a1ab4ceeef8d981c8956a6address account: <Generated Sequence Transactions API Wallet Address>role string inputted is the result of keccak256("MINTER_ROLE") in solidity or ethers.solidityPackedKeccak256(ethers.toUtf8Bytes("MINTER_ROLE")) in javascriptThis makes it so that only your specific address can mint from the contract, it will error otherwise.Complete the role update by clicking write and sign the sponsored transaction.You application is now ready for you to send a test transaction from the client frontend by signing into your wallet and clicking mint.Give it a try!