- Setup Cloudflare Environment with Wrangler Cli and Deploy a Test
- Deploy, Sponsor & Update Metadata for an ERC1155 Contract with Sequence Builder
- Use EthAuthProof to Prevent EOA DDoS
- Mint a Collectible to Wallet
- HTTPS GET: returns blockNumber
- HTTPS POST(proof, address): mints a collectible & returns transaction hash
1. Setup Cloudflare Environment With Wrangler Cli and Deploy a Test
In order to create the project from scratch, first create a project withmkdir, cd into the project, and run pnpm init to create a package.json.
Next, make sure wrangler cli is installed in your project and set the wrangler keyword as an alias in your local bash session.
"Hello World" Worker application.
wrangler init with the last 2 step answered as No to decline git versioning and deployment.
This will clone down a starter repository that can be used to deploy code to the cloud.
Local API Testing
At any point in the guide, you can use the
At any point in the guide, you can use the
wrangler dev command in the project folder for local testingDeploy Test
Finally,cd into the randomly generated project folder, and perform a wrangler deploy command.
This should print a URL, which you can enter in the browser the URL https://<app>.<account>.workers.dev to view the Hello World! result.
2. Deploy, Sponsor and Update Metadata for an ERC1155 Contract with Sequence Builder
First, follow this guide to deploy a contract. Then, one must update the role access of the contract in the Builder to only receive requests from the minter wallet address, which can be done in 2 steps. You can do this in Sequence Builder by providingminter permission to your Sequence Wallet Transactions API Address.
In order to know what the transactions API address you are working with is, one must first either:
- Have one generated for you using this app by selecting your network, and generating a wallet key with the
generate local walletbutton (for demo purposes only) Recommended: You can also print locally the account address produced from an EOA wallet private key using the following code snippet:
Contracts page, select your Linked contracts and under Write Contract tab expand the grantRole method.
Complete with the following details:
bytes32 role: 0x9f2df0fed2c77648de5860a4cc508cd0818c85b8b8a1ab4ceeef8d981c8956a6
address account: <Generated Sequence Transactions API Wallet Address>
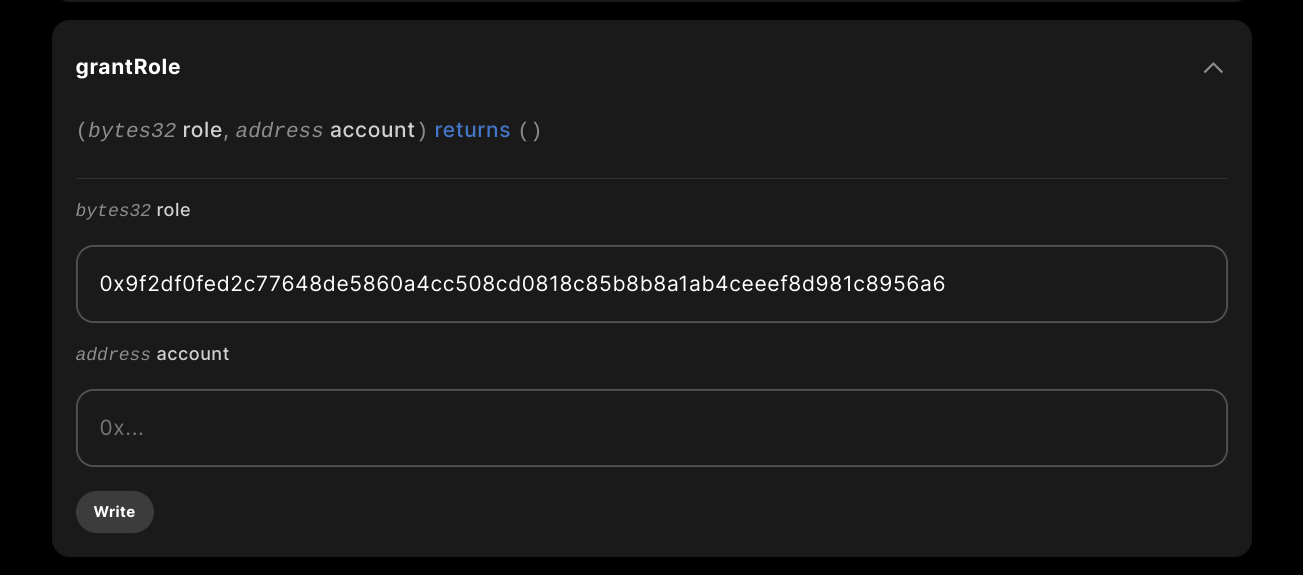
role string inputted is the result of keccak256("MINTER_ROLE") in solidity or ethers.keccak256(ethers.toUtf8Bytes("MINTER_ROLE")) in javascript
This makes it so that only your specific address can mint from the contract, it will error otherwise.
Complete the role update by clicking write and sign the sponsored transaction.
Update Metadata
Next, you’ll need to update the metadata with your media or assets for your contract, which can be done by following this guide.Contract Sponsoring
Finally, in order to sponsor the contract follow this guide to sponsor a contract.3. Use EthAuthProof to prevent EOA DDoS
Now that we have a contract deployed, we can return to the cloudflare worker directory and project, and installethers and 0xsequence to get access to sequence APIs in order to perform a proof validation that the request is coming from a trusted source, a sequence wallet.
proofString and address are valid, as well as the environment variables.
The code scaffold placed into src/index.ts would look like this, with callContract and getBlockNumber mocked out, using the mentioned verification step of calling verify before any contract call.
Add Cloudflare Environment Variables
Then, pass in the environment variables for your build by updating the[vars] section in your wrangler.toml.
Implement Window Object in Wrangler Template
It should be noted, if you try to deploy this you’ll get a missingwindow object required by the web3 modules.
To prevent this, add the following line to your wrangler.toml file to make the environment compatible.
Testing the Deploy
You can now redeploy usingwrangler deploy
And perform a curl request to test your endpoint like such:
Using the ETHAuthProof Viewer dapp
When you arrive on the page, the first thing you should do is select a network. Then you have an option to either connect and generate the Proof, or, generate a local wallet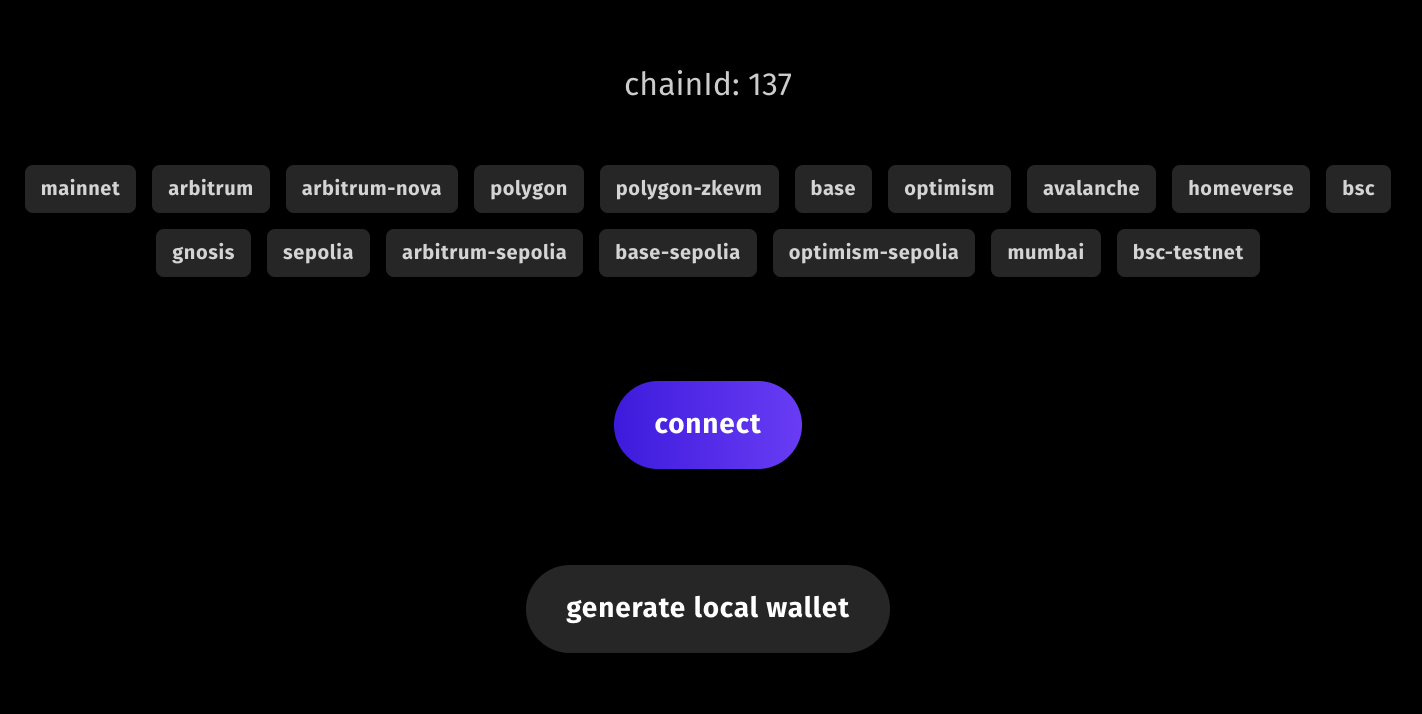
connect button and then copy to clipboard.
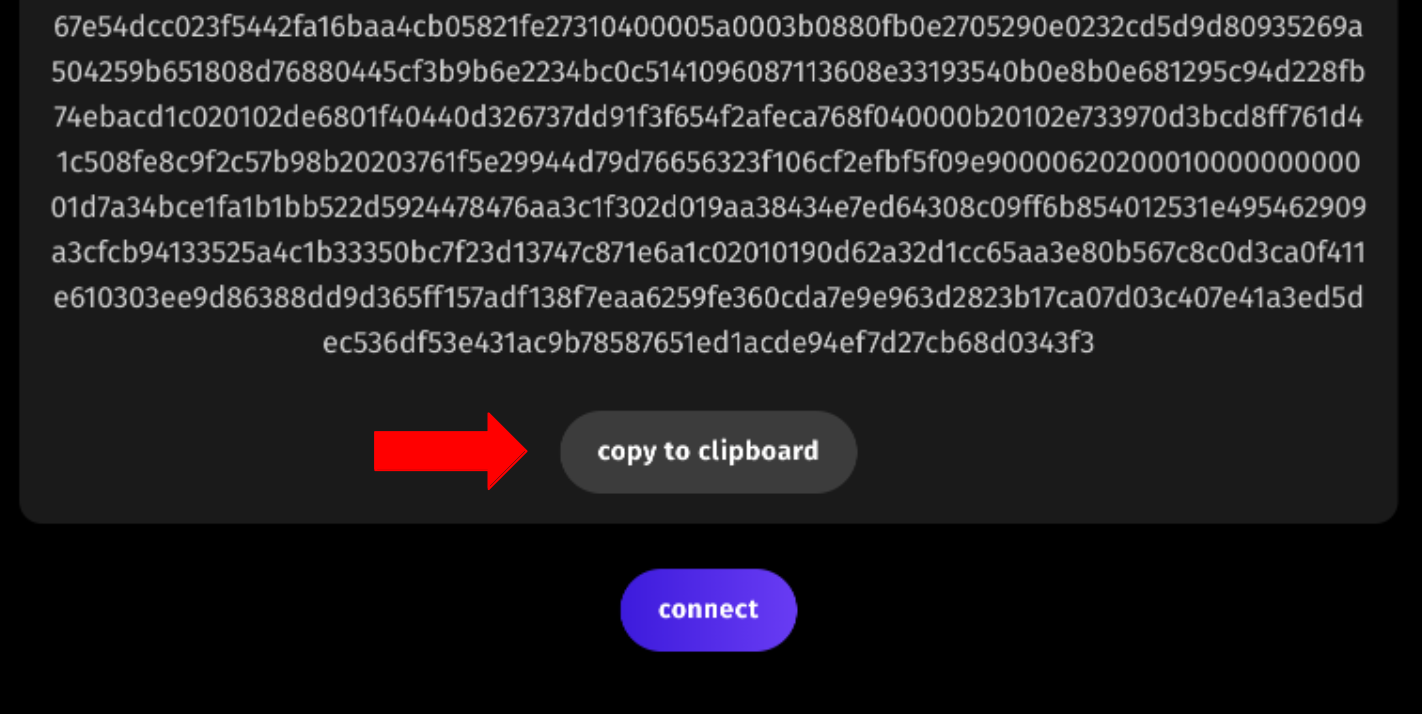
ETHAuthProof with anyone as this means someone can prove ownership of your wallet and interact with specific APIs.
Finally, replace the url with your app from this step, the <some_proof> with the generated value copied from the viewer app, and <some_address> with your wallet address and it should return just the mocked 0x string.
4. Mint a Collectible to Wallet
Finally, to deploy and mint a collectible from the sponsored contract address, we install the following packagescallContract and getBlockNumber methods previously mocked out as follows: