Skip to content

Treasure Chests with AI Minting

Time to complete: 50-60 minutes

In this guide, we will create a web3 application built in React, leveraging tools from the Sequence Stack to mint AI generated loot from treasure chests using an Embedded Wallet for authentication, and Cloudflare workers for easy, no-confirmation transactions.

We've wrapped this in a dungeon crawler game to showcase these features in a game environment that you can play and earn rewards.

The tools will enable you to perform:

  1. Sequence Builder Console Signup & Project Creation: Create a project with the Builder
  2. Access Key Management: Claim a public, secret access key, and waas config key to interact with the Sequence stack
  3. Embedded Wallet Integration: Integrate an Embedded Wallet into the application
  4. Deploy a Contract & Sponsor gas: Deploy an items contract and sponsor gas
  5. Deploy a Cloudflare Worker: Deploy a Cloudflare worker for gasless and no-confirmation transactions
  6. Generating AI Prompts & Images: Craft AI prompts from an API and generate images to be uploaded
  7. Store Media to Sequence Metadata service: Upload collection and token metadata to Sequence
  8. Securing your Cloudflare Worker: Prevent outside requests to your Cloudflare worker by restricting the referrer URL
  9. (Optional) Native Mint Restriction Per Wallet: Restrict daily mints per wallet

1. Sequence Builder Console Signup & Project Creation

First start by following this walkthrough for how to sign up to the Sequence Builder Console and to learn how to create a project.

To use certain features, like Gas Sponsoring and the use of the Transactions API, you'll need to upgrade your project plan to Developer using this walkthrough

2. Access Key Management

Now that you have a project, you'll need to acquire 3 different Access Keys for your project in order to authenticate your application with the Sequence Stack:

  1. Waas Config Key used for the Embedded Wallet, which can be learned about here
  2. Public Access Key used for the Embedded Wallet & Transactions API, which can be done here
  3. Secret Access Key used for the Metadata Service, with the following steps

Secret Access Key Creation

Access Settings

First start by accessing settings, and selecting the API Keys
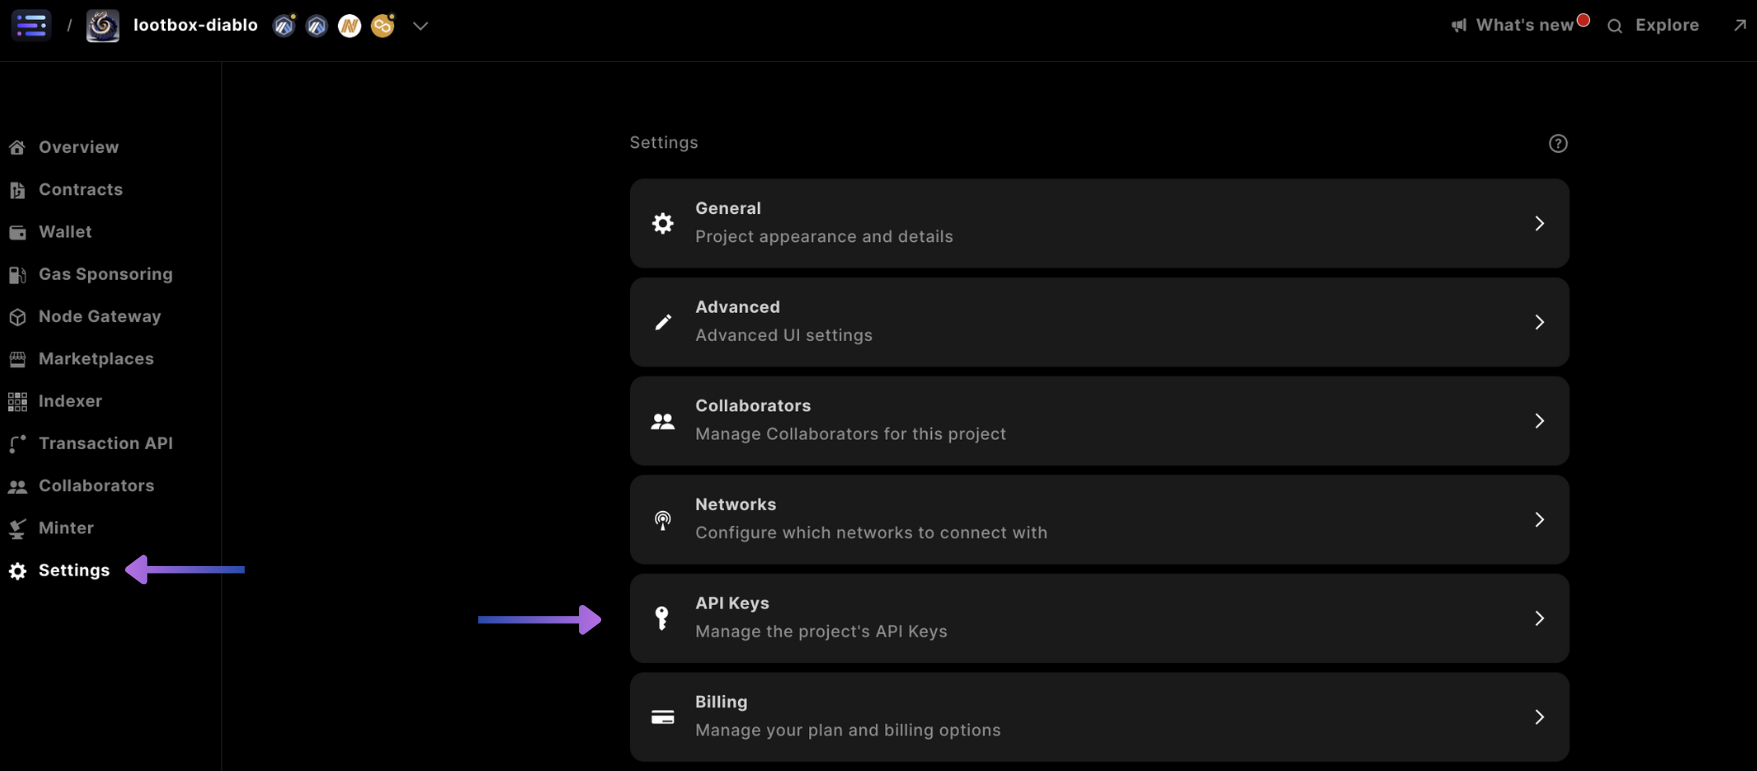
builder settings access keys

Add Service Account

Scroll down and select
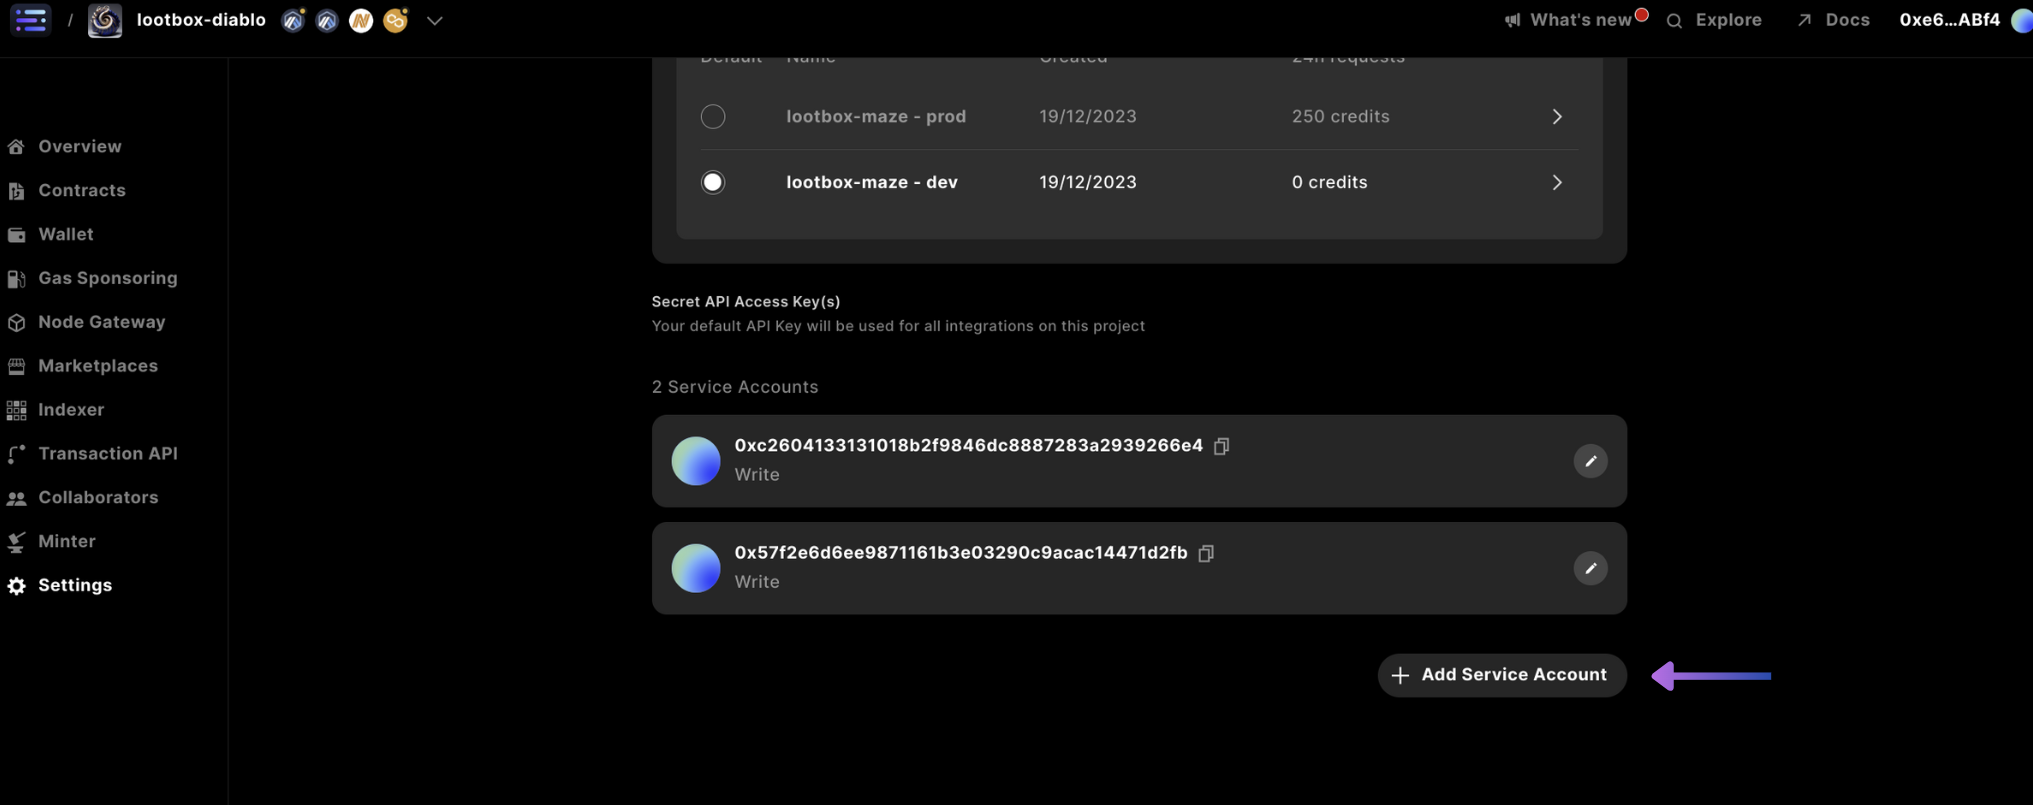
 + Add Service Account

builder settings add service account

Select Write Permission

Then change the access to
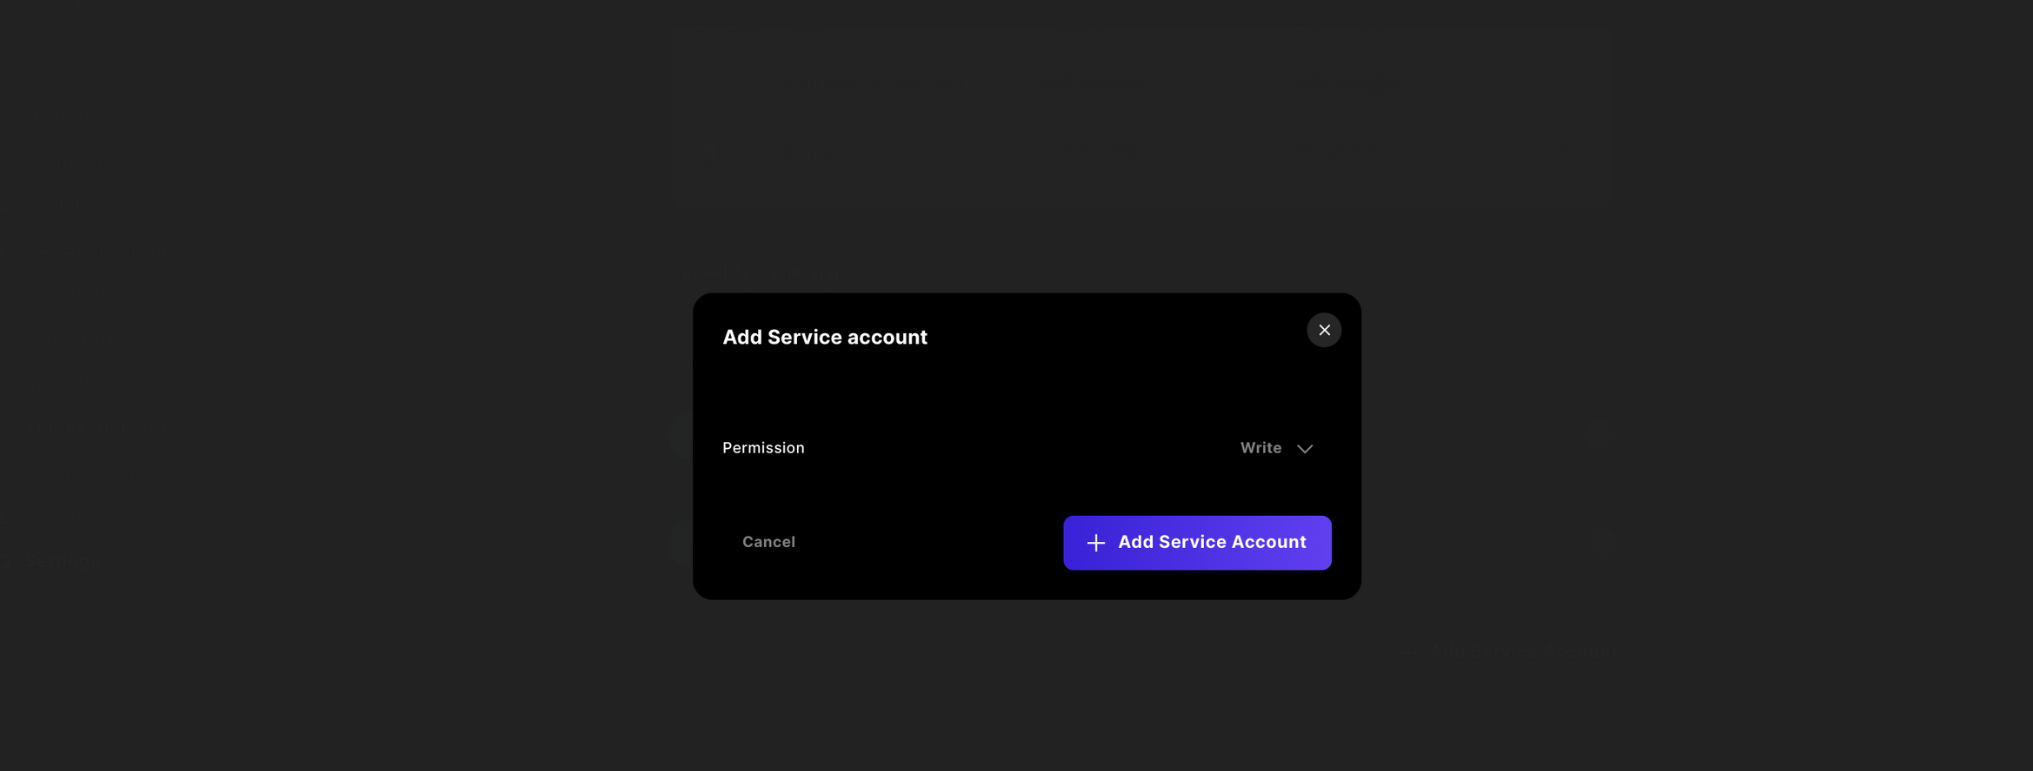
 Write and Confirm

builder settings add service account

Finally copy the key and store it in a safe location, as you will not have access to this in the future from the Builder Console.

3. Embedded Wallet Integration

We'll start from scratch building up the project with the necessary pieces, to enable the use of a Sequence Embedded Wallet which enables users to be onboarded to your application using web2 authentication providers.

First start by creating a project folder with mkdir <project>, then cd <project> and create a vite project using React:

pnpm create vite
 
# or 
yarn create vite
 
# or 
npm create vite

Next, we'll install the correct Wallet-as-a-Service (Waas) package to use the Embedded Wallet:

pnpm install @0xsequence/waas
 
# or
npm install @0xsequence/waas
 
# or
yarn add @0xsequence/waas

For all of the new files created in the follows steps, have them be created in /src

First, create a file called something like SequenceEmbeddedWallet.ts with the following initialization code:

import { SequenceWaaS } from '@0xsequence/waas'
 
const sequence = new SequenceWaaS({
    projectAccessKey: import.meta.env.VITE_PROJECT_ACCESS_KEY!,
    waasConfigKey:  import.meta.env.VITE_WAAS_CONFIG_KEY!,
    network: 'arbitrum-nova'
})
 
export default sequence;

Then create another file called useSessionHash.ts that generates a session hash from the SDK unique to the user:

import sequence from './SequenceEmbeddedWallet.ts'
import { useEffect, useState } from "react";
 
export function useSessionHash() {
    const [sessionHash, setSessionHash] = useState("")
    const [error, setError] = useState<any>(undefined)
 
    useEffect(() => {
        const handler = async () => {
            try {
                setSessionHash(await sequence.getSessionHash())
            } catch (error) {
                console.error(error)
                setError(error)
            }
        }
        handler()
        return sequence.onSessionStateChanged(handler)
    }, [setSessionHash, setError])
 
    return {
        sessionHash,
        error,
        loading: !!sessionHash,
    }
}

Finally, to implement Google auth, you will need the GoogleOAuthProvider to wrap your application. The following command will install it and Apple Auth sign in, which will be used later:

pnpm i @react-oauth/google react-apple-signin-auth

Then, the starter code is implemented with the previous imported files, in the following code within the main.tsx file:

import React from 'react'
import ReactDOM from 'react-dom/client'
import './index.css'
import App from './App.tsx'
import { useSessionHash } from "./useSessionHash.ts";
 
import { ThemeProvider } from '@0xsequence/design-system'
import { GoogleOAuthProvider } from '@react-oauth/google'
 
 
function Dapp() {
  const { sessionHash } = useSessionHash()
 
  return (
	<GoogleOAuthProvider clientId="<GOOGLE_CLIENT_ID>" nonce={sessionHash} key={sessionHash}>
		<App />
	</GoogleOAuthProvider>
  );
}
 
ReactDOM.createRoot(document.getElementById('root')!).render(
  <React.StrictMode>
    <Dapp />
  </React.StrictMode>
)

Once your main.tsx is ready, lets create the login buttons, which will look like this:

embedded wallet social login

In 
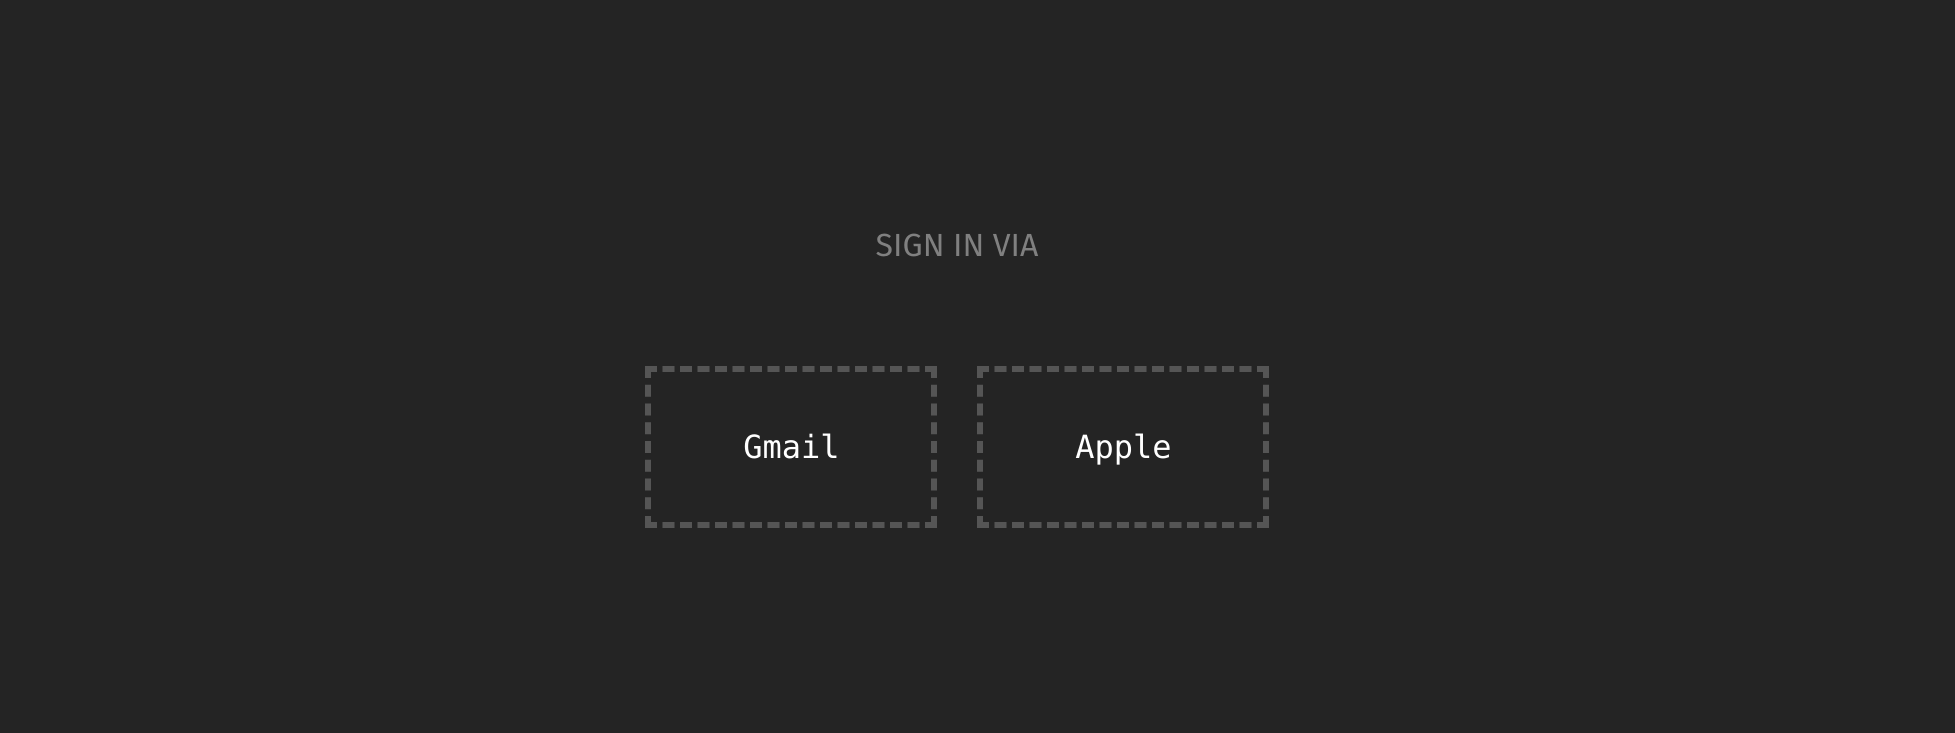
App.tsx use the following code that checks to see if a user is connected and presents a wallet address based on the signed in user, with the various social auth buttons and handlers:

import { useState, useEffect } from 'react'
import './App.css'
import sequence from './SequenceEmbeddedWallet'
import { useSessionHash } from './useSessionHash'
import { CredentialResponse, GoogleLogin } from '@react-oauth/google';
import AppleSignin from 'react-apple-signin-auth';
import playImage from './assets/play.svg'
 
function LoginScreen () {
  const { sessionHash } = useSessionHash()
 
  const [wallet, setWallet] = useState<any>(null)
 
  const handleGoogleLogin = async (tokenResponse: CredentialResponse) => {
    const res = await sequence.signIn({
      idToken: tokenResponse.credential! // inputted id credential from google
    }, "template")
    setWallet(res.wallet)
  }
 
  const handleAppleLogin = async (response: any) => {
    const res = await sequence.signIn({
      idToken: response.authorization.id_token! // inputted id token from apple
    }, "template")
 
    setWallet(res.wallet)
  }
 
  // checks to see if there is a logged in user
  useEffect(() => {
    setTimeout(async () => {
      if(await sequence.isSignedIn()){
        setWallet(await sequence.getAddress())
      }
    }, 0)
  }, [])
 
  useEffect(() => {
 
  }, [wallet])
 
  const signOut = async () => {
    try {
      const sessions = await sequence.listSessions()
 
      for(let i = 0; i < sessions.length; i++){
        await sequence.dropSession({ sessionId: sessions[i].id })
      }
    }catch(err){
      console.log(err)
    }
  }
 
  return (
    <>
      {
        !wallet 
      ? 
        <>
          <span className='sign-in-via'>SIGN IN VIA</span>
          <br/>
          <br/>
          <br/>
          <div className="login-container">
          <div className='dashed-box-google'>
              <p className='content'>
                <div className='gmail-login' style={{overflow: 'hidden', opacity: '0', width: '90px', position: 'absolute', zIndex: 1, height: '100px'}}>
                  <GoogleLogin 
                    nonce={sessionHash}
                    key={sessionHash}
                    onSuccess={handleGoogleLogin} shape="circle" width={230} />
                  </div>
                  <span className='gmail-login'>Gmail</span>
              </p>
          </div>
          <div className='dashed-box-apple'>
            <p className='content' 
            style={{position:'relative'}}>
                <span className='apple-login'>
                  {/* @ts-ignore */}
                  <AppleSignin
                    key={sessionHash}
                    authOptions={{
                      clientId: '<replce with com. bundle id>',
                      scope: 'openid email',
                      redirectURI: '<must be a deployed URL>',
                      usePopup: true,
                      nonce: sessionHash
                    }}
                    onError={(error: any) => console.error(error)}
                    onSuccess={handleAppleLogin}
                  />Apple
                </span>
            </p>
            </div>
          </div>
        </>
      : 
        <>
          <div className="login-container">
          <p style={{cursor: 'pointer'}} onClick={() =>signOut()}>sign out</p>
          &nbsp;&nbsp;&nbsp;
          <span >{wallet}</span>
          </div>
        </>
      }
    </>
  )
}
 
function App() {
  return (
    <LoginScreen/>
  )
}
 
export default App

Then, include a .env file in the root of your project, adding it to .gitignore, and updating the file with the following values from the Sequence Builder:

VITE_PROJECT_ACCESS_KEY=
VITE_WAAS_CONFIG_KEY=

Run your code with the following command in the root folder and give it a try:

pnpm run dev

4. Deploy A Contract & Sponsor Gas

We will deploy an token contract so we are able to link the AI-generated images to the metadata for any given token. When deploying your contract, the recommended approach is to use an ERC1155 over an ERC721. The benefits of using an ERC1155

  • Semi-Fungible: which is ideal for game assets that can have multiple copies of the same underlying item.
  • Gas Savings: for projects that require multiple tokens as a single ERC1155 can hold many different varieties.

In terms of the gas savings benefit, instead of deploying a new contract for each token type, a single ERC1155 token contract can hold the entire system state, reducing deployment costs and complexity.

To deploy a contract, you can follow this guide to deploy your ERC1155, and update your wrangler.toml with the CONTRACT_ADDRESS.

Then, for the minting function to work programmatically so that transactions are gasless for your relayer, you will need to make the Transactions API draw from your account credits on your upgraded billing plan by sponsoring your deployed smart contract address.

To allow the Transactions API to relay transactions without a fee, sponsor gas by following this guide for the deployed contract.

5. Deploy Transactions API on a Cloudflare Worker

Following the previous step, the Sequence Transactions API can be implemented on a serverless Cloudflare worker so a game or app user interaction is seamless without a confirmation signature or gas payment. In this case, the worker will leverage the Sequence Transactions API to mint tokens to the user's address. You'll also benefit from not having to be worried about transaction speed, throughput or re-orgs, and experience automatic scaling with Cloudflare.

Minting A Token

If you want to learn how to deploy a Cloudflare Worker from scratch, you can follow this guide on minting a serverless NFT minting service with your deployed ERC1155 contract or simply clone the template specific to this guide.

Once setup, we will call the endpoint of the cloudflare instance to mint our NFTs in a later step.

6. Generating AI Prompts & Images

When beginning your journey into AI image generation, you will require a source of AI model prompts to produce media. For this guide and demo, we've sourced prompts from the items contained in the Diablo game.

In the template, we've included code to call an already deployed API and code to parse the response.

With this API, we will showcase how to generate images using the prompt from the deployed Diablo API within the generate function within the Cloudflare worker:

const generate = async () => {
	const url = 'https://flask-production-2641.up.railway.app/'; // External API endpoint
	
	const init = {
		method: 'GET',
		headers: {
		'Content-Type': 'application/json',
		},
	};
 
	const response = await fetch(url, init); // Fetch data from external API
	const data: any= await response.json(); 
	const defend = Math.random() >= 0.5 ? true : false
	const attributes = []
	// parse the data to create the attributes
	
	return {loot: data[defend ? 'armor' : 'weapon'], attributes: attributes}
}

Then complete the getInferenceWithItem function in order to get the instantiated inference reference from the Scenario API and pass in a prompt which is the generated loot name and type, as well as some additional parameters model parameters, which can be customized via the Scenario API docs:

const getInferenceWithItem = async (env: Env, prompt: any) => {
	try {
		const res: any = await fetch(`https://api.cloud.scenario.com/v1/models/${env.SCENARIO_MODEL_ID}/inferences`, {
			method: 'POST',
			headers: {
				'Authorization': `Basic ${env.SCENARIO_API_KEY}`,
				'accept': 'application/json',
				'content-type': 'application/json'
			},
			body: JSON.stringify({
						"parameters": {
						"numSamples": 1,
						"qualityBoostScale": 4,
						"qualityBoost": false,
						"type": "txt2img",
						"disableMerging": false,
						"hideResults": false,
						"referenceAdain": false,
						"intermediateImages": false,
						"scheduler": 'EulerDiscreteScheduler',
						"referenceAttn": false,
						"prompt": prompt + ' single object on black background no people'
					}
				})
		})
 
		const data = await res.json()
		console.log(data)
		return {inferenceId: data.inference.id}
	}catch(err){
		console.log(err)
		return {inferenceId: null, err: "ERROR"}
	}
}

Then we simply implement the above functions in the react code:

	...
	if(mint){
		...
	} else {
		const loot = await generate()
		const inferenceId = await getInferenceWithItem(env, loot.loot.name + " " + loot.loot.type)
		...
	}
	...

Once we have the inferenceId we can call poll the inference status and return when complete, signified by the succeeded status descriptor:

const getInferenceObjectWithPolling = async (env: Env, id: any) => {
	console.log('getting inference status for: ', id.inferenceId)
	const inferenceId = id.inferenceId
 
	const headers = {
		'Authorization': `Basic ${env.SCENARIO_API_KEY}`,
		'accept': 'application/json',
		'content-type': 'application/json'
	}
 
	// Function to poll the inference status
	const pollInferenceStatus = async () => {
		let status = '';
		let inferenceData: any = null;
		while (!['succeeded', 'failed'].includes(status)) {
			// Fetch the inference details
			try {
				const inferenceResponse = await fetch(`https://api.cloud.scenario.com/v1/models/${env.SCENARIO_MODEL_ID}/inferences/${inferenceId}`, {
					method: 'GET',
					headers
				})
				if (inferenceResponse.ok) {
					console.log(inferenceResponse.statusText)
					inferenceData = await inferenceResponse.json();
				}
			}catch(err){
				console.log(err)
			}
			status = inferenceData.inference.status;
			console.log(`Inference status: ${status}`);
 
			// Wait for a certain interval before polling again
			await new Promise(resolve => setTimeout(resolve, 5000)); // Polling every 5 seconds
		}
		// Handle the final status
		if (status === 'succeeded') {
			console.log('Inference succeeded!');
			console.log(inferenceData); // Print inference data
			return inferenceData
		} else {
			console.log('Inference failed!');
			console.log(inferenceData); // Print inference data
			throw new Error("Scenario API Failed")
		}
	};
 
	// Start polling the inference status
	return await pollInferenceStatus();
}

Again, we add the above function to the react code and pass the inferenceId. When you receive the response, you can obtain the image url with resObject.inference.images[0].url:

	...
	if(mint){
		...
	} else {
		const loot = await generate()
		const inferenceId = await getInferenceWithItem(env, loot.loot.name + " " + loot.loot.type)
		const resObject = await getInferenceObjectWithPolling(env, inferenceId)
		console.log(resObject.inference.images[0].url) // prints image url
		...
	}
	...

7. Store Media to Sequence Metadata Service

With our media url from the Scenario API in hand, we can move onto storing the asset to the Sequence Metadata Service. This enables you to link the AI-generated image to the specific token metadata - all through REST-API calls.

Each Dungeon Minter treasure chest reward follows the same process where metadata is first stored using the Sequence Metadata API, the url and the randomly generated tokenID (which allows for parallel requests) is returned to the client. The user then consents, after collectible inspection, to mint the token where the tokenID and the user's address passed back to the worker created in Step 5.

Implementation

Complete and integrate this guide in order to build your serverless Media Service leveraging the Sequence Metadata API that uses Cloudflare workers or simply clone our cloudflare template for this guide.

Once complete, pass the stored media tokenID and url to the frontend to be rendered, to allow a user to mint after first viewing what they're minting:

	const randomTokenIDSpace = ethers.BigNumber.from(ethers.utils.hexlify(ethers.utils.randomBytes(20)))
	...
	const jsonCreateAsset = await collectionsService.createAsset({...})
	...
	const response = await uploadAsset(env, projectID, collectionID, jsonCreateAsset.asset.id, String(randomTokenIDSpace), imageUrl)
	return new Response(JSON.stringify({tokenID: String(randomTokenIDSpace), image: response.url }), { status: 200 });

8. Minting with your Cloudflare Worker

The last step is to finally mint the corresponding tokenId that you linked the metadata to previously to the user's address. Here we post a request to the Cloudflare Worker we created in Step 5 which will mint the token to the user.

const data = {
	address: address,
	mint: true,
	tokenID: tokenID
};
 
const res = await fetch(ENDPOINT, {
	method: 'POST',
	headers: {
	'Content-Type': 'application/json',
	},
	body: JSON.stringify(data),
})
 
const json = await res.json()

One important note is that you will likely want to ensure that your Cloudflare workers only process requests from a certain frontend origin, you can simply check the request.headers for the Referrer value and compare it against the CLIENT_URL in the wrangler.toml:

async function handleRequest(request: any, env: Env, ctx: ExecutionContext) {
	const originUrl = new URL(request.url);
	const referer = request.headers.get('Referer');
 
	if(referer.toString() != env.CLIENT_URL){
		return new Response('Bad Origin', { status: 500 }); // Handle errors
	} 
 
	...
}

Conclusion

Let's recap what we've done during this tutorial:

We've covered how to create a Sequence project and obtain access to our suite of APIs. We've deployed and setup an embedded wallet to ensure smooth gameplay for an example dungeon crawler game. Additionally, we've used the Sequence platform to deploy a contract, sponsor gas for that contract to simplify the user experience. We also deployed a serverless NFT minter using the Sequence Transaction API which enables your game to scale to millions of players and handle complex blockchain interactions like reorgs. Furthermore, we've leveraged the scenario.gg API to dynamically create game assets as rewards for players. These images are then linked to the metadata of an NFT using the Sequence Metadata API. You should now understand how to mint AI art for your Scenario.gg and Sequence powered game.

It's clear how many components go into creating a scalable, secure, and fun blockchain-enabled game, but the Sequence platform with Scenario has you covered.

Lastly, you can see all the steps above incorporated in a complete experience with our dungeon crawler game to brave the maze and get your own dungeon loot.

Happy building!

9. (Optional) Native Mint Restriction Per Wallet

As an option to prevent overuse of the treasure chest minting from specific wallets, a parameter called DAILY_MINT_RESTRICTION can be set in the wrangler.toml as a maximum mint allowance per day. And, if you feel it's necessary to add an ADMIN to your protocol to be able to mint an infinite amount.

These features can be implemented in the code with the following steps:

async function handleRequest(request: any, env: Env, ctx: ExecutionContext) {
	... 
	const payload = await request.json()
	const { address, tokenID }: any = payload
 
	// check for admin
	if(address.toLowerCase() != env.ADMIN.toLowerCase() && !await hasDailyMintAllowance(env, address)){
		// check for daily mint allowance
		return new Response(JSON.stringify({limitExceeded: true}), { status: 400 })
	}
	...
}

Where hasDailyMintAllowance is broken down into 2 functions:

  • fullPaginationDay of transactions of the users address
  • mintCount that corresponds to the from being the 0x address

Full Pagination Of Indexer For A Day

In order to use the Sequence Indexer, we'll need to pnpm install @0xsequence/indexer

Then, to implement we use a while loop that gets the first batch of transactions and the page.after value from the indexer, and continuously checks if the timestamp is less than 24 hours appending to a temporary array for each pass. This ensures we get all of the available transactions:

import { SequenceIndexer } from '@0xsequence/indexer'
 
const isLessThan24Hours = (isoDate: string) => {
    const dateProvided: any = new Date(isoDate);
    const currentDate: any = new Date();
    const twentyFourHours = 24 * 60 * 60 * 1000; // 24 hours in milliseconds
 
    // Calculate the difference in milliseconds
    const difference = currentDate - dateProvided;
 
    // Check if the difference is less than 24 hours
    return difference < twentyFourHours && difference > 0;
}
 
const fullPaginationDay = async (env: Env, address: string) => {
    const txs: any = []
	const indexer = new SequenceIndexer(`https://{env.CHAIN_HANDLE}-indexer.sequence.app`, env.PROJECT_ACCESS_KEY)
 
    const filter = {
        accountAddress: address,
    };
 
    // query Sequence Indexer for all token transaction history
	let txHistory: any
	let firstLoop = true;
    let finished = true;
    // if there are more transactions to log, proceed to paginate
    while(firstLoop || (!finished && txHistory.page.more)){  
		if(firstLoop){
			firstLoop = false
			txHistory = await indexer.getTransactionHistory({
				filter: filter,
				page: { pageSize: 50 }
			})
 
			for(let i = 0; i < txHistory.transactions.length; i++){
				if(!isLessThan24Hours(txHistory.transactions[i].timestamp)){
					finished = true
				}
				txs.push(txHistory.transactions[i])
			}
		}
        txHistory = await indexer.getTransactionHistory({
            filter: filter,
            page: { 
                pageSize: 50, 
                // use the after cursor from the previous indexer call
                after: txHistory!.page!.after! 
            }
        })
		for(let i = 0; i < txHistory.transactions.length; i++){
			if(!isLessThan24Hours(txHistory.transactions[i].timestamp)){
				finished = true
			}
			txs.push(txHistory.transactions[i])
		}
    }
 
    return txs
}

Mint Count For A Day

All collectibles minted from the ERC721 and ERC1155 standard Sequence contracts are from the 0x address:

const mintCount = (env: Env, txs: any) => {
	let count = 0
	for(let i = 0; i < txs.length; i++){
		if(
			txs[i].transfers[0].from == '0x0000000000000000000000000000000000000000' 
			&& txs[i].transfers[0].contractAddress == env.CONTRACT_ADDRESS.toLowerCase()
		) count++
	}
	return count
}

Has Daily Mint Allowance

const hasDailyMintAllowance = async (env: Env, address: string) => {
	const txs = await fullPaginationDay(env, address)
	const count = mintCount(env, txs)
	return count < env.DAILY_MINT_RESTRICTION
}