Create App Identifier
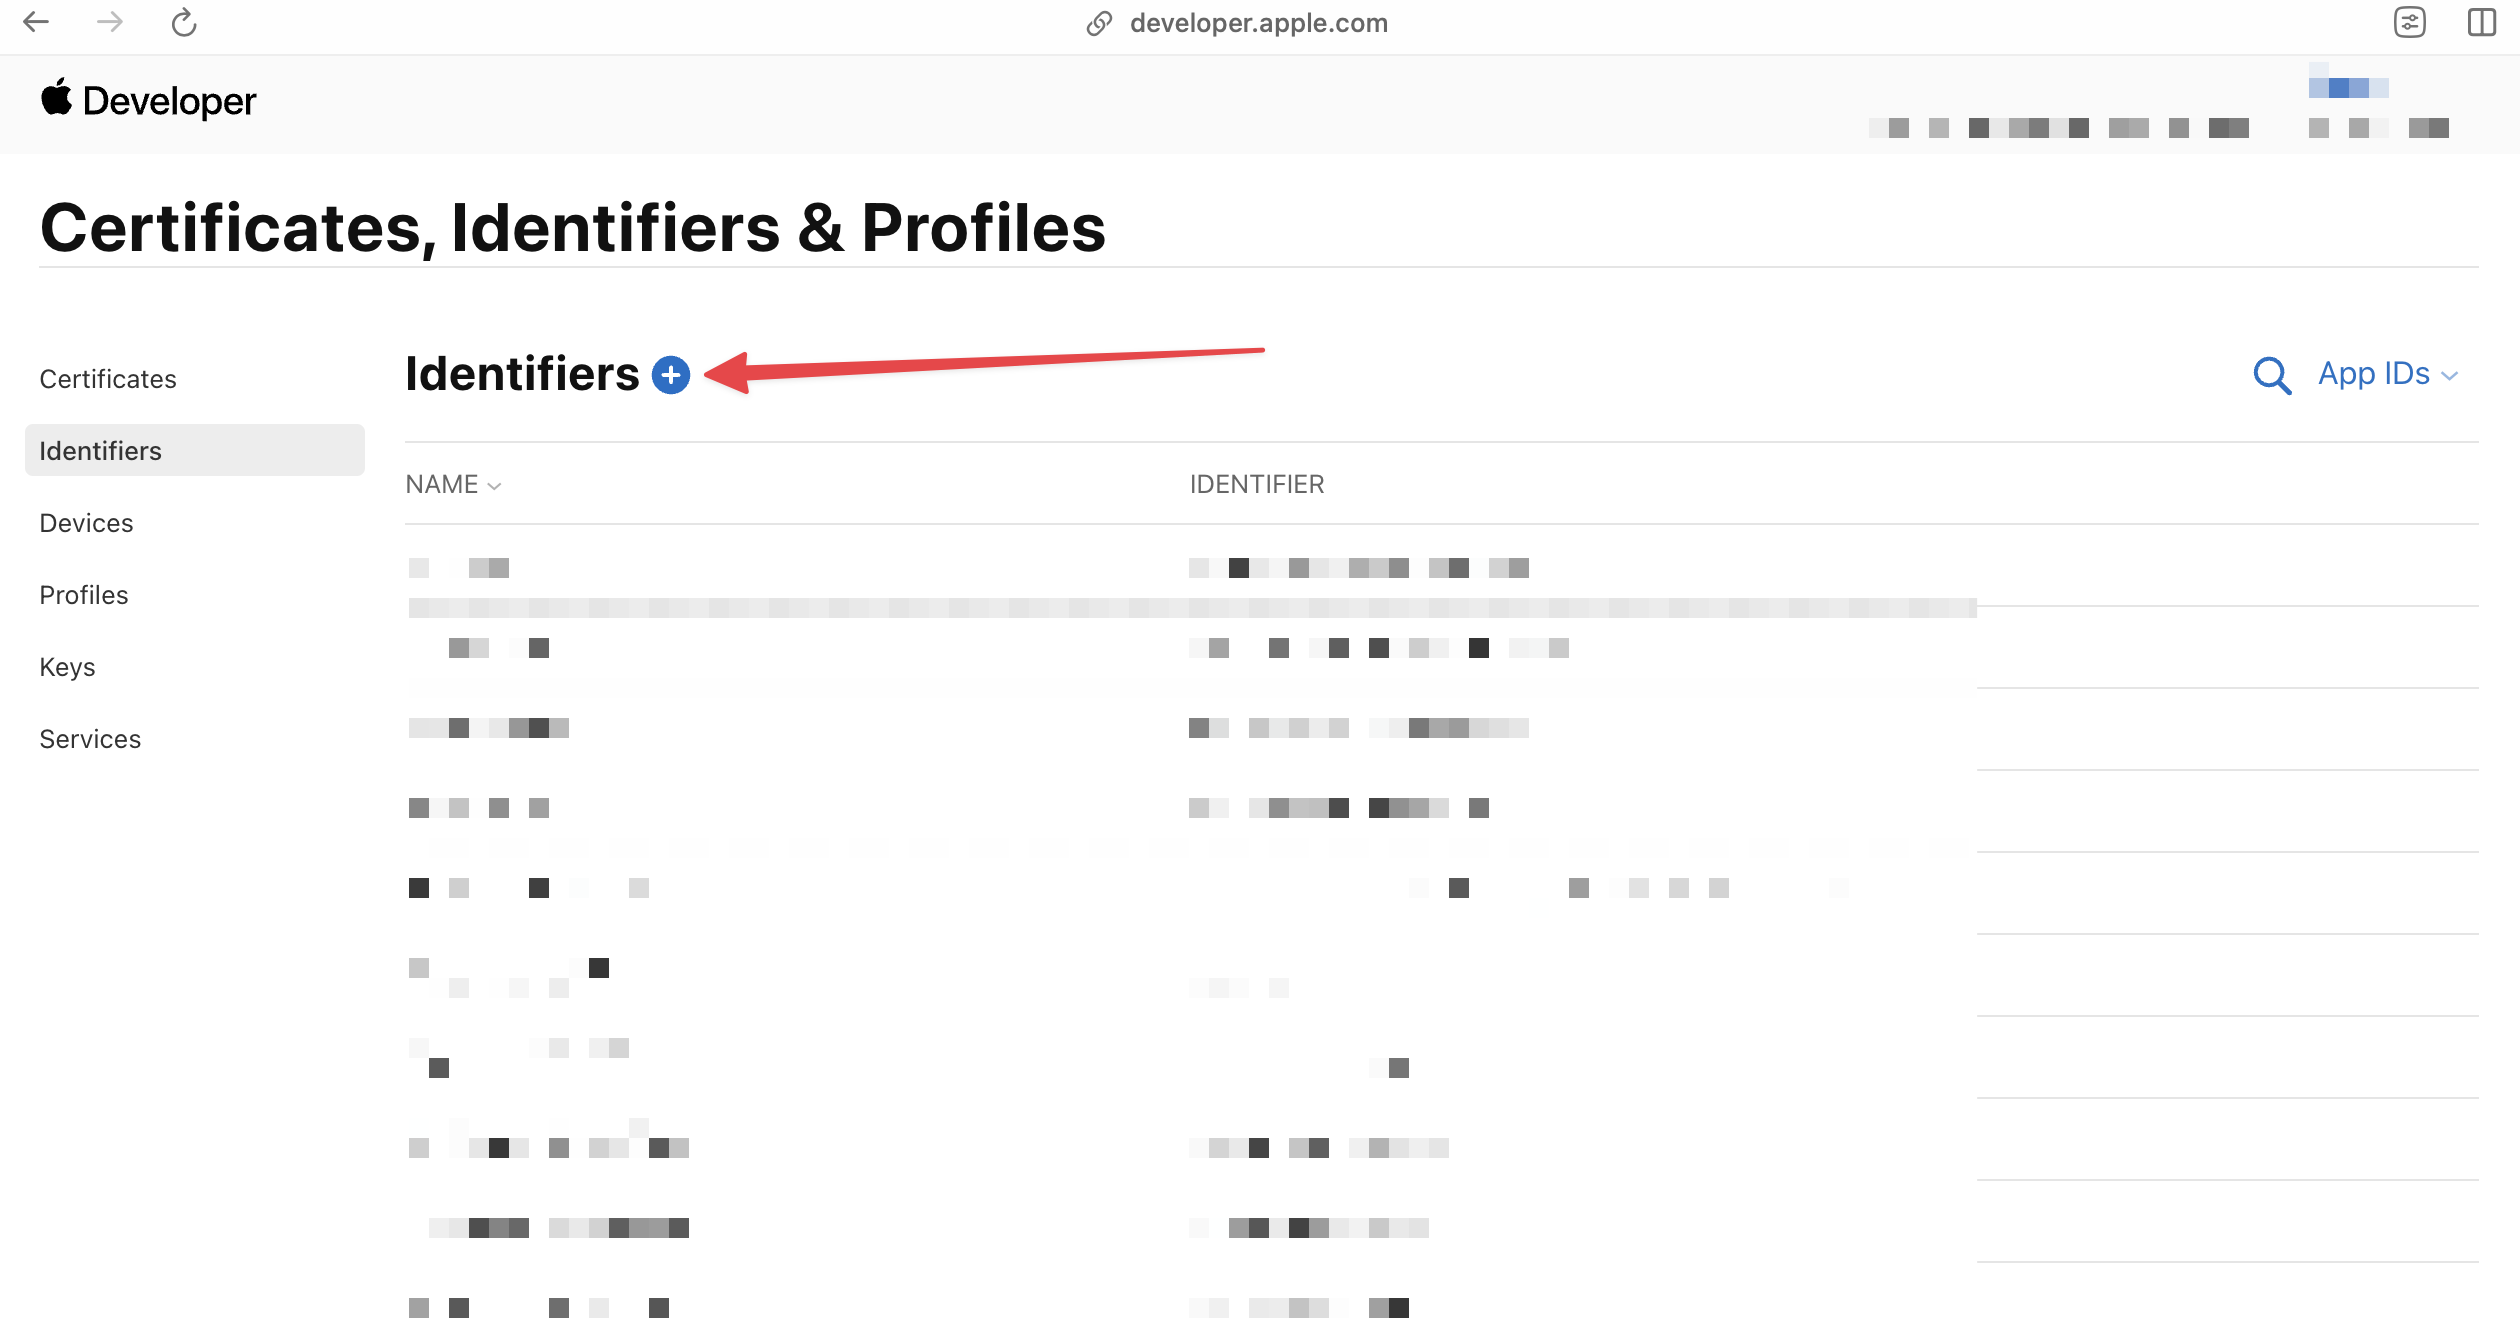
To start with, access the Apple Developer Console and navigate to Certificates > Identifiers. Once there, click on the+ button to create a new identifier.
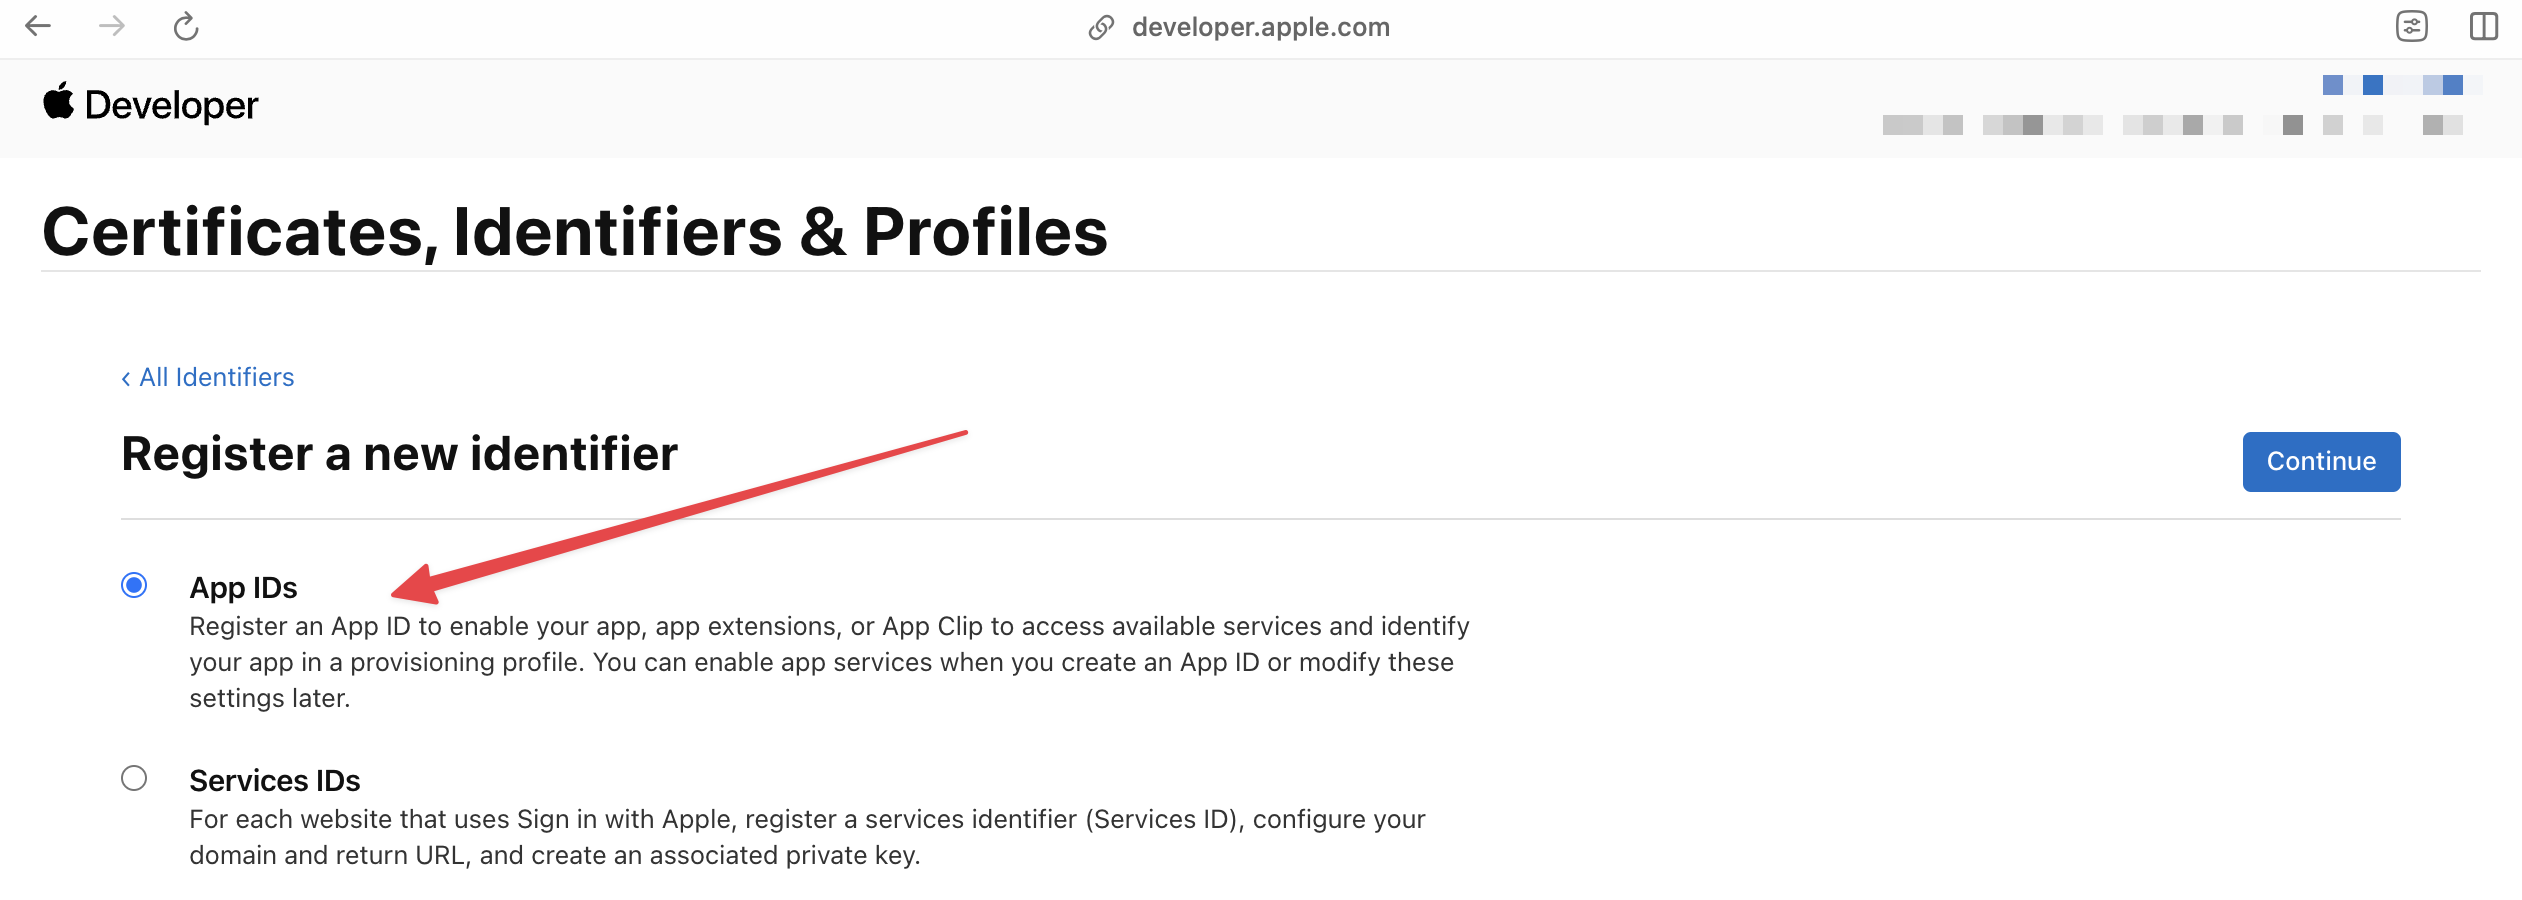
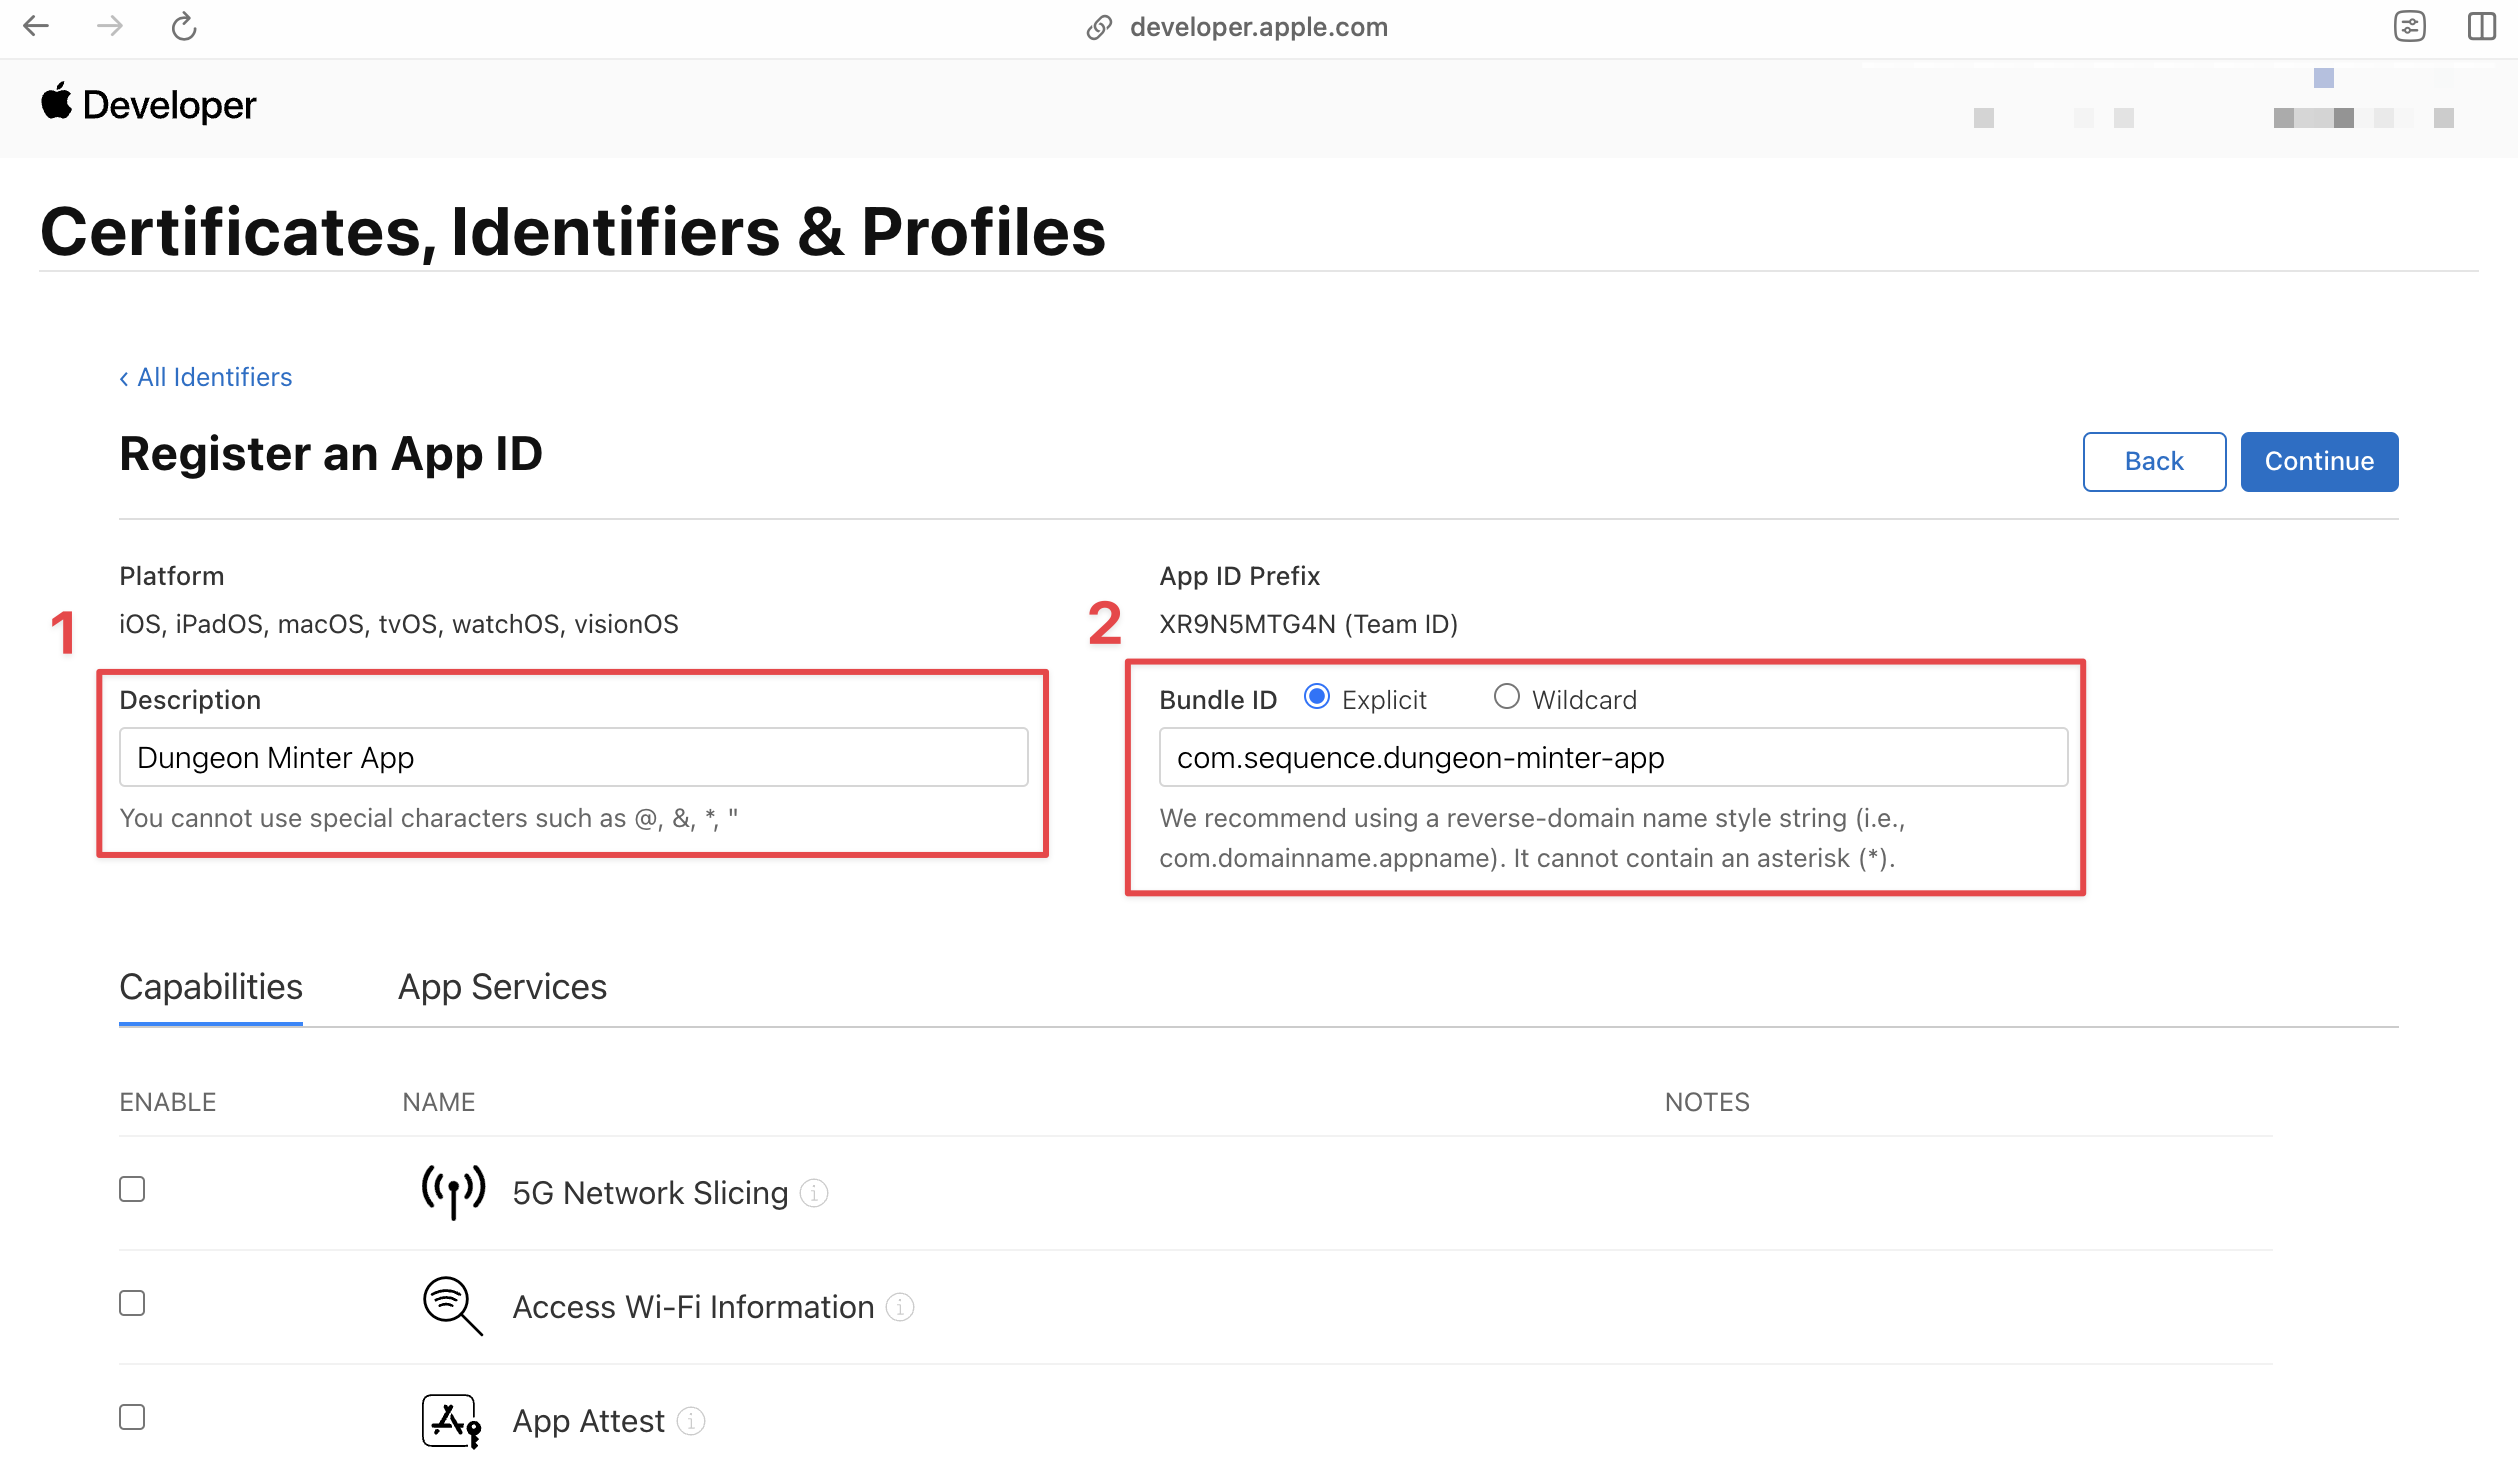
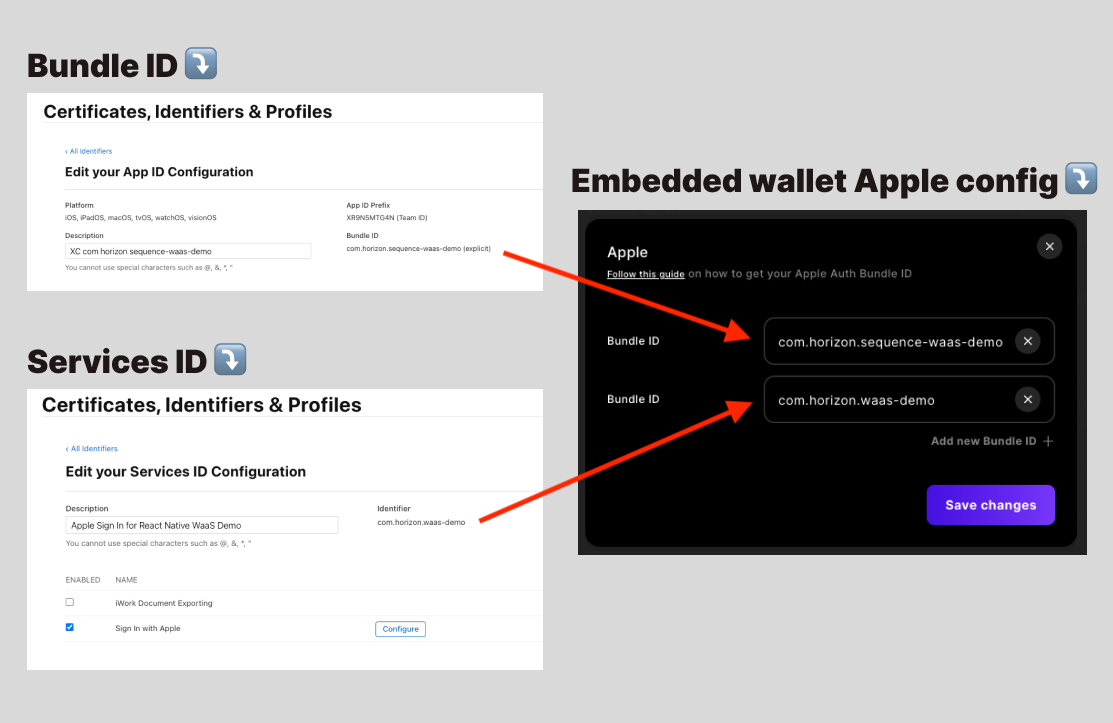
Create App ID
Provide the following in the form:- Description
- Bundle ID: This is the unique bundle identifier for your iOS project. If you are configuring for a web application, you can provide a placeholder value.
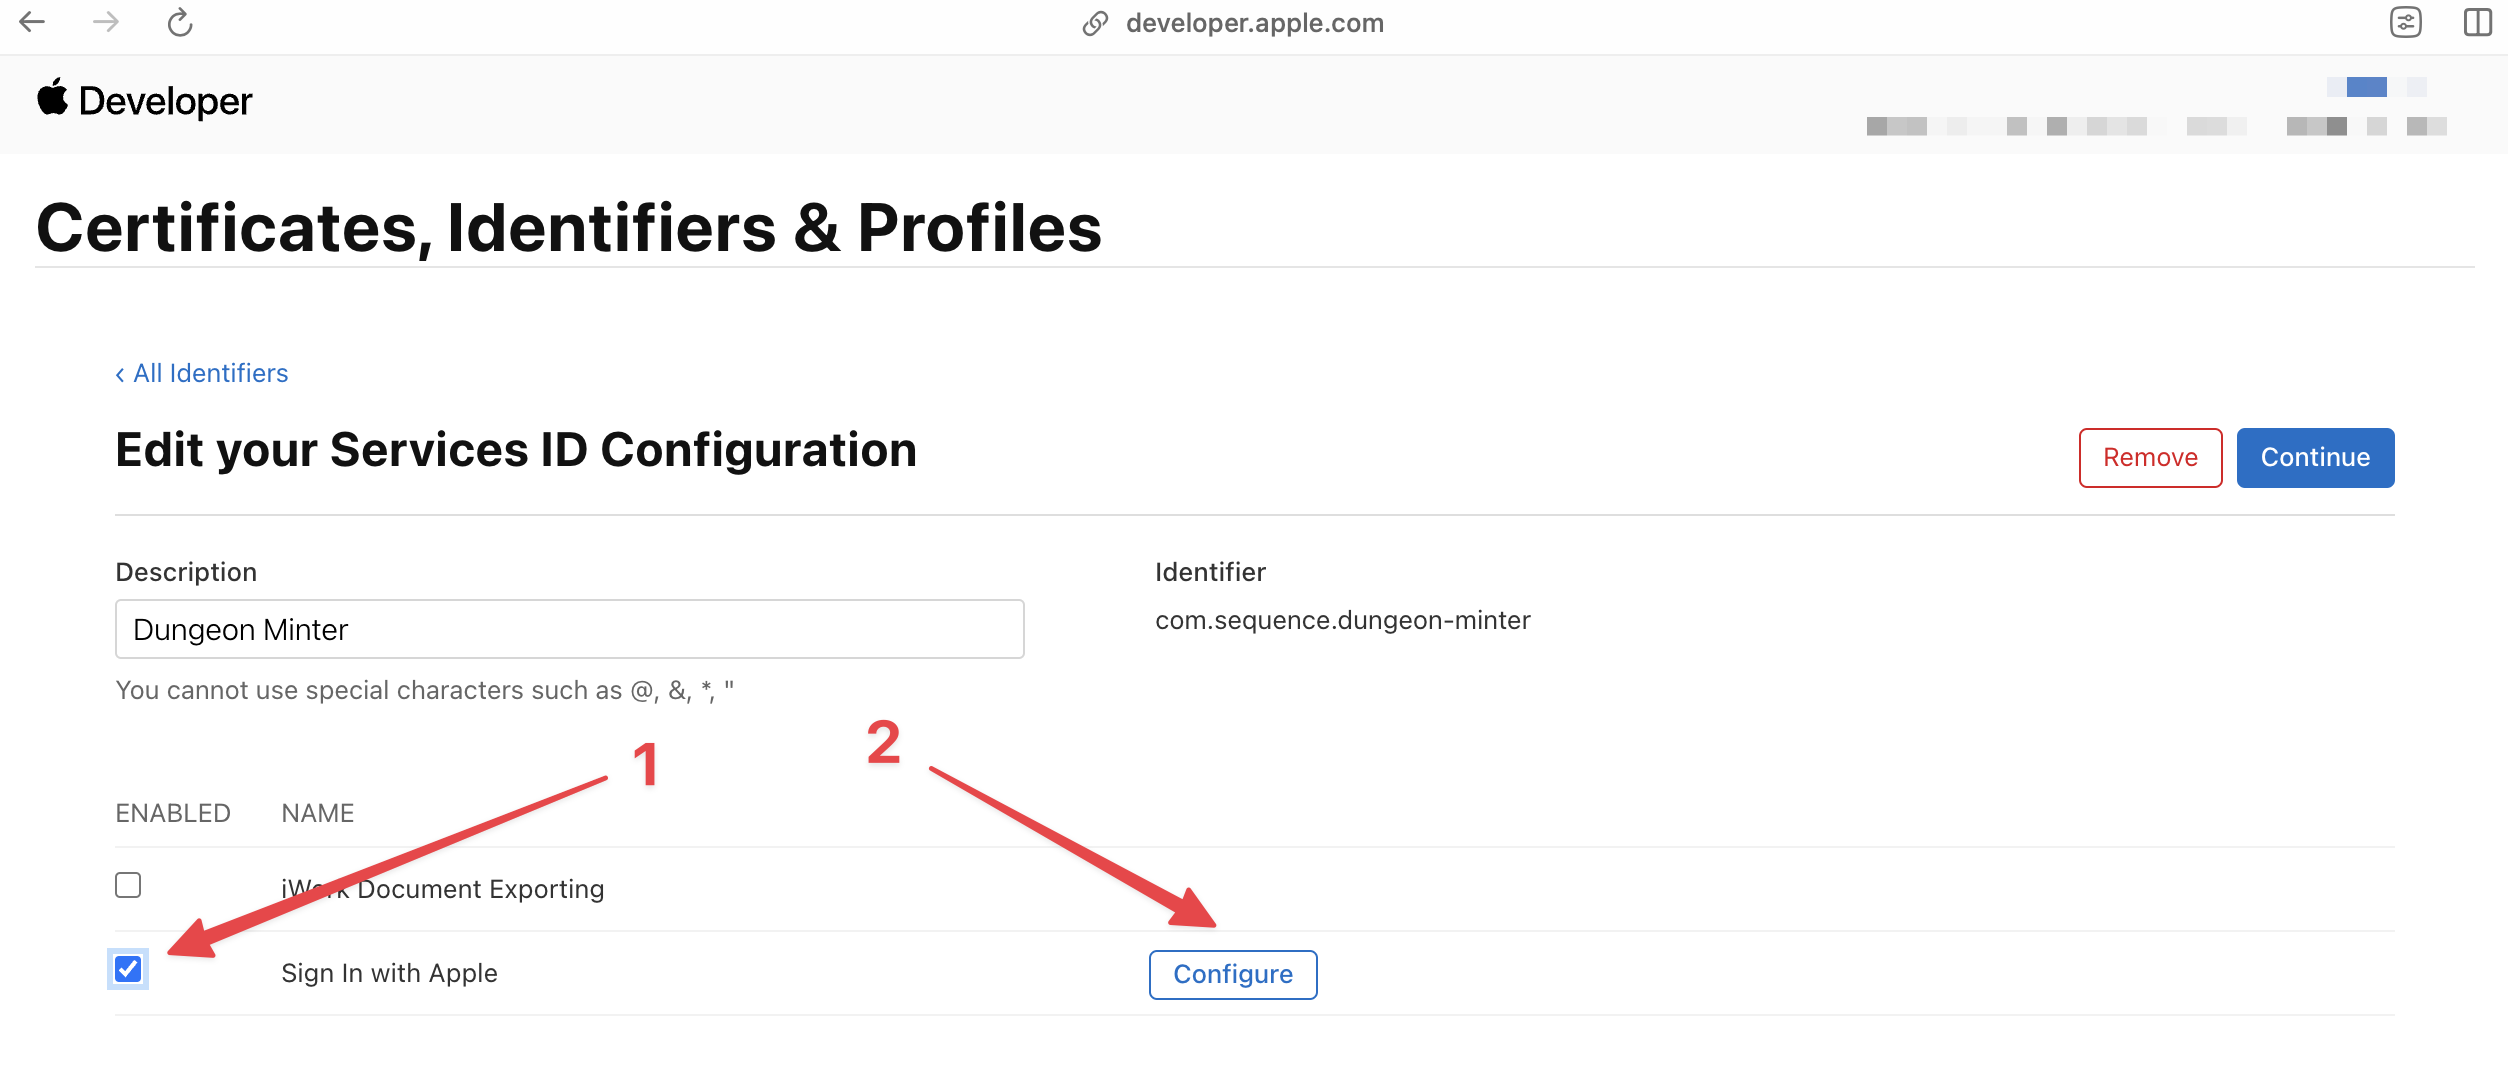
Configure Web Services ID
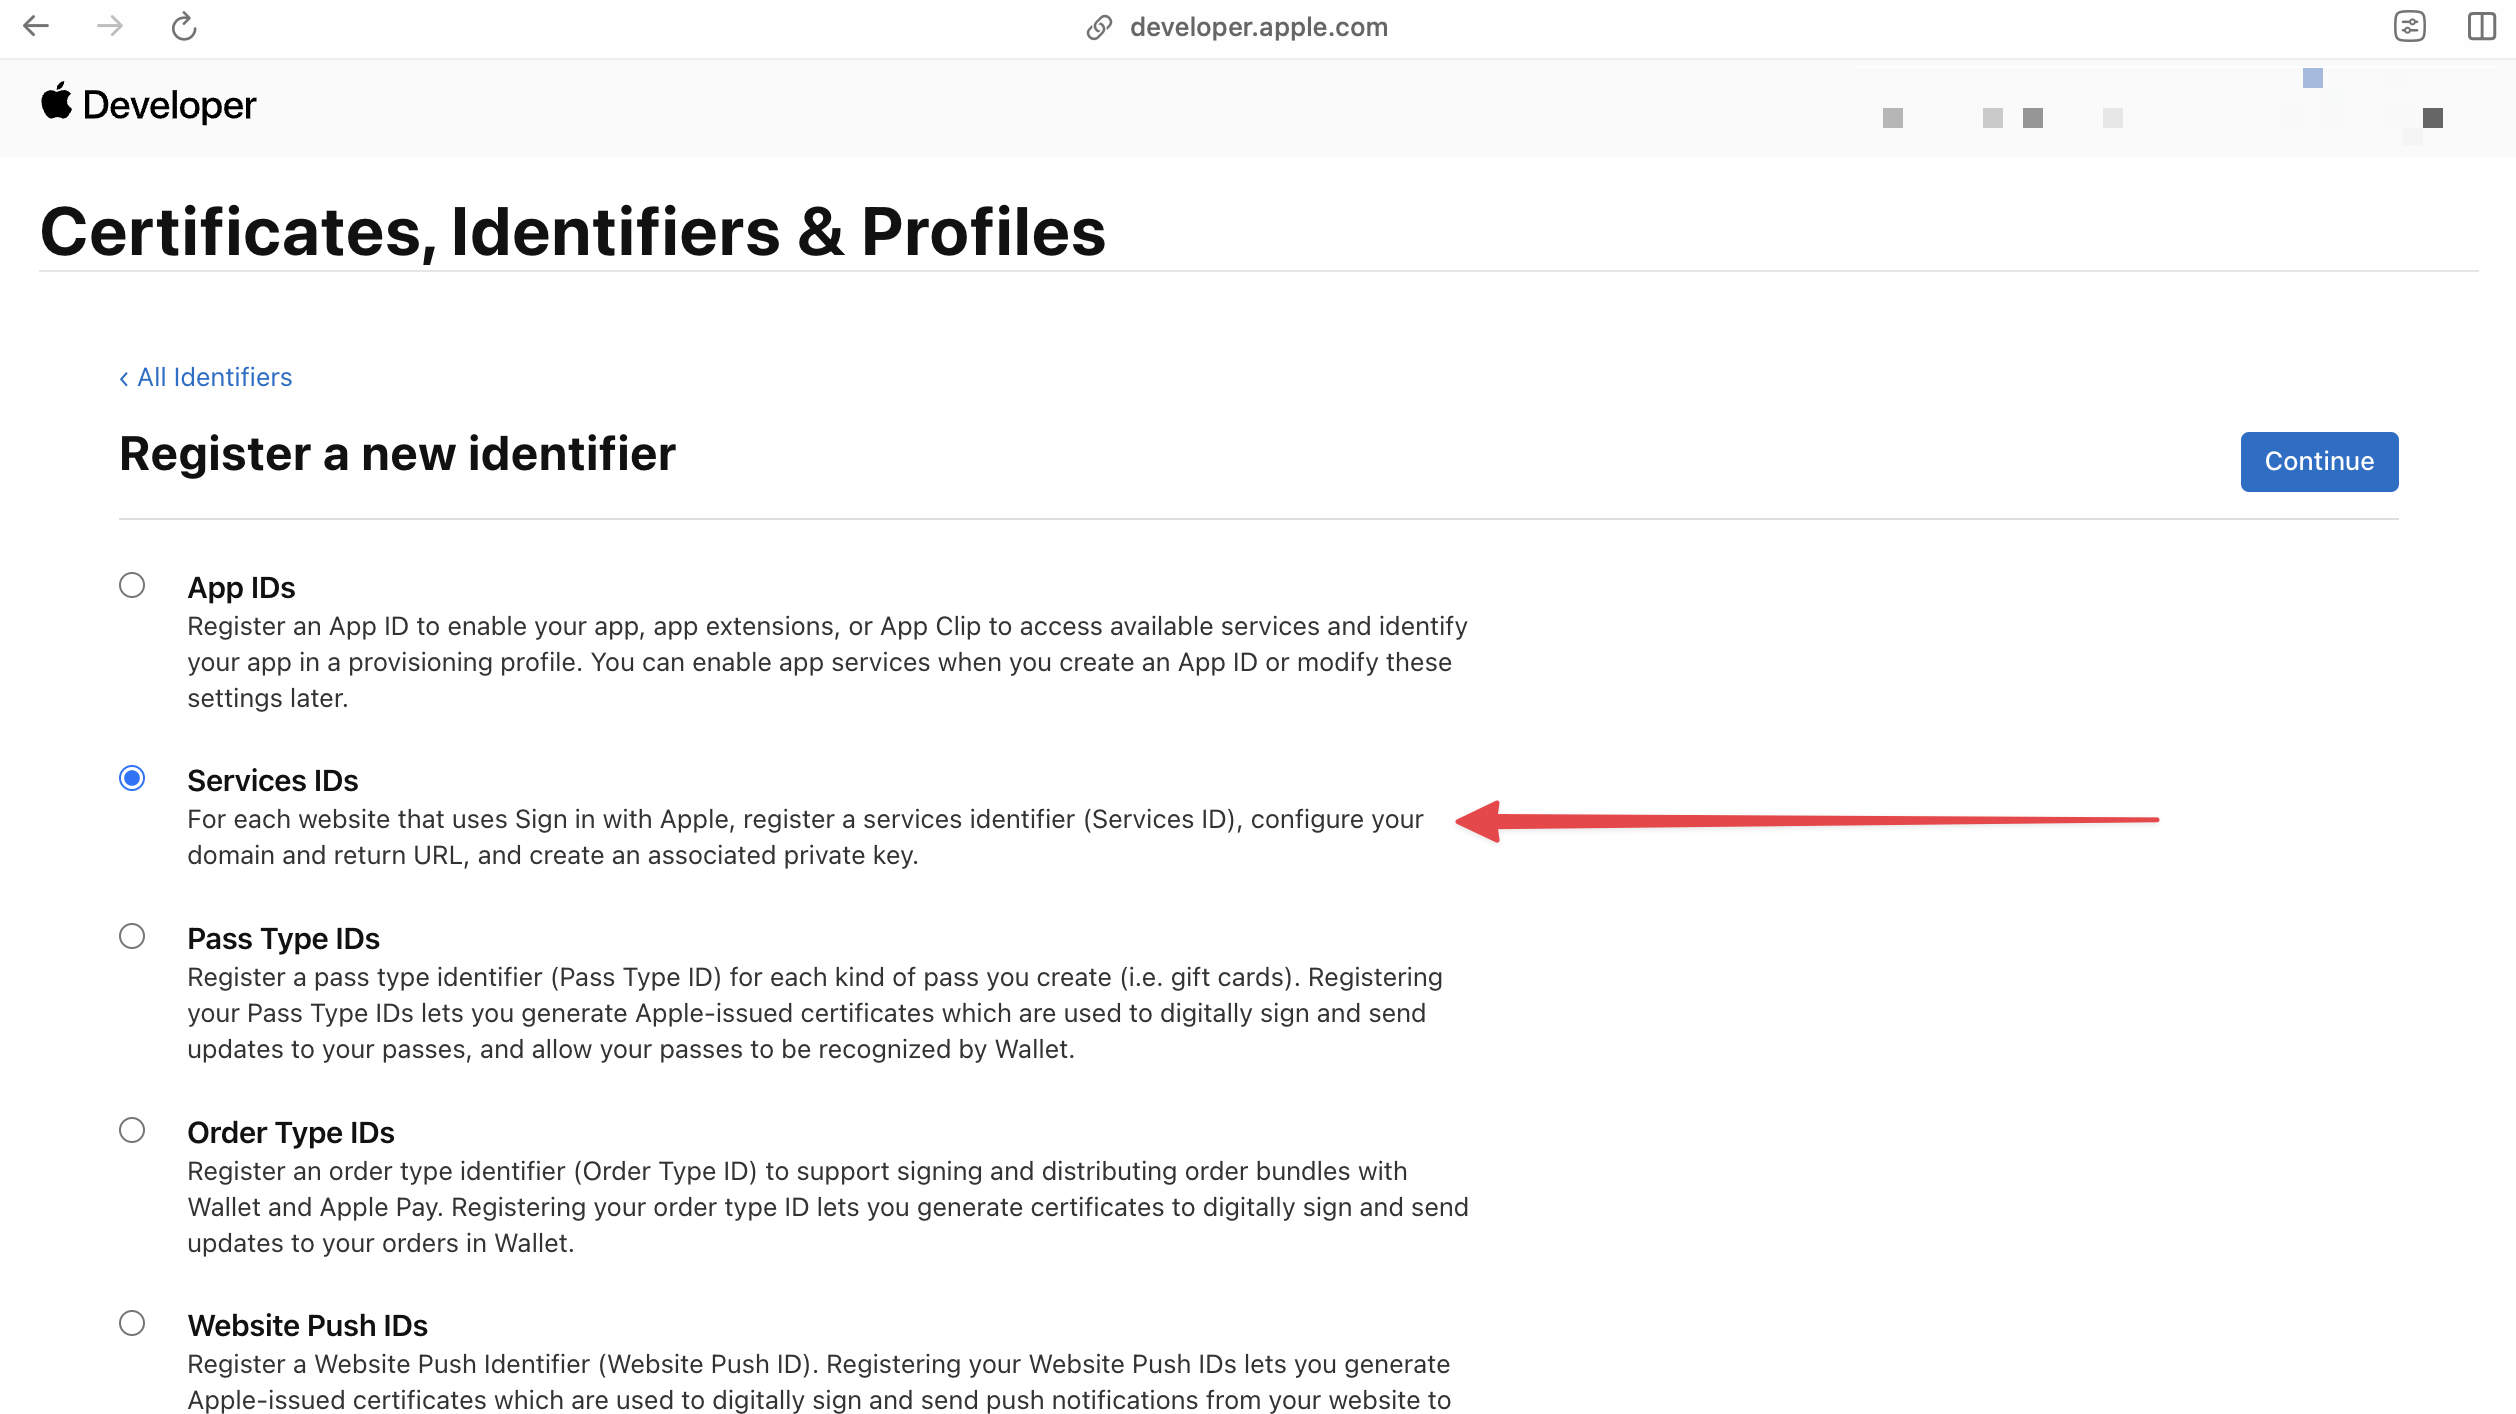
If you are configuring your Client ID for a web application, click on the+ sign on the Identifiers section and select the Services IDs option. Click Continue.
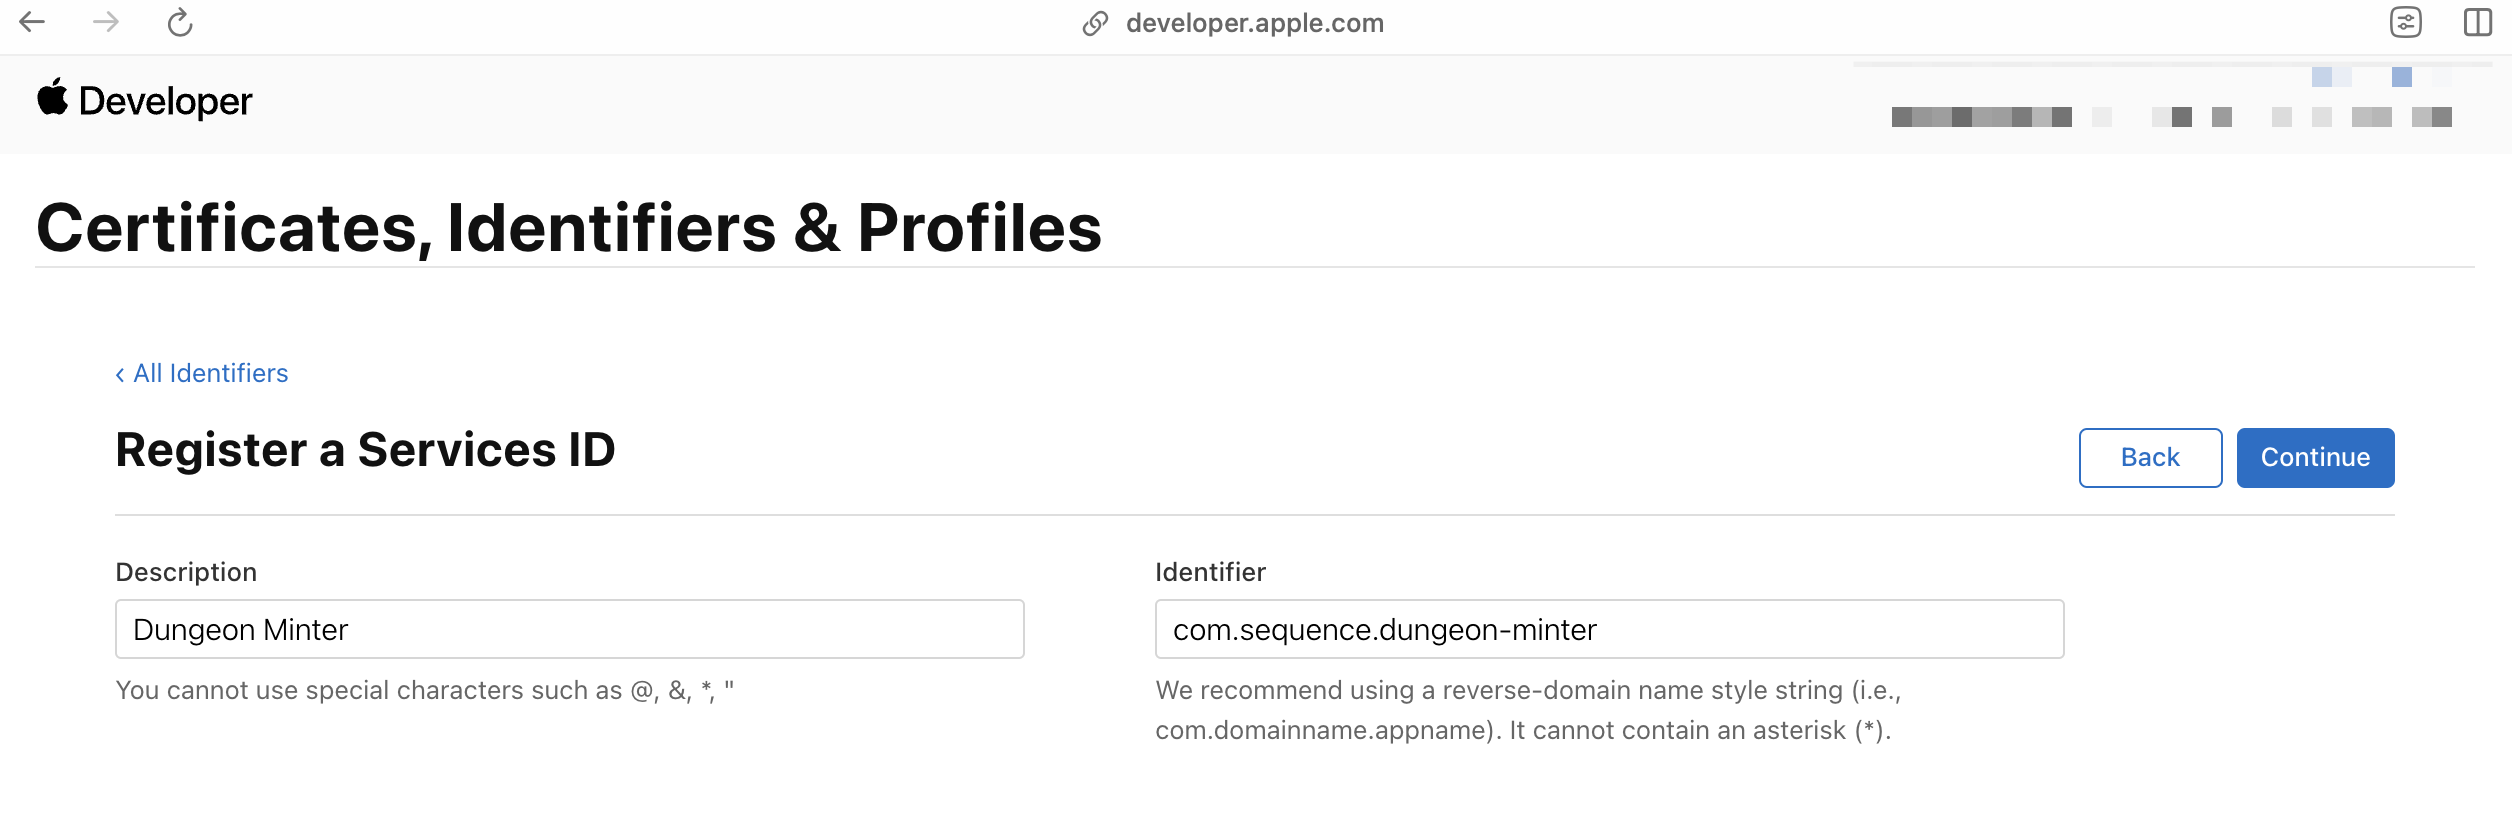
- Description
- Identifier: This will be the client ID for your web application that you use to identify in the SDK and Sequence Builder.
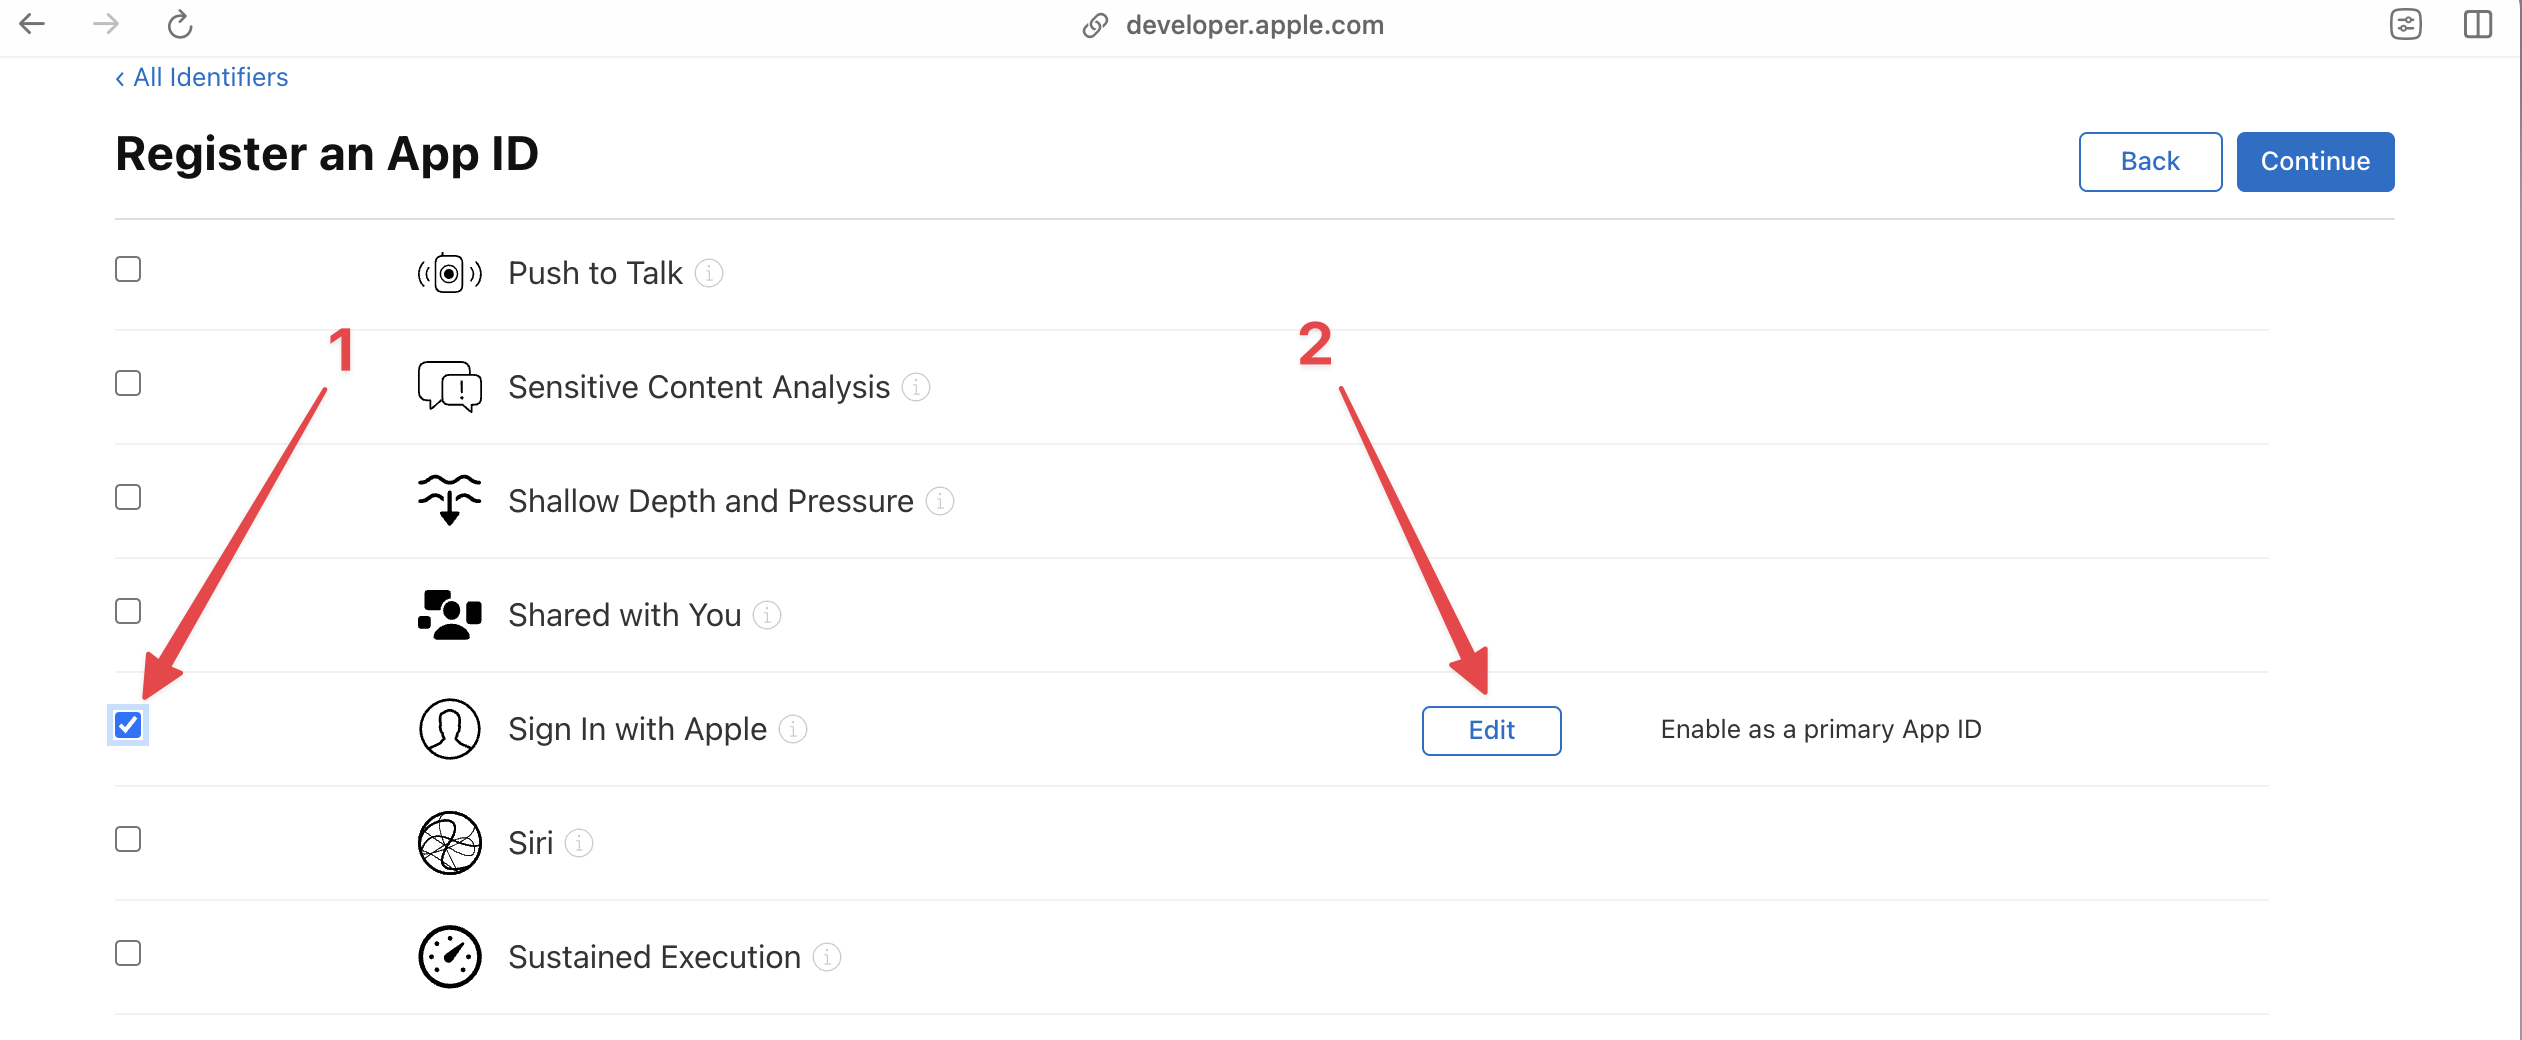
- Primary App ID: Select the App ID you created earlier.
- Domains and Subdomains: A list of domains that will be whitelisted for interacting with this Services ID.
- Return URLs: A list of redirect URIs that the user will be redirected to on successful authentication, Sequence SDKs will by default redirect to the same page that loads the SDK.
Apple Auth won’t work without
https when testing locally. If you are registering a localhost address, we recommend that you use a tool such as ngrok to create a secure tunnel to your local server and use the https URL provided by ngrok.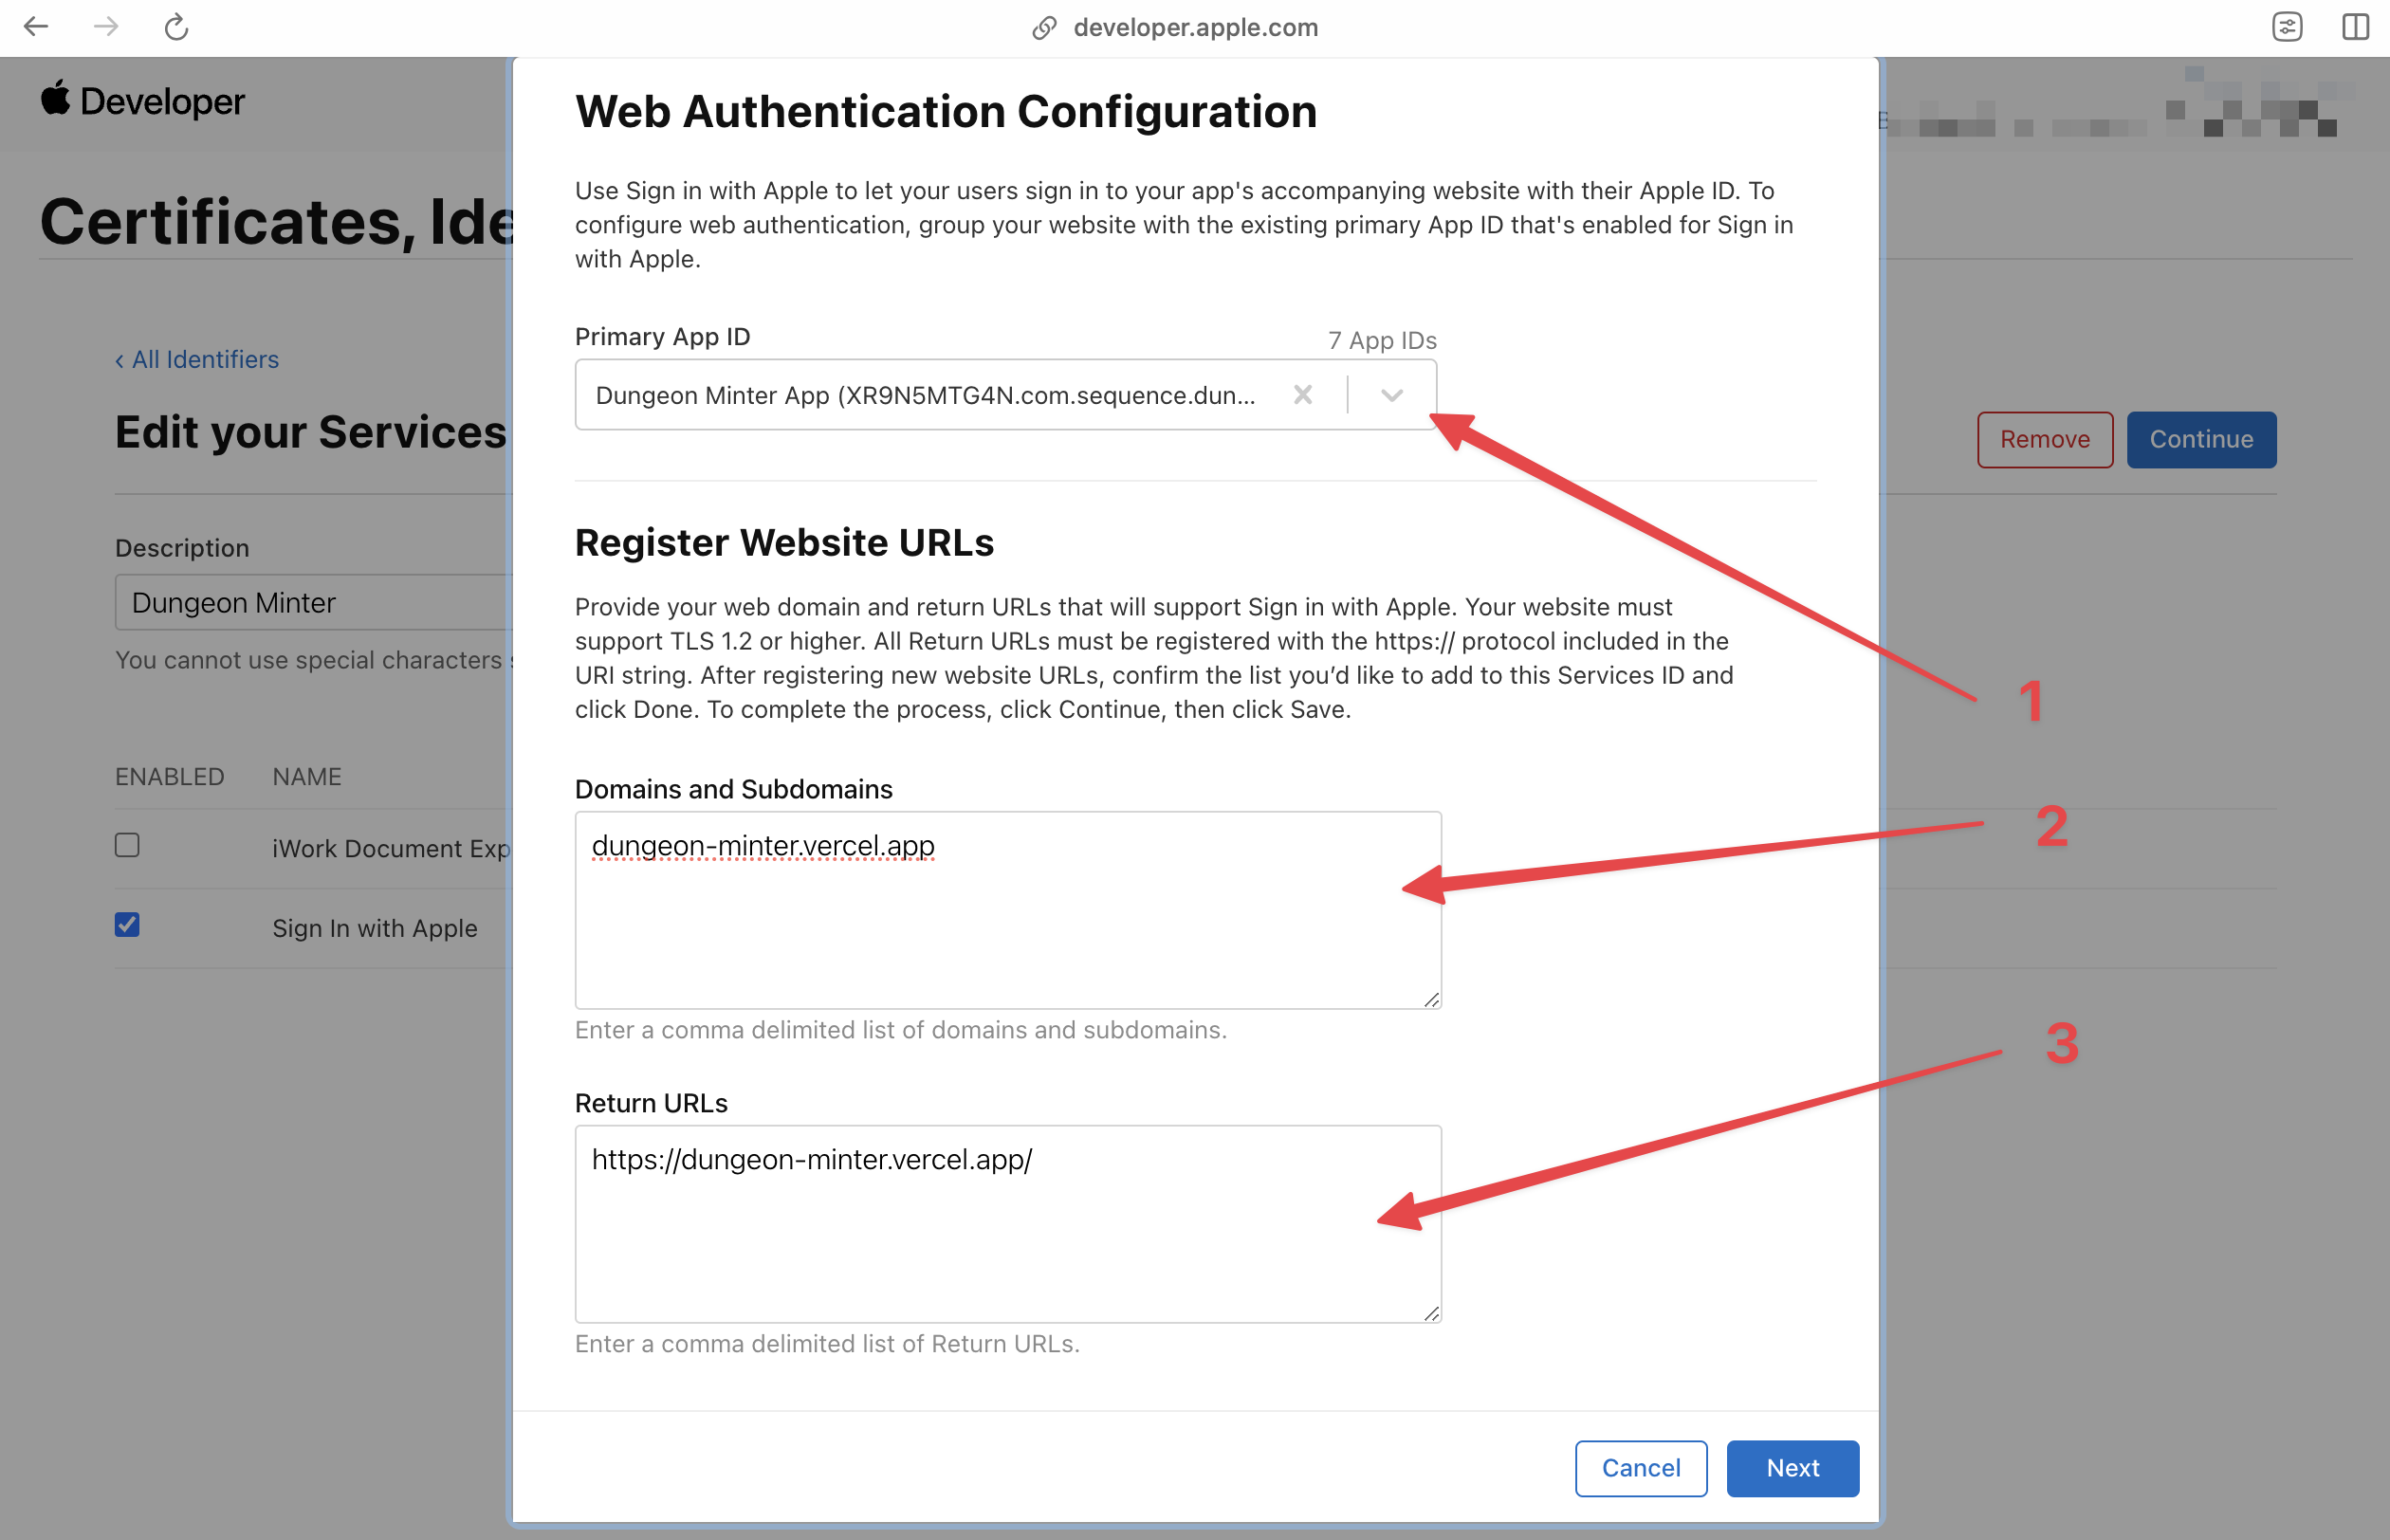
If you ever need to update the domains or redirect URLs for the Services ID, simply editing the identifier won’t work. Due to aggressive caching by Apple, you will need to delete the identifier and create a new one with the updated values.