Prerequisites
Before configuring your Shop, make sure:- You’ve completed the Marketplace configuration flow (Marketplace Settings, Page Settings, Wallet Settings)
- You have one or more Sequence deployed item contracts (1155)
Launch a Shop
Get started quickly at Sequence Builder to launch your shop.
1
Create Project
2
Optional: Create Collectible
If you already have a Collectible, skip to the next step. Otherwise, complete this guide to create a collectible and add a collection to your collectible to include it in your shop.
3
Deploy Shop
After accessing your project and the 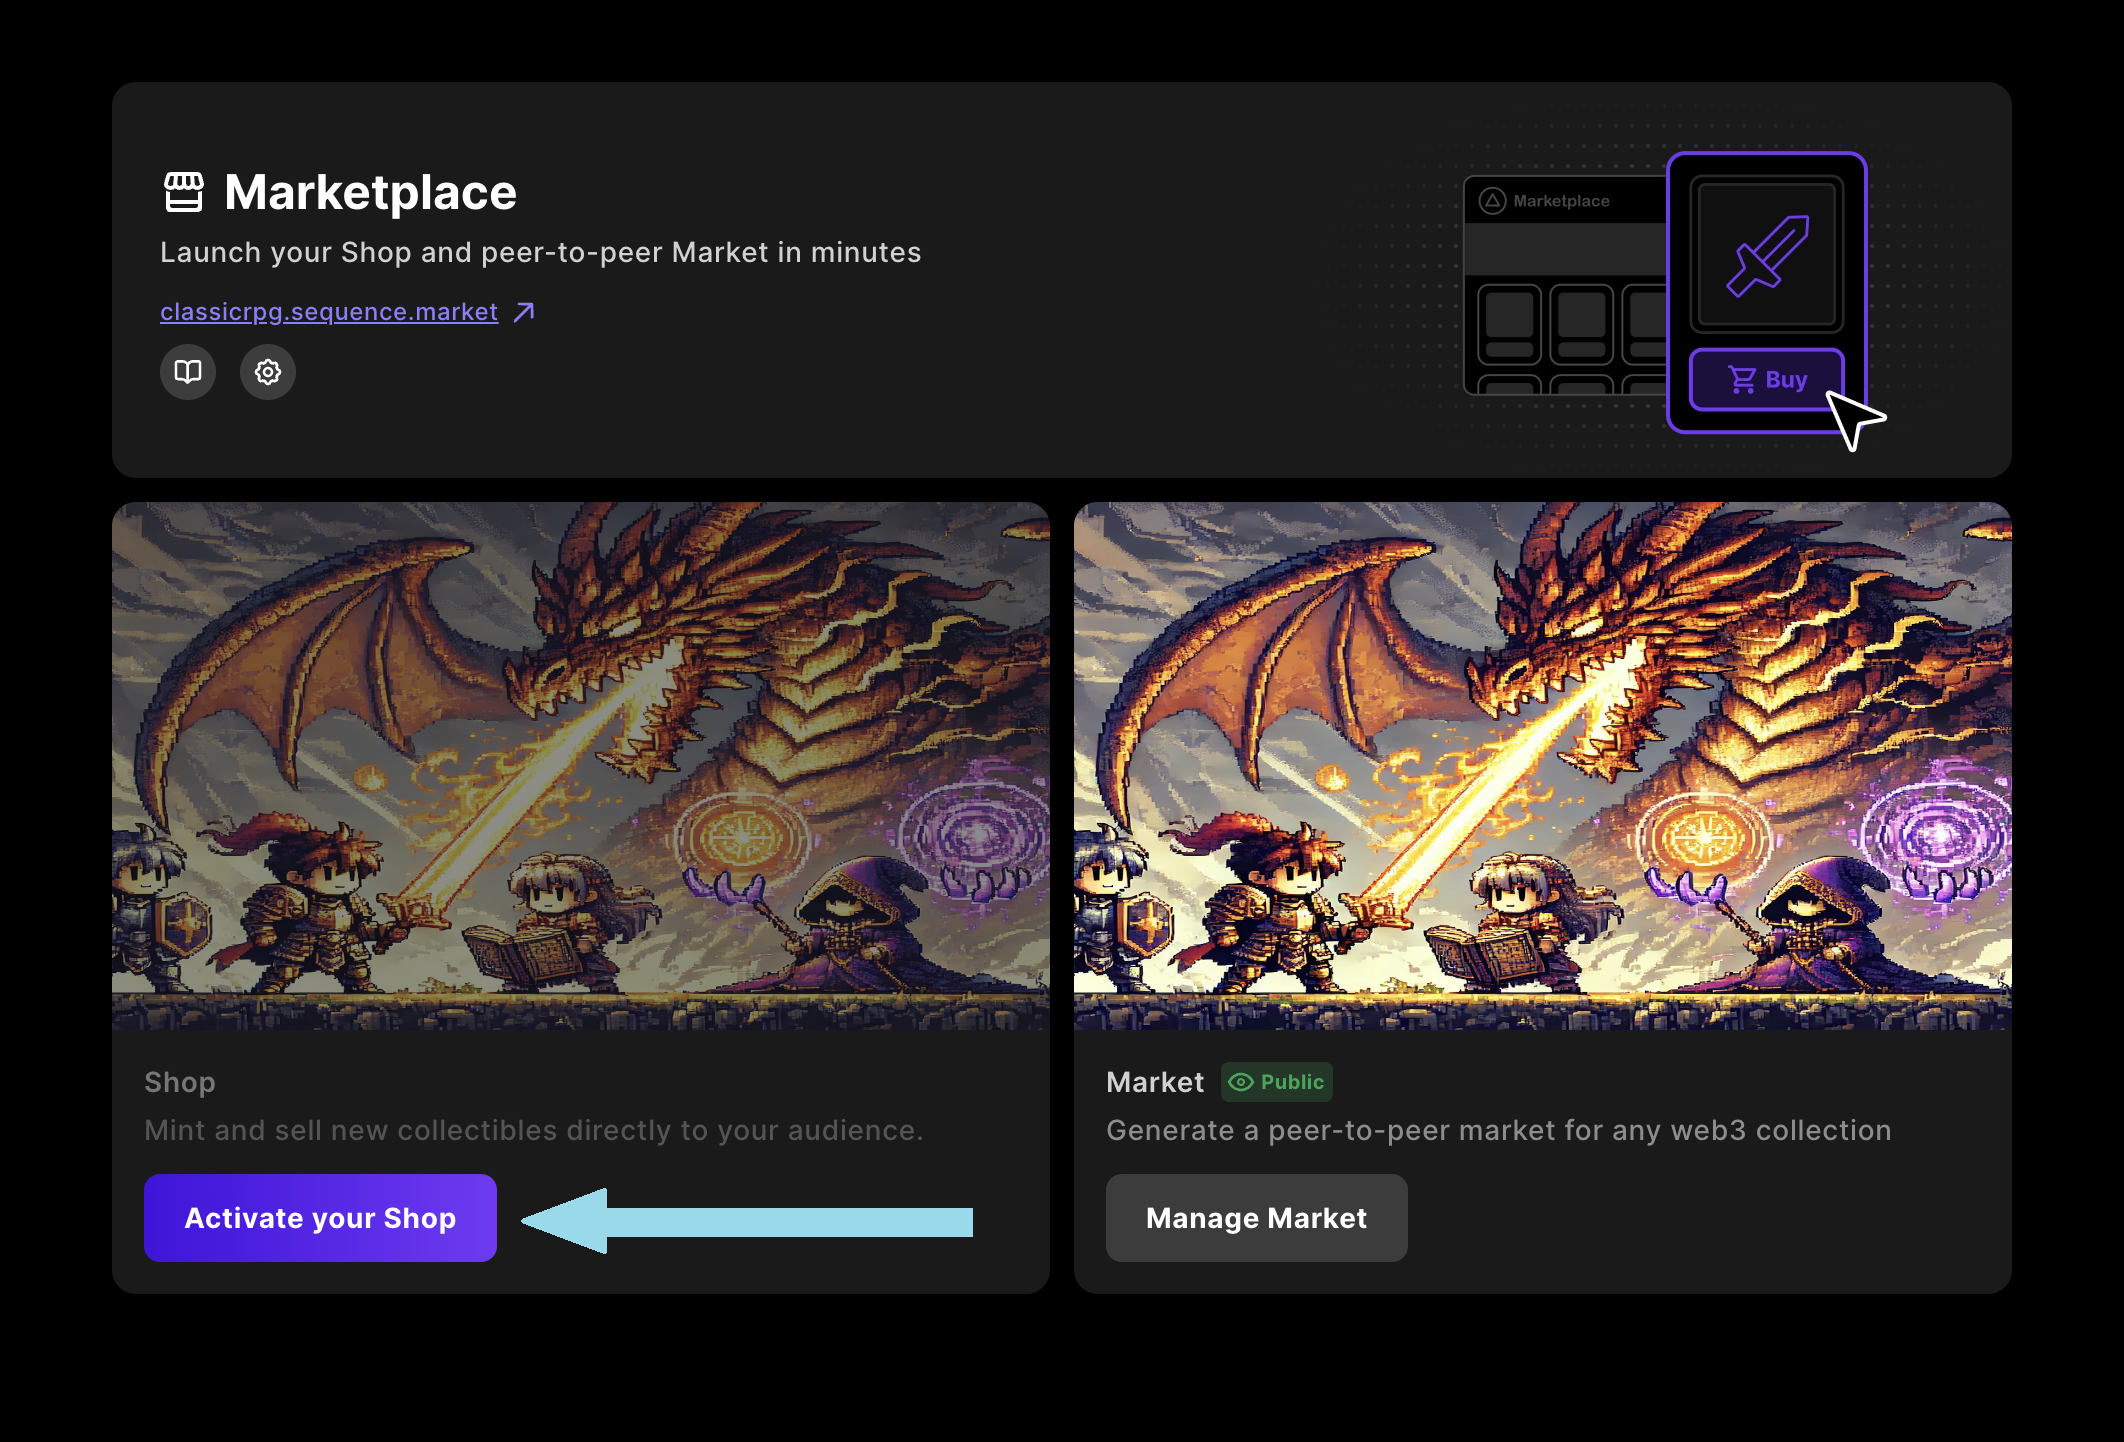
Marketplace nav tab, select the Activate your Shop button.Supported Sale Contracts
Only Sequence-issued contracts are currently supported:ERC-1155 Item Sale
Note: Allowlists and Merkle proofs are not supported at this time.
4
Add a Sale
To create or import a sale: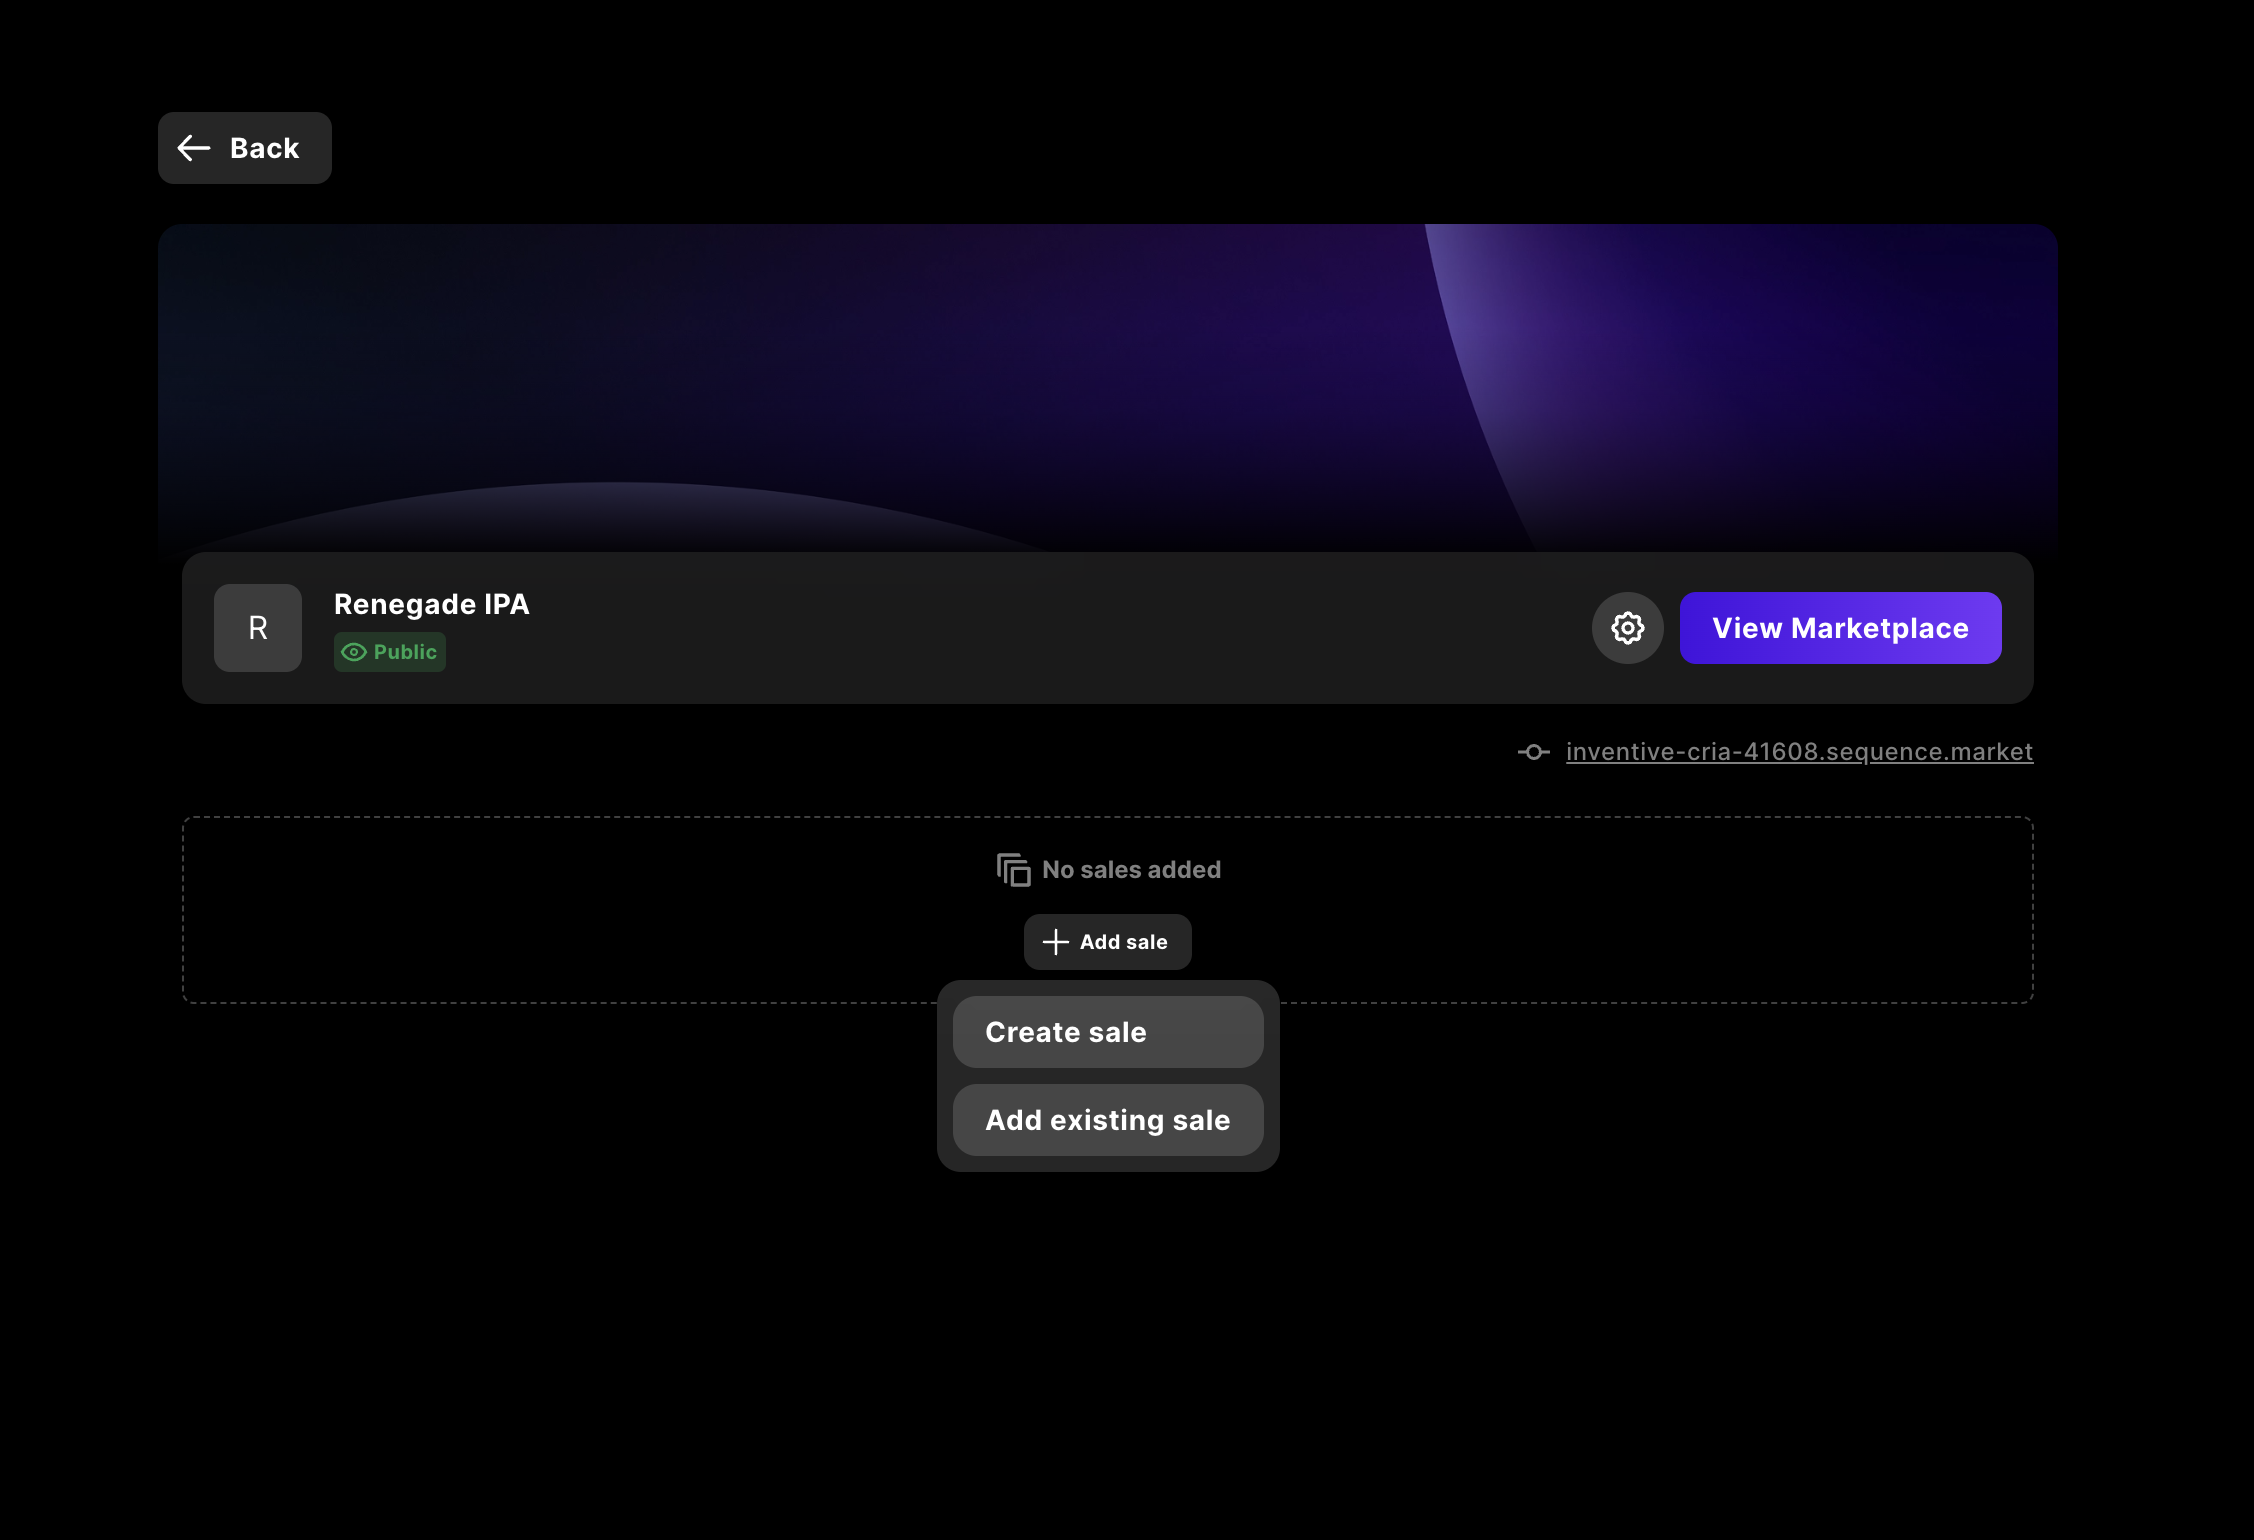
- Click the Add Sale button.
- Choose one of the following options:
- Create New Sale (If you choose this option, you should go to the step 5)
- Import Existing Sale Contract
- Simply select the sale contract from the list
5
Create a New Sale
If you choose to create a new sale, follow these steps:
- Enter a name for the sale.
- Upload a banner image for the sale. (Recommended size: 2440 x 960 pixels)
- Select an item contract:
- Must be a Sequence-deployed
ERC-1155contract - Must be linked to a collection with valid metadata
- Must be a Sequence-deployed
Note: If the selected collection is private or missing metadata, image previews and titles may not render correctly.
ERC-1155
When creating an ERC-1155 sale, you can choose between two configuration modes:- Sell a uniform range — All tokens share the same default settings and draw from a single pool, unless you override settings for specific tokens.
- Sell specific items — Select individual token IDs and assign unique settings to each one.
Sell a uniform range
All tokens share the same default settings and draw from a single pool, unless you override settings for specific tokens.Default sale settings (apply to the whole pool):- Start time (UTC) — When minting/purchase opens.
- End time (UTC) — When minting/purchase closes.
- Default item price — Used for any token in the range that doesn’t have an explicit override.
- Default currency — Payment token (e.g., sETH).
- Min token ID — First token ID included in the pool.
- Max token ID — Last token ID included in the pool (inclusive).
- Remaining supply — Total mints still allowed across the contract/pool. Must be greater than 0. This value is dynamic and will decrease automatically as sales are triggered, reflecting the live remaining number of mints available.
Sell specific items
Select individual token IDs and assign unique settings to each one.Sale settings:- Default currency — Payment token for this sale (e.g., sETH).
- Click Add items and enter one or more token IDs.
- For each item, set its price, supply, start/end time (if different from any default timing you want), and other available options.
- Save the list.
6
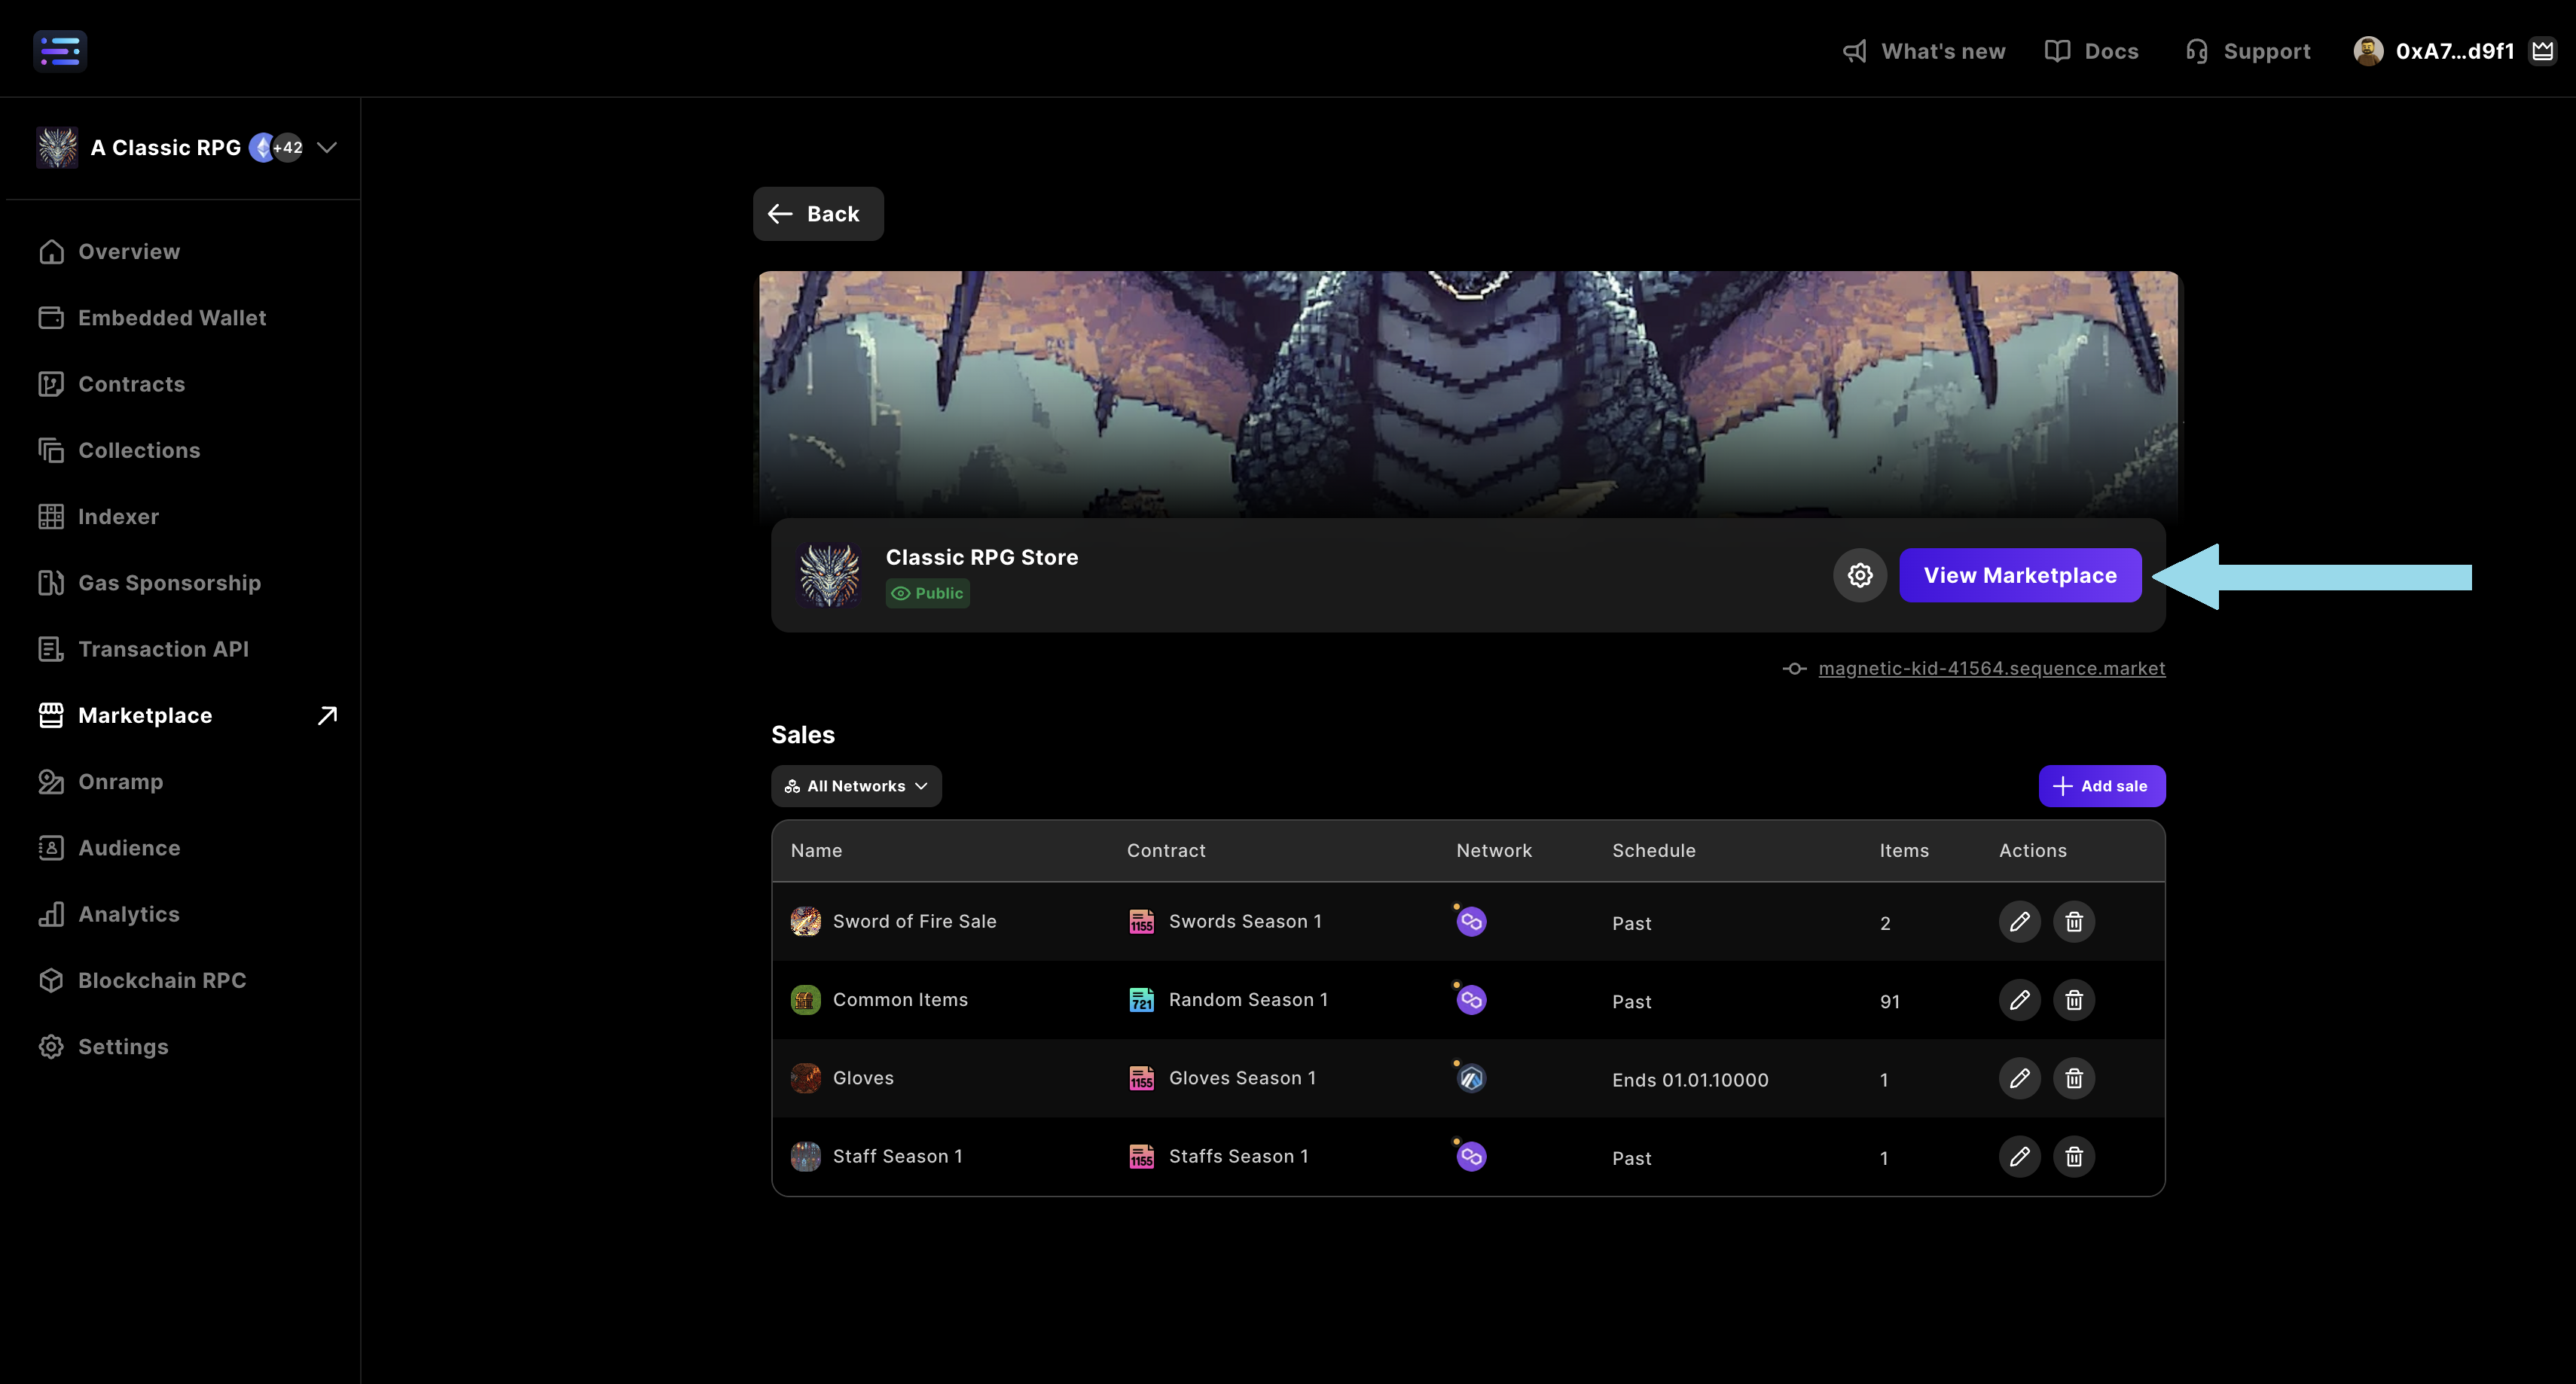
Previewing and Testing the Shop
To preview the Shop before making it public: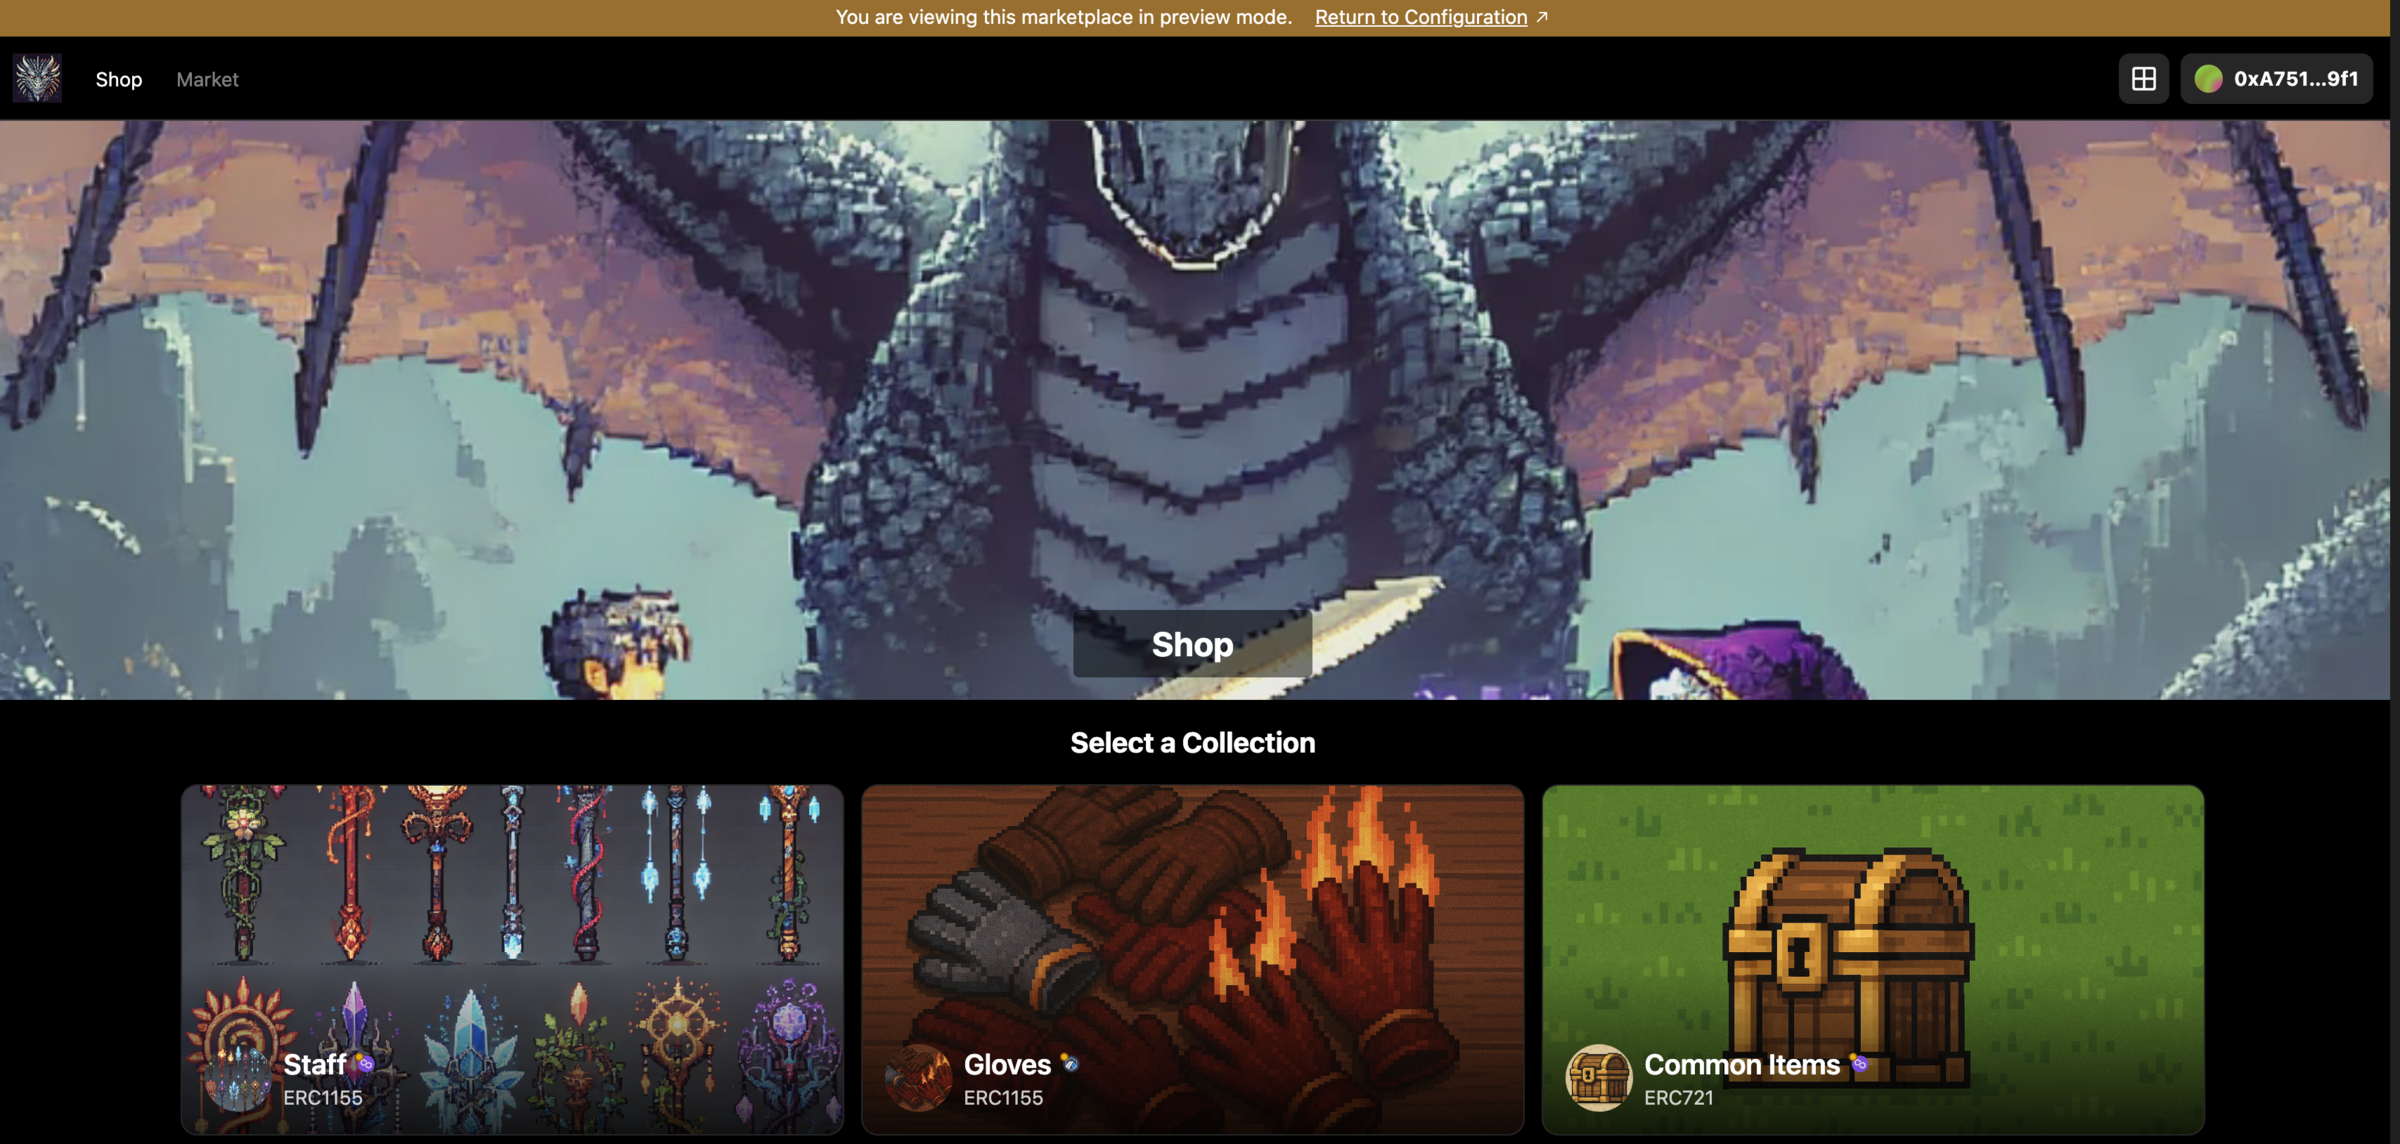
- From the Shop section in Builder, click View Marketplace.
- Sign in with your configured wallet.
- Refresh the page to trigger private mode preview.
7
Update Shop Settings
Open shop settings to update configuration.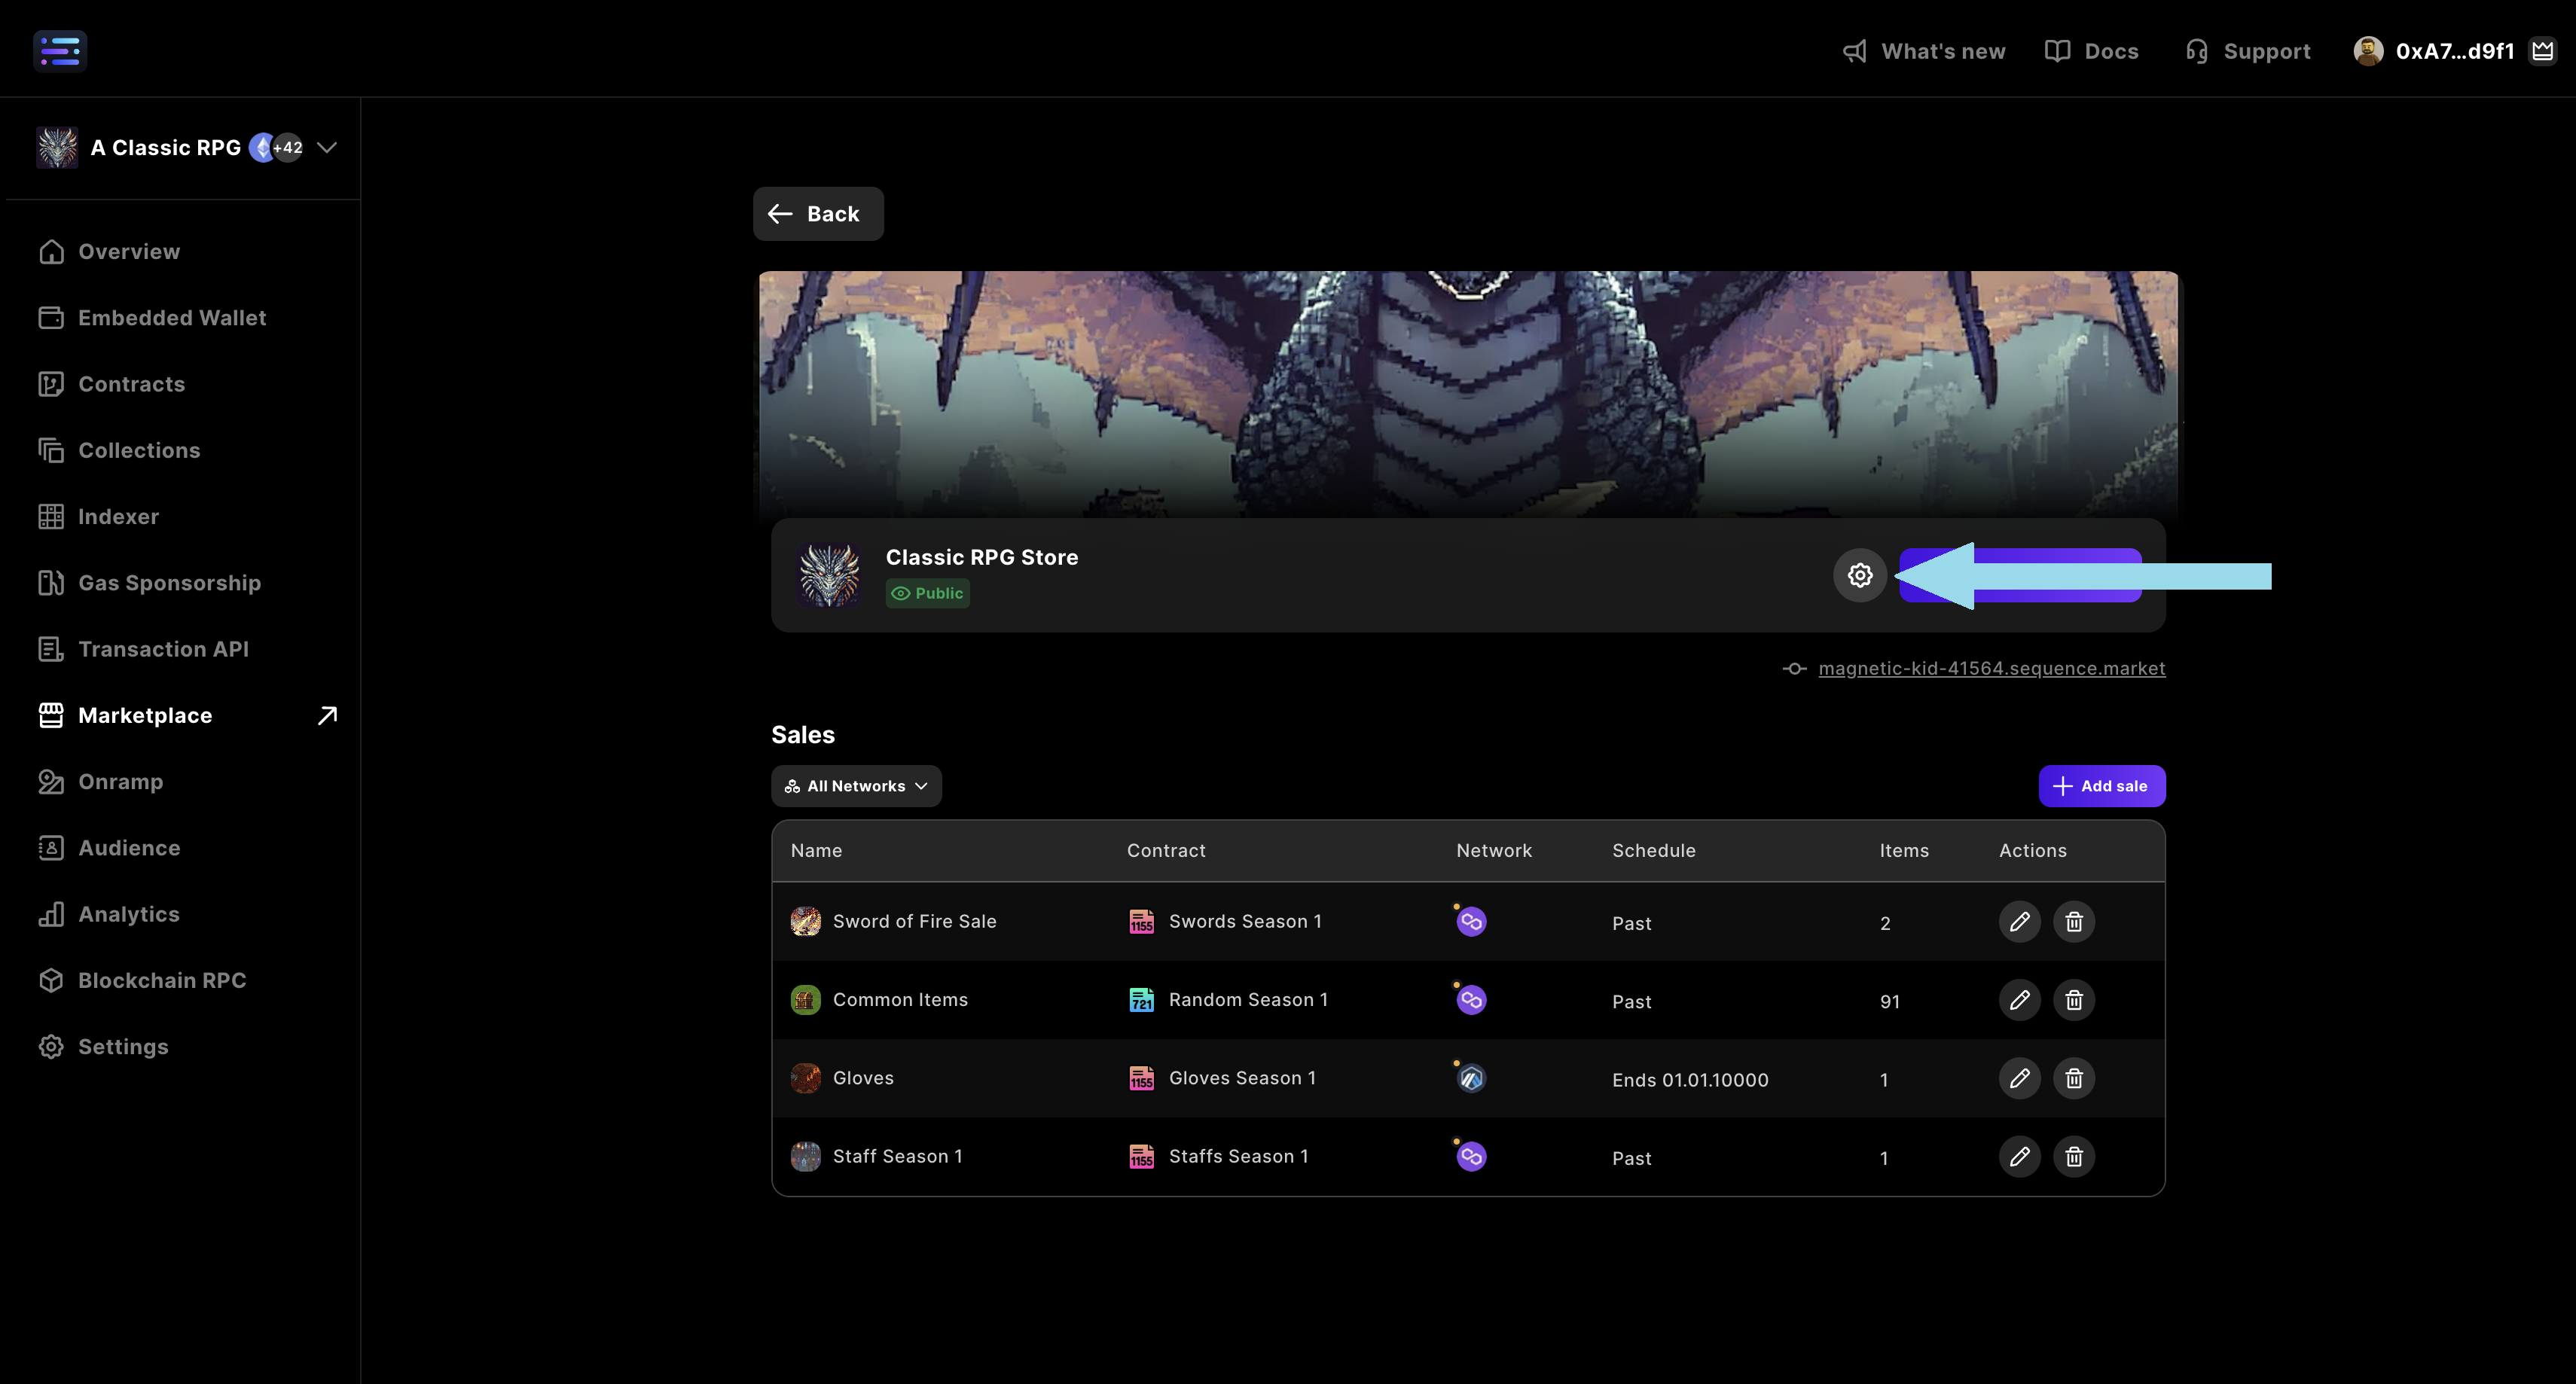
Edit and update the marketplace name, located in the top left-hand corner, over the banner, and in the webpage document title (i.e. the browser tab title).
Add a custom domain so that users can access the marketplace from a public URL of your choosing that is not randomly generated.
Add an external website to link to.
Add a Discord server to be linked to with an icon.
Add an X profile to be linked to with an icon.
Add an Instagram account to be linked to with an icon.
Add a YouTube page to be linked to with an icon.
Add a TikTok page to be linked to with an icon.
Add a logo that will appear on the left side of the header on your page.
Add a favicon that will appear in the browser tab when users visit your page.
Add a thumbnail that will be displayed as the banner image when logging in with Sequence.
-
Edit and update the banner image located at the top of the marketplace page.-
Edit and update your marketplace visibility. Options: Private & Public.
-
Edit and update the banner image located at the top of the shop page.-
Edit and update your shop visibility. Options: Private & Public.
Select wallet type Sequence Embedded Wallet.
Add various other community-based wallets, like Coinbase or WalletConnect.
EIP-6963, titled “Multi Injected Provider Discovery,” is an Ethereum Improvement Proposal that introduces a standardized method for decentralized applications (apps) to detect and interact with multiple wallet providers injected into a web page so wallets don’t overlap in the injected JavaScript global object.
General
General
Marketplace Name
Edit and update the marketplace name, located in the top left-hand corner, over the banner, and in the webpage document title (i.e. the browser tab title).Custom Subdomain
Add a custom domain so that users can access the marketplace from a public URL of your choosing that is not randomly generated.Website
Add an external website to link to.Discord
Add a Discord server to be linked to with an icon.X
Add an X profile to be linked to with an icon.Instagram
Add an Instagram account to be linked to with an icon.YouTube
Add a YouTube page to be linked to with an icon.TikTok
Add a TikTok page to be linked to with an icon.Header logo
Add a logo that will appear on the left side of the header on your page.Recommendation: horizontal watermark 80px height
Favicon
Add a favicon that will appear in the browser tab when users visit your page.Recommendation: 1:1 aspect ratio 320x320
Thumbnail
Add a thumbnail that will be displayed as the banner image when logging in with Sequence.Pages
Pages
Market
- Banner
Edit and update the banner image located at the top of the marketplace page.Recommendation: 4:1 aspect ratio, 2400x600
- Visibility
Edit and update your marketplace visibility. Options: Private & Public.Shop
- Banner
Edit and update the banner image located at the top of the shop page.Recommendation: 4:1 aspect ratio, 2400x600
- Visibility
Edit and update your shop visibility. Options: Private & Public.Wallets
Wallets
Select Sequence Wallet Type
Select wallet type Sequence Embedded Wallet.Enable Multiple Supported Wallets
Add various other community-based wallets, like Coinbase or WalletConnect.Enable EIP-6963 Wallets
EIP-6963, titled “Multi Injected Provider Discovery,” is an Ethereum Improvement Proposal that introduces a standardized method for decentralized applications (apps) to detect and interact with multiple wallet providers injected into a web page so wallets don’t overlap in the injected JavaScript global object.8
Going Live
Once you have finished testing your Shop and validated all configurations:
- Go to the Marketplace → Pages Settings tab.
- Change the Shop visibility from Private to Public.
9
Launch Shop
Once you’re finished, launch your Shop and share it with your friends and community!